Yes, you can spackle wood. Spackling is a technique used to fill in small cracks and holes in wood surfaces, creating a smooth and even finish. Whether you are working on a wooden furniture piece or repairing a wooden wall, spackling can help you achieve a seamless look.
Spackling wood involves using a specialized wood filler or putty that is designed to adhere to and blend seamlessly with the wood surface. It is an effective way to repair minor damages such as nail holes, dents, and scratches.

Before spackling, it is important to prepare the wood surface by cleaning it and ensuring it is free from any dirt, dust, or loose particles. Once the surface is clean and dry, apply the spackle using a putty knife, smoothing it out to create a level surface. After the spackle dries, sand it down gently to achieve a smooth finish.
Overall, spackling wood can help you restore the appearance of your wooden surfaces by filling in imperfections and achieving a professional-looking result.

The Basics of Spackling Wood: A Step-by-Step Guide
When it comes to woodworking projects, spackling wood is an essential skill to have. Whether you are fixing a small nail hole or repairing a larger damaged area, spackling can help you achieve a smooth and flawless finish. In this section, we will walk you through the step-by-step process of spackling wood, ensuring that you have all the knowledge and tools necessary to complete the task successfully.
Step 1: Gather Your Supplies
The first step in any woodworking project is to gather all the necessary supplies. To spackle wood, you will need:
- Wood filler or spackle compound
- Putty knife or a flexible scraper
- Sandpaper or sanding block
- Primer (optional)
- Paint or stain for finishing (optional)
Make sure you have all these supplies readily available before you begin spackling.
Step 2: Prepare the Surface
Before you start spackling, it is crucial to prepare the surface properly. Begin by cleaning the area you plan to spackle. Remove any dust, dirt, or loose particles using a brush or cloth. This ensures that the spackle will adhere well to the wood surface.
If the area has any peeling paint or loose wood fibers, gently scrape or sand them away. Smooth out any rough edges to create a clean and even surface for spackling.
Step 3: Apply the Spackle
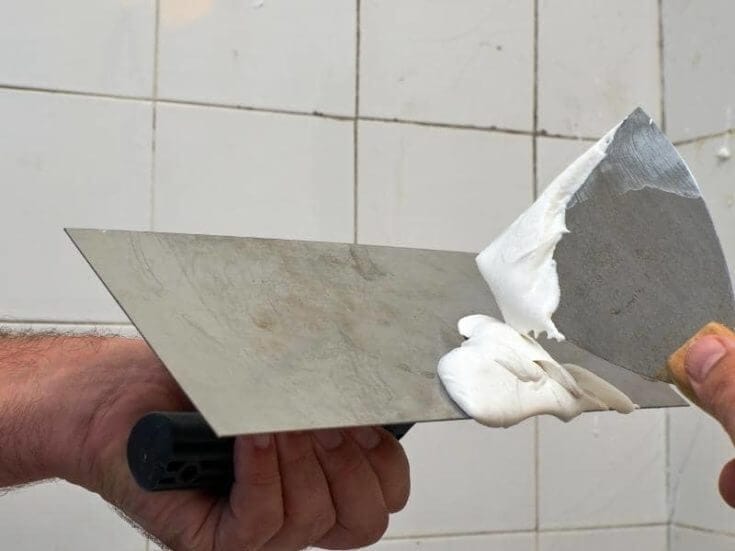
Now it’s time to apply the spackle to the wood. Using a putty knife or a flexible scraper, scoop out a small amount of spackle compound or wood filler. Apply it to the damaged area or the nail hole, spreading it evenly with the knife. Press the spackle firmly into the wood, ensuring it fills the cavity completely.
For larger damaged areas, it may be necessary to apply multiple layers of spackle. Allow each layer to dry thoroughly before applying the next. Follow the manufacturer’s instructions for drying time.
Step 4: Sand and Smooth
Once the spackle has dried completely, it’s time to sand and smooth the area. Use sandpaper or a sanding block to gently sand the spackled surface. Start with a coarse-grit sandpaper and gradually move to finer grits until the area is smooth and level with the surrounding wood.
Be careful not to oversand or apply too much pressure, as this can damage the wood or remove too much spackle. Take your time and work slowly for the best results.
Step 5: Prime and Paint (Optional)
If you plan to paint or stain the spackled area, it is recommended to apply a coat of primer before painting. Primer helps the paint adhere better and provides a more even finish.
Once the primer is dry, you can apply your chosen paint or stain to the spackled area. Use a brush or roller to ensure an even application, following the manufacturer’s instructions for drying time between coats.
Step 6: Final Touches
After the paint or stain has dried completely, inspect the spackled area for any imperfections. If necessary, you can lightly sand the area again and apply an additional coat of paint or stain to achieve a seamless finish.
In summary, spackling wood is a straightforward process that can greatly enhance the appearance of your woodworking projects. By following these step-by-step instructions and taking your time, you can achieve professional-looking results. Remember to gather your supplies, prepare the surface, apply the spackle, sand and smooth, and optionally prime and paint. With practice, you will become proficient in spackling wood and be able to tackle any repairs or finishing touches with confidence.
Choosing the Right Spackle for Wood Repair: Tips and Recommendations
When it comes to wood repair, finding the right spackle can make a significant difference in the final result. Whether you are dealing with minor scratches or major damages, using the correct spackle is crucial for achieving a seamless and long-lasting repair. In this section, we will discuss some essential tips and recommendations to help you choose the right spackle for your wood repair needs.
1. Consider the Type of Damage
Before selecting a spackle product, it’s important to evaluate the type and severity of the damage on your wood surface. Different spackles are designed to address specific issues, such as cracks, holes, or gouges. By identifying the nature of the damage, you can narrow down your options and choose a spackle that is specifically formulated to tackle your particular repair.
2. Look for Wood-Friendly Formulas
Wood is a delicate material that requires special care, especially during the repair process. When choosing a spackle, opt for products that are specifically formulated for wood surfaces. These wood-friendly spackles are designed to adhere well to wood and provide a smooth finish without causing any further damage. Look for spackles that mention “wood” or “wood repair” on their labels.
3. Consider the Drying Time
The drying time of a spackle can vary significantly depending on the product and the brand. Some spackles dry quickly within minutes, while others may require several hours or even overnight drying time. Consider your project timeline and choose a spackle that aligns with your needs. Keep in mind that faster-drying spackles may be more suitable for smaller repairs, while larger repairs may require longer drying times.
4. Evaluate Ease of Application
When it comes to wood repair, ease of application is crucial for achieving a professional-looking result. Look for spackles that are easy to apply and spread smoothly. Consider the consistency of the spackle – some products may be too thick or too thin, making them difficult to work with. Additionally, check if the spackle can be easily sanded and painted over once it has dried for a seamless finish.
5. Check for Paint Compatibility
If you plan to paint over the repaired area, it’s essential to choose a spackle that is compatible with paint. Some spackles are specifically designed to be paintable and can seamlessly blend with the surrounding wood when painted over. However, certain spackles may not adhere well to paint or may require additional surface preparation before painting. Always check the product label for paint compatibility information.
6. Read Reviews and Recommendations
Before making a final decision, take the time to read reviews and recommendations from other users. Online platforms, forums, and DIY communities can provide valuable insights into the performance and quality of different spackles. Look for products with positive reviews and high ratings, as they are more likely to deliver satisfactory results.
7. Seek Professional Advice
If you are uncertain about which spackle to choose or if you are dealing with significant damage, it may be beneficial to seek professional advice. Consult with a wood repair specialist or a professional at your local hardware store. They can assess the damage and recommend the most suitable spackle for your specific needs, ensuring a successful and long-lasting repair.
In summary, choosing the right spackle for wood repair requires careful consideration of the type of damage, wood-friendliness, drying time, ease of application, paint compatibility, and recommendations from others. By following these tips and recommendations, you can confidently select a spackle that will help you achieve a seamless and durable repair on your wood surfaces.
Common Wood Spackling Mistakes to Avoid for a Flawless Finish
When it comes to repairing wood surfaces, spackling is a popular choice. Spackling is a versatile compound that can fill in cracks, holes, and other imperfections, giving your woodwork a flawless finish. However, if not used correctly, spackling can lead to unsightly results and even damage the wood itself. To ensure that you achieve a seamless and professional-looking finish, it’s important to avoid these common wood spackling mistakes.
1. Using the Wrong Type of Spackling
Not all spackling compounds are the same. There are different types of spackling available, each suited for specific applications. Using the wrong type of spackling can lead to issues such as cracking, shrinking, or poor adhesion. It’s essential to choose the appropriate spackling compound based on the size and depth of the imperfection you need to repair. For small cracks or shallow holes, lightweight spackling is ideal. For larger holes or deeper repairs, opt for a heavyweight spackling compound.
2. Neglecting Surface Preparation
One of the most common mistakes people make when spackling wood is failing to properly prepare the surface beforehand. In order for the spackling compound to adhere well and provide a smooth finish, the wood surface needs to be clean, dry, and free of loose particles. Remove any dirt, dust, or old paint from the area to ensure proper adhesion. Additionally, sand the area lightly to create a slightly roughened surface for better bonding.
3. Overfilling or Underfilling the Imperfections
Proper application of spackling compound is crucial for achieving a flawless finish. Overfilling the cracks or holes can lead to uneven surfaces and visible patches once painted. On the other hand, underfilling the imperfections may result in a weak repair that can easily crack or break. It’s important to follow the manufacturer’s instructions and apply the spackling compound in thin layers, gradually building it up until the imperfection is level with the surrounding wood surface.
4. Failing to Sand and Feather the Edges
Once the spackling compound has dried, it’s essential to sand and feather the edges to blend it seamlessly with the surrounding wood. Neglecting this step can leave visible edges or ridges that are easily noticeable, even after painting. Use fine-grit sandpaper or a sanding block to gently smooth out the repaired area, gradually blending it with the surrounding wood. This will create a smooth transition and ensure a flawless finish.
5. Rushing the Drying Time
Patience is key when it comes to spackling. Rushing the drying time can lead to a subpar finish. Allow the spackling compound to dry completely as per the manufacturer’s instructions before proceeding with sanding or painting. Inadequate drying time can cause the compound to shrink or crack, resulting in an uneven surface. Follow the recommended drying time and ensure proper ventilation to expedite the drying process.
6. Forgetting to Prime Before Painting
Priming the repaired area before painting is crucial for achieving a flawless and long-lasting finish. Failing to prime can result in uneven paint absorption, color variations, or a dull appearance. Apply a coat of primer specifically designed for wood surfaces, following the manufacturer’s instructions. Allow the primer to dry completely before proceeding with the paint application. This will ensure that the paint adheres evenly and provides a professional-looking finish.
In summary, avoiding these common wood spackling mistakes can help you achieve a flawless finish when repairing wood surfaces. Remember to choose the right type of spackling, prepare the surface properly, apply the compound in thin layers, sand and feather the edges, allow for adequate drying time, and prime before painting. By following these guidelines, you can achieve a seamless repair and enhance the beauty of your woodwork.
Pro Tips for Sanding and Priming Wood Before Spackling
When it comes to repairing and restoring wood surfaces, proper preparation is key. Sanding and priming are essential steps before spackling to ensure a smooth and durable finish. In this section, we will discuss some professional tips and techniques for sanding and priming wood before spackling.
1. Gather the Right Tools
Before you begin sanding and priming, make sure you have the necessary tools at hand. These include sandpaper (both coarse and fine-grit), a sanding block or sanding machine, a tack cloth, and primer.
2. Prepare the Surface
Start by preparing the wood surface for sanding. Remove any dirt, dust, or loose particles by wiping it down with a damp cloth. This will ensure that the sanding process is more effective and prevents any debris from getting trapped under the primer.
3. Sand with the Grain
When sanding the wood, always sand with the grain to avoid creating scratches or marks that can be difficult to remove. Use long and smooth strokes, applying even pressure to achieve an even surface. Start with a coarse-grit sandpaper to remove any imperfections, and then switch to a finer grit for a smoother finish.
4. Use a Sanding Block or Machine
To make the sanding process easier and more consistent, consider using a sanding block or machine. These tools provide better control and help to evenly distribute the pressure, resulting in a more uniform finish. Be careful not to apply too much pressure, as it can cause dents or unevenness in the wood.
5. Remove Sanding Residue
After sanding, it is important to remove all sanding residue from the surface. Use a tack cloth or a soft brush to gently remove any dust or particles. This step ensures a clean surface for priming and prevents any debris from interfering with the adhesion of the primer.
6. Choose the Right Primer
Selecting the appropriate primer is crucial for achieving a successful spackling job. Consider the type of wood you are working with and choose a primer that is compatible with it. There are various types of primers available, including oil-based, latex-based, and shellac-based. Consult with a professional or refer to the manufacturer’s guidelines for the best primer option for your specific project.
7. Apply Primer Evenly
Once the surface is properly sanded and cleaned, apply the primer evenly using a brush or roller. Work in small sections and make sure to cover the entire surface. Avoid applying too much primer, as it can lead to drips and an uneven finish. Allow the primer to dry completely before proceeding to spackling.
8. Check for Imperfections
After the primer has dried, inspect the surface for any imperfections that may still be visible. If necessary, lightly sand the primed areas using a fine-grit sandpaper to achieve a smooth finish. Wipe away any sanding residue before proceeding to spackling.
In summary, sanding and priming wood before spackling is a crucial step in achieving a professional and long-lasting finish. By following these pro tips, you can ensure that your wood restoration project is successful and that the spackling adheres well to the surface. Take your time, use the right tools and materials, and enjoy the satisfaction of a beautifully restored wood surface.
Advanced Techniques for Spackling Damaged or Rotted Wood
When it comes to repairing damaged or rotted wood, spackling is an effective technique that can restore the integrity and appearance of the wood. While basic spackling methods are suitable for minor repairs, advanced techniques are necessary for more extensive damage or rot. In this section, we will explore some advanced techniques for spackling damaged or rotted wood.
1. Assessing the extent of the damage
Prior to starting the spackling process, it is crucial to assess the extent of the damage on the wood. This helps in determining the appropriate spackling technique and the amount of preparation required. Look for signs of rot, such as soft or crumbly wood, discoloration, or fungus growth. Assess any structural damage, such as sagging or weakened areas.
2. Removing rotted or damaged wood
Before applying spackling compound, remove any loose or rotted wood from the damaged area. Use a chisel or a rotary tool with a cutting bit to carefully remove the damaged portions. Ensure that you reach a solid and stable base before proceeding with the spackling process. This step is crucial to prevent further decay and to create a stable surface for the spackling compound to adhere to.
3. Reinforcing the damaged area
In cases where the damage is severe or structural integrity is compromised, reinforcing the damaged area is essential. One method is to use epoxy consolidants or wood hardeners. Apply the consolidant to the damaged wood and allow it to cure. This strengthens the wood and prevents further deterioration. Additionally, consider using reinforcing materials like fiberglass cloth or metal plates to provide added stability to the repaired area.
4. Choosing the right spackling compound
When it comes to spackling damaged or rotted wood, not all spackling compounds are created equal. Look for specialized wood repair spackling compounds that are designed to bond well with wood and provide long-lasting durability. These compounds are typically water-resistant, shrink-resistant, and have excellent adhesion properties. Choose a compound that matches the color of the wood or opt for a neutral shade that can be easily painted over.
5. Applying the spackling compound
Before applying the spackling compound, ensure that the damaged area is clean and dry. Use a putty knife to apply the compound evenly onto the damaged or rotted wood. Fill in the voids or holes completely, ensuring that the compound is level with the surrounding wood surface. Smooth out the spackling compound using the putty knife, removing any excess material. Allow the compound to fully dry as per the manufacturer’s instructions.
6. Sanding and finishing
Once the spackling compound is dry, it’s time to sand and finish the repaired area. Use a fine-grit sandpaper to smooth out the spackled surface, blending it seamlessly with the surrounding wood. Ensure that the repaired area is flush with the rest of the wood surface. Wipe away any dust or debris, and if necessary, apply a primer or sealant before painting or staining the wood to match the surrounding area.
7. Regular maintenance and prevention
After successfully spackling the damaged or rotted wood, it is crucial to regularly inspect and maintain the repaired area. Keep an eye out for any signs of further damage or decay. Ensure that the wood is properly sealed and protected from moisture, as this can lead to future rot or deterioration. Consider applying a protective coating or paint to enhance the longevity of the repair.
In summary, advanced techniques for spackling damaged or rotted wood involve assessing the extent of the damage, removing rotted wood, reinforcing the area if necessary, choosing the right spackling compound, applying it properly, and finishing with sanding and sealing. By following these techniques, you can effectively restore the integrity and appearance of damaged or rotted wood, prolonging its lifespan and preventing further deterioration.
FAQs
Can you spackle wood?
No, spackling is not recommended for filling gaps or holes in wood. Spackle is typically used on drywall or plaster surfaces. For wood, it is best to use wood filler or putty specifically designed for repairing and filling wood surfaces.
Conclusion:
In conclusion, spackling wood is not recommended as it is primarily used for repairing small holes and cracks in drywall. Wood surfaces require different treatment and repair methods. To effectively repair wood, it is best to use wood fillers or putty that are specifically designed for that purpose.
Using spackle on wood may not provide long-lasting results and could potentially damage the wood further. It is important to properly assess the damage and choose the appropriate repair method to ensure the integrity and aesthetics of the wood surface.
Remember to always follow the manufacturer’s instructions when working with any repair product and consider seeking professional advice for complex wood repairs.