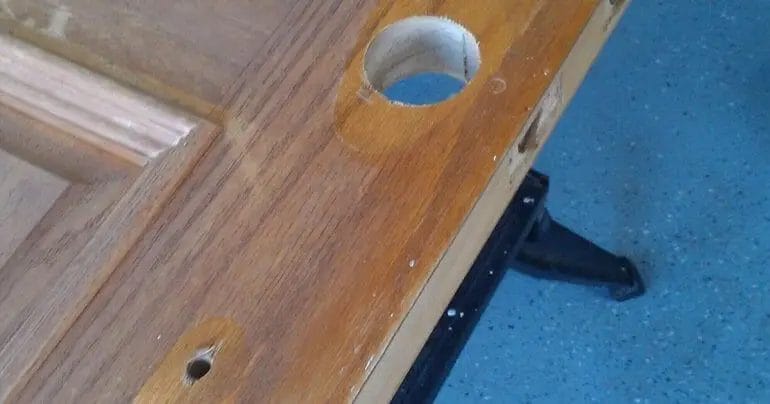
If you have a hole in your wooden furniture or any other wooden surface, patching it up is a simple and straightforward process. With the right tools and materials, you can easily restore the integrity and aesthetic of the wood. In this guide, we will show you step-by-step how to patch a hole in wood, ensuring a seamless repair that will make your wood look as good as new. Whether you are a DIY enthusiast or a beginner, you’ll find these instructions easy to follow and achieve professional results.

Easy and Effective Wood Hole Patching Techniques
Wood is a popular material used in various construction and furniture projects. Over time, however, wood can get damaged or develop holes due to wear and tear or pest infestation. Patching these holes is essential to restore the functionality and aesthetics of the wood. In this section, we will explore some easy and effective wood hole patching techniques that can be used by both professionals and DIY enthusiasts.

1. Wood Filler
Wood filler is a versatile and widely used product for patching wood holes. It is a putty-like substance that can be applied to the damaged area of the wood using a putty knife or a spatula. Wood fillers are available in different colors to match the shade of the wood. They can be easily shaped and smoothed to blend seamlessly with the surrounding surface.
Before applying wood filler, it is important to clean the area and remove any loose particles or debris. The wood surface should also be sanded lightly to ensure better adhesion. Once the area is prepared, the wood filler can be applied in layers, allowing each layer to dry before adding the next. After the final layer, the excess filler can be sanded down to achieve a smooth finish.
2. Epoxy Resin
Epoxy resin is another effective option for patching wood holes. It is a two-part adhesive that combines a resin and a hardener. When mixed together, epoxy resin forms a strong and durable bond with the wood. It can be used to fill both small and large holes, as well as cracks and gaps.
To use epoxy resin, the damaged area should be cleaned and sanded, similar to wood filler. The resin and hardener should be mixed according to the manufacturer’s instructions. The mixture can then be applied to the hole using a putty knife or a syringe for better precision. Excess resin can be removed using a scraper or sandpaper. Epoxy resin requires sufficient curing time, so it is important to follow the recommended drying time before sanding or painting the patched area.
3. Wood Plugs
For smaller holes or gaps, wood plugs can be a suitable option for patching. Wood plugs are cylindrical pieces of wood that can be inserted into the holes and glued in place. They are typically available in different wood species to match the original wood.
To patch a hole using wood plugs, the damaged area should be cleaned and prepped. A pilot hole is then drilled into the center of the hole to accommodate the wood plug. The plug is coated with wood glue and inserted into the hole. Excess glue can be wiped off using a damp cloth. Once the glue is dry, the excess portion of the wood plug can be trimmed and sanded to achieve a flush finish.
4. Patching Compound
Patching compounds are specifically designed for repairing damaged wood surfaces. They are available in paste or powder form and can be mixed with water to create a workable consistency. Patching compounds are ideal for filling shallow holes, cracks, and imperfections.
To use a patching compound, the damaged area should be cleaned and sanded. The compound can be mixed according to the manufacturer’s instructions and applied to the hole using a putty knife or a trowel. It should be spread evenly and leveled with the surrounding surface. Once dry, the patched area can be sanded and painted to match the wood color.
5. Wood Veneer
In cases where the wood hole is too large to be filled with filler or compound, wood veneer can be used to patch the area. Wood veneer is a thin layer of wood that can be glued onto the damaged surface to create a seamless repair.
To patch with wood veneer, the damaged area is cleaned and prepped. The veneer is cut to size, ensuring it covers the entire hole. Wood glue is applied to the back of the veneer and it is pressed firmly onto the damaged area. Excess glue can be wiped off, and the patched area can be sanded and finished to match the surrounding wood.
Summary
Wood hole patching is an essential skill for maintaining the integrity and appearance of wooden surfaces. Whether using wood filler, epoxy resin, wood plugs, patching compounds, or wood veneer, it is important to adequately prepare the damaged area and follow the manufacturer’s instructions for best results. With these easy and effective wood hole patching techniques, anyone can restore the beauty and functionality of wood with minimal effort.
Step-by-Step Guide to Fixing Holes in Wood
Wood is a popular and versatile material used in various applications, from furniture to flooring. However, over time, wood can develop holes due to wear and tear, insect damage, or accidents. Fixing these holes is essential to maintain the integrity and aesthetics of the wood. In this guide, we will walk you through the step-by-step process of fixing holes in wood effectively.
1. Assess the Size and Depth of the Hole
The first step in fixing a hole in wood is to assess the size and depth of the hole. This will help determine the appropriate repair method and materials needed. Small, shallow holes can be easily filled, while larger or deeper holes may require more extensive repairs.
2. Clean the Hole
Before starting the repair, it’s important to clean the hole thoroughly. Use a brush or vacuum to remove any debris, dust, or loose wood particles from the hole. This will ensure a clean surface for the repair material to adhere to.
3. Choose the Right Filling Material
Next, choose the appropriate filling material based on the size and location of the hole. There are various options to consider, including wood putty, epoxy filler, or wood filler. Wood putty is ideal for smaller holes, while epoxy filler is better suited for larger or deeper holes. Wood filler is a versatile option that can be used for both small and large holes.
4. Apply the Filling Material
Apply the chosen filling material to the hole using a putty knife or a spatula. Ensure that the hole is completely filled, and the material is evenly spread. For larger holes, it may be necessary to apply the filling material in layers, allowing each layer to dry before applying the next.
5. Smooth and Sand the Surface
After the filling material has dried, use sandpaper to smooth the surface. Start with a coarse-grit sandpaper to remove any excess material and rough edges. Gradually switch to finer-grit sandpaper to achieve a smooth and seamless finish. Wipe away any dust or debris before proceeding to the next step.
6. Match the Color
If necessary, match the color of the repaired area to the surrounding wood. Use wood stain or paint to achieve a close match. Apply the color evenly to the repaired area and allow it to dry completely.
7. Seal and Protect
To ensure the longevity of the repair, it’s important to seal and protect the fixed area. Apply a wood sealant or varnish to the entire surface, including the repaired section. This will help prevent future damage and maintain the overall appearance of the wood.
By following these step-by-step instructions, you can successfully fix holes in wood and restore its integrity and beauty. Remember to choose the right materials, take your time during the repair process, and protect the repaired area for long-lasting results. With a little effort and the right tools, you can easily tackle any hole in wood and enjoy the natural beauty of this timeless material.
Quick DIY Solutions for Patching Holes in Wood
Wooden furniture and surfaces can easily develop holes over time due to various reasons such as wear and tear, accidental damage, or insect infestation. These holes not only compromise the structural integrity of the wood but also affect its aesthetic appeal. Fortunately, there are several quick and easy DIY solutions that you can use to patch holes in wood and restore its functionality and appearance. In this section, we will explore some effective methods for repairing small to medium-sized holes in wood.
1. Wood Filler
Wood filler is one of the most commonly used materials for patching holes in wood. It is a versatile product that can be used to repair both small and medium-sized holes. Wood filler comes in different colors, allowing you to match it with the existing wood color for a seamless repair.
To use wood filler, start by cleaning the area around the hole to remove any dirt or debris. Then, apply the filler using a putty knife or a spatula, ensuring that it fills the hole completely. Smooth out the surface using the putty knife and let it dry according to the manufacturer’s instructions. Once dry, sand the patched area gently to achieve a smooth finish. You can then paint or stain the wood to match the rest of the surface.
2. Wood Dowels
For slightly larger holes, wood dowels can be a great solution. Wood dowels are cylindrical rods made of wood that can be cut to size and inserted into the hole to fill the void. This method provides a more durable and stable repair, especially for holes in load-bearing structures.
To use wood dowels, start by measuring the diameter of the hole and choose a dowel with a slightly larger diameter. Using a drill bit of the same size as the dowel, drill a hole into the wood to the same depth as the length of the dowel. Apply some wood glue inside the hole and insert the dowel, ensuring it is flush with the surface. Let the glue dry completely before sanding and finishing the repaired area.
3. Epoxy Putty
Epoxy putty is a two-part compound that hardens to create a strong and durable repair. It is an excellent option for filling larger holes or gaps in wood. Epoxy putty is available in different colors, allowing you to match it with the wood color for a seamless finish.
To use epoxy putty, start by kneading the two parts together until they are fully mixed. Apply the putty to the hole, ensuring that it fills the void completely. Use a putty knife or spatula to shape and smooth the putty to match the surrounding surface. Let the epoxy putty cure according to the manufacturer’s instructions and then sand and finish the repaired area.
4. Wood Veneer Patch
Wood veneer patches are an ideal solution for repairing holes in veneered surfaces. They are thin sheets of wood that can be cut to size and glued onto the damaged area to restore the appearance and integrity of the surface.
To use wood veneer patches, start by cutting the patch to the desired size, ensuring it covers the entire hole. Apply wood glue to the back of the patch and press it firmly onto the damaged area. Use a weight or clamp to hold the patch in place until the glue dries completely. Once dry, sand the repaired area gently and finish it to match the rest of the surface.
5. Sawdust and Glue Mixture
If you prefer a more natural and cost-effective solution, you can create a DIY wood filler using a mixture of sawdust and glue. This method is suitable for small holes and can produce excellent results.
To create the sawdust and glue mixture, start by collecting sawdust from the same type of wood as the one you are repairing. Mix the sawdust with wood glue to create a thick paste. Apply the mixture to the hole using a putty knife or spatula, ensuring it fills the void completely. Allow the mixture to dry and then sand and finish the repaired area.
Summary
Patching holes in wood can be a simple and rewarding DIY project. Whether you choose to use wood filler, wood dowels, epoxy putty, wood veneer patches, or a sawdust and glue mixture, these quick solutions can help restore the functionality and appearance of your wooden furniture and surfaces. Remember to clean and prepare the area before applying the chosen patching material, and follow the manufacturer’s instructions for drying and finishing. With these quick DIY solutions, you can easily
Best Materials and Tools for Repairing Wood Holes
Wooden furniture and structures can develop holes over time due to various reasons such as wear and tear, insect infestation, or accidents. Fortunately, these holes can be repaired with the right materials and tools. In this section, we will discuss the best materials and tools for repairing wood holes, ensuring a seamless and durable fix.
Wood Filler
Wood filler is a must-have material when it comes to repairing wood holes. It is a substance that can be used to fill in the gaps and create a smooth surface. Wood fillers are available in different formulations, including water-based and solvent-based options. When choosing a wood filler, consider the color, texture, and compatibility with your project. Opt for a wood filler that closely matches the color of your wood to achieve a natural-looking repair.
Sanding Block or Sandpaper
Before applying the wood filler, it is essential to prepare the surface by sanding it. A sanding block or sandpaper is necessary for smoothing and leveling the area around the hole. Start with a coarse-grit sandpaper, such as 80 or 100 grit, to remove any rough edges or splinters. Then, switch to a finer-grit sandpaper, such as 180 or 220 grit, to achieve a smooth finish.
Putty Knife or Spatula
To apply the wood filler effectively, you will need a putty knife or spatula. These tools allow you to spread the filler evenly over the hole and smooth out any excess. Look for a putty knife or spatula with a flexible blade to ensure easy application and precise control. It is recommended to have multiple sizes of putty knives or spatulas to accommodate different hole sizes.
Wood Glue
If the wood around the hole is loose or damaged, using wood glue is essential to strengthen the area. Apply wood glue to the edges of the hole and press the loose pieces firmly together. Leave it to dry according to the manufacturer’s instructions before proceeding with the wood filler application.
Clamps
If the wood needs to be held in place during the repair, clamps can be extremely useful. They ensure that the glued pieces stay tightly together and prevent any movement while the glue dries. Choose clamps that are appropriate for the size and shape of your project, and follow the instructions on how to properly secure them.
Paint or Stain
After the wood filler has dried and the repair is complete, you may need to finish the surface by painting or staining it. This step is crucial to match the repaired area with the rest of the wood. Choose a paint or stain color that matches the existing finish, and apply it evenly using a brush or a cloth. Allow the paint or stain to dry completely before using the repaired wood structure.
In summary, repairing wood holes requires specific materials and tools to ensure a successful outcome. Wood filler, sanding block or sandpaper, putty knife or spatula, wood glue, clamps, and paint or stain are some of the essential items you will need. By following the proper repair process and using these materials and tools effectively, you can restore the integrity and aesthetics of your wood furniture or structures.
Pro Tips for a Seamless Wood Hole Patching Process
Repairing small holes and imperfections in wood surfaces can be a simple and cost-effective way to restore the beauty of your furniture or wooden fixtures. By following these pro tips, you can achieve a seamless wood hole patching process and make your wood surfaces look as good as new.
1. Gather the Necessary Tools and Materials
Before you begin the wood hole patching process, make sure you have all the necessary tools and materials on hand. This will ensure that you can work efficiently and achieve optimal results. Some essential items include:
- Wood filler or putty
- Sandpaper (various grits)
- Putty knife
- Painter’s tape
- Primer and paint (if needed)
- Stain or finish (if needed)
2. Prepare the Surface
Before applying any wood filler or putty, it is crucial to prepare the surface properly. Start by cleaning the area around the hole using a mild detergent and water. This will remove any dirt, grime, or grease that may affect the adhesion of the filler. Once the area is clean and dry, use sandpaper to lightly roughen the surface around the hole. This will help the filler adhere better.
3. Choose the Right Wood Filler
There are various types of wood fillers available, so it is essential to choose one that matches the color and texture of your wood. For small holes and imperfections, a water-based wood filler is usually sufficient. If you are working on a larger hole or need to fill deep gaps, consider using an epoxy-based filler for added durability.
4. Apply the Wood Filler
Using a putty knife, apply the wood filler to the hole or imperfection in a smooth and even manner. Fill the hole slightly above the surface to allow for sanding later. Make sure to push the filler into the hole firmly to ensure proper adhesion. Smooth out any excess filler using the putty knife and clean any spills or smears around the area.
5. Let the Filler Dry and Sand the Surface
Allow the wood filler to dry completely according to the manufacturer’s instructions. This typically takes a few hours, but it may vary depending on the product. Once the filler is dry, use sandpaper with a fine grit to smooth the surface. Start with a higher grit sandpaper and gradually move to a finer one for a polished finish. Sand in a circular or back-and-forth motion until the patch is level with the surrounding wood.
6. Prime and Paint (if necessary)
If you need to paint the patched area, apply a layer of primer to ensure proper adhesion and coverage. Allow the primer to dry completely before applying the paint. Choose a paint color that matches the rest of the wood surface, and apply it using a small brush or roller. For a seamless finish, feather the paint edges into the surrounding wood.
7. Apply Stain or Finish (if necessary)
If you are patching a hole on a stained or finished wood surface, it is essential to match the color and finish. Apply a stain or finish that matches the existing wood using a brush or cloth. Allow the stain or finish to dry completely before applying additional coats if needed. Blend the stained or finished area with the surrounding wood for a seamless look.
8. Final Touches and Maintenance
Once the wood hole patching process is complete, inspect the repaired area for any imperfections or unevenness. If necessary, repeat the filling and sanding process until you achieve the desired result. Afterward, maintain the repaired wood surface by regularly cleaning and protecting it with appropriate products.
In summary, by following these pro tips for a seamless wood hole patching process, you can restore the beauty of your wood surfaces and achieve professional-looking results. Remember to gather the necessary tools and materials, prepare the surface, choose the right wood filler, apply it properly, let it dry, sand the surface, and finish off with primer, paint, stain, or finish as needed. With careful attention to detail and proper maintenance, your wood surfaces will look as good as new.
FAQs
1. How can I patch a hole in wood?
To patch a hole in wood, start by cleaning the area around the hole and removing any loose debris. Then, fill the hole with wood filler or putty, using a putty knife to smooth it out. Allow it to dry thoroughly before sanding and painting or staining to match the surrounding wood.
2. What if the hole in the wood is too large to patch?
If the hole is too large to patch with wood filler, you can use a technique called a dutchman patch. This involves cutting a matching piece of wood and fitting it into the hole, securing it with glue or nails. Then, sand and finish the patched area to blend it with the rest of the wood.
3. Can I use wood glue to patch a hole in wood?
Wood glue is not typically recommended for patching holes in wood, as it is not designed to fill voids. It is best to use wood filler or putty specifically made for this purpose, as they are formulated to dry hard and can be sanded and painted or stained.
Conclusion
In conclusion, knowing how to patch a hole in wood can be a valuable skill for any DIY enthusiast or homeowner. By following the steps outlined in this guide, you can easily repair and restore the integrity of your wooden surfaces, saving you time and money in the process.
Remember to always choose the right materials and tools for the job, taking into consideration the size of the hole and the type of wood you are working with.
Whether you are dealing with small nail holes or larger cracks and gouges, with patience and attention to detail, you can achieve professional-looking results. Patching holes in wood not only improves the appearance of the surface but also extends the lifespan of your woodwork.