Attaching fabric to wood can be a great way to add texture, color, and style to any wooden object or piece of furniture. Whether you’re looking to upholster a chair, create a fabric-covered wall panel, or decorate a wooden frame, there are a few methods you can use to securely attach fabric to wood. In this guide, we’ll explore different techniques, including using adhesive sprays, staples, and glue, to help you achieve a professional and durable fabric-to-wood attachment. Let’s dive in!
Using Staples to Secure Fabric to Wood Surfaces
Fabric can be a versatile and visually appealing material to use in various DIY projects. Whether you’re upholstering furniture, creating wall art, or making decor items, securing the fabric to a wood surface is an essential step. One effective way to achieve this is by using staples. In this section, we will explore the process of using staples to secure fabric to wood surfaces.

Materials Needed
- Wood surface
- Fabric
- Staple gun
- Staples
- Scissors
Step-by-Step Process
1. Prepare the Wood Surface
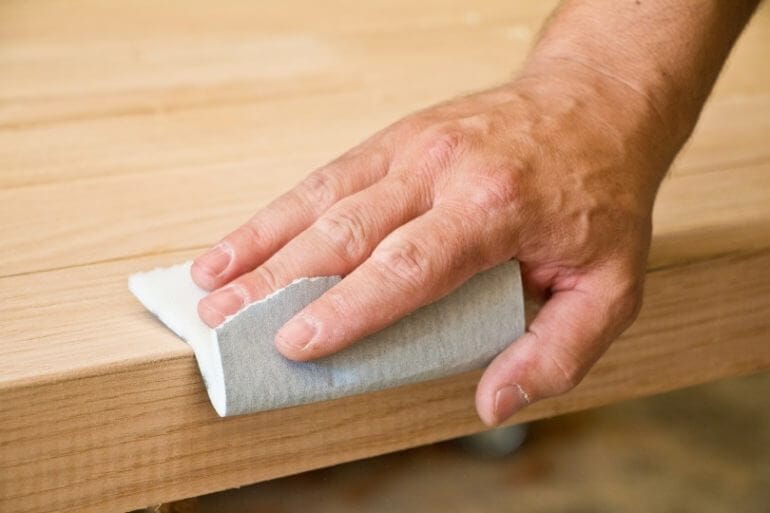
The first step is to ensure that the wood surface you are working with is clean and smooth. Remove any dust or debris using a soft cloth or brush. If the wood surface has any rough edges or splinters, sand them down to create a smooth surface for the fabric.
2. Cut the Fabric
Measure and cut the fabric according to the size of the wood surface you are covering. Leave some extra fabric on all sides to ensure a secure fit and easy stapling.
3. Position the Fabric
Place the fabric over the wood surface, ensuring that it is centered and aligned properly. Smooth out any wrinkles or creases to achieve a neat and even appearance.
4. Begin Stapling
Start at one edge of the wood surface and fold the fabric over it, securing it in place. Use the staple gun to drive a staple through the fabric and into the wood surface. Position the staple approximately 1-2 inches from the edge to ensure a secure hold.
5. Continue Stapling
Move along the edge, folding the fabric over and stapling it at regular intervals. Maintain an even tension on the fabric to prevent any sagging or puckering. Space the staples approximately 2-3 inches apart for a secure attachment.
6. Corners and Curves
When you reach a corner or curve, fold the fabric neatly to create a clean finish. For corners, fold the fabric inward and staple it down securely. For curves, make small pleats or gathers in the fabric to fit the shape, stapling as needed.
7. Complete the Stapling
Continue stapling along all sides of the wood surface until the fabric is securely attached. Trim off any excess fabric if necessary.
8. Inspect and Adjust
Once you have completed the stapling, carefully inspect the fabric for any loose areas or unevenness. Make any necessary adjustments by restapling or smoothing out the fabric as needed.
Summary
Using staples to secure fabric to wood surfaces is a simple yet effective method for various crafting and DIY projects. By following the step-by-step process outlined above, you can achieve a secure and professional-looking finish. Remember to choose the right staples for the job and use a staple gun with enough power for a secure hold. With a little practice and attention to detail, you can confidently enhance your wood surfaces with fabric.

Sewing fabric onto wooden surfaces
When it comes to adding a touch of texture and warmth to wooden surfaces, sewing fabric onto them can be a creative and practical solution. Whether you want to embellish a wooden chair, create a unique wall hanging, or add a decorative element to a wooden tabletop, sewing fabric onto wood can bring a whole new dimension to your project. In this section, we will explore the steps involved in sewing fabric onto wooden surfaces, as well as some helpful tips and ideas to get you started.
Materials needed
Before diving into the process, it’s essential to gather all the necessary materials. Here’s a list of items you’ll need:
- Wooden surface (chair, tabletop, wall art, etc.)
- Fabric of your choice
- Measuring tape
- Scissors
- Thread
- Sewing needle
- Fabric glue or adhesive (optional)
- Pins
- Iron and ironing board
- Trim or embellishments (optional)
Steps to sew fabric onto wooden surfaces
Follow these step-by-step instructions to sew fabric onto a wooden surface:
- Prepare the wooden surface: Start by ensuring that the wooden surface is clean and smooth. Sand any rough edges or imperfections, and wipe away any dust or debris.
- Measure and cut the fabric: Measure the dimensions of the wooden surface and add a few inches on each side to allow for folding and securing. Use these measurements to cut the fabric to the appropriate size.
- Iron the fabric: Before sewing, iron the fabric to remove any wrinkles or creases. This will ensure a smooth and polished look once the fabric is attached to the wood.
- Secure the fabric: If desired, you can use fabric glue or adhesive to secure the fabric in place. Apply a thin layer on the backside of the fabric and press it onto the wooden surface. This step is optional and depends on personal preference.
- Pin the fabric: If you’re not using adhesive, use pins to secure the fabric onto the wooden surface. Start by pinning the corners and then work your way along the edges, making sure the fabric is taut and even.
- Sew the fabric: Thread your needle and knot the end. Begin sewing along one edge of the fabric, using a basic stitch or a decorative stitch of your choice. Continue sewing along the remaining edges, removing the pins as you go.
- Finishing touches: Once all the fabric is securely sewn onto the wooden surface, trim any excess fabric if needed. You can also add additional embellishments, such as trim or decorative buttons, to enhance the overall aesthetic.
Tips and ideas
Here are some additional tips and ideas to consider when sewing fabric onto wooden surfaces:
- Choose a fabric that complements the wood and the overall style of the piece you’re working on. Consider the color, pattern, and texture of the fabric.
- If you’re new to sewing, start with a smaller project, such as a wooden picture frame, before tackling larger surfaces.
- Experiment with different sewing techniques and stitches to add visual interest and uniqueness to your fabric and wood combination.
- Consider mixing and matching fabrics to create a patchwork effect or incorporating different textures for added dimension.
- If you’re unsure about sewing directly onto the wood, you can create a fabric panel or cover that can be attached to the wooden surface using adhesive or other fastening methods.
In summary, sewing fabric onto wooden surfaces offers a creative way to transform plain wood into something visually appealing and unique. With the right materials and techniques, you can add texture, color, and pattern to wooden furniture, walls, or other decorative pieces. So, gather your supplies, unleash your creativity, and start sewing fabric onto wood to elevate your DIY projects to a whole new level.
Using Velcro to Attach Fabric to Wood
When it comes to attaching fabric to wood, there are several methods you can use. One popular and effective option is to use Velcro. Velcro is a versatile fastening system that consists of two components: the hook side and the loop side. This simple yet innovative invention can provide a secure and temporary bond between fabric and wood.
Step 1: Gather Your Supplies
Before you begin attaching fabric to wood using Velcro, make sure you have the necessary supplies ready:
- Velcro strips or squares
- Fabric of your choice
- Wood surface
- Scissors
- Adhesive suitable for wood and fabric
- Measuring tape or ruler
- Marker or pencil
Step 2: Prepare the Wood Surface
First, ensure that the wood surface is clean and smooth. Remove any dust, dirt, or debris using a damp cloth. If the surface is rough or uneven, consider sanding it lightly to create a smoother area for attaching the Velcro.
Step 3: Measure and Cut the Velcro
Measure the dimensions of the wood surface where you want to attach the fabric. Use the measuring tape or ruler to determine the length and width required for the Velcro strips or squares. Mark the measurements on the Velcro using a marker or pencil. Cut the Velcro strips or squares according to the marked measurements using scissors.
Step 4: Attach Velcro to Wood
Apply a suitable adhesive to the back of the Velcro strips or squares. Make sure to use an adhesive that is suitable for both wood and fabric. Press the hook side of the Velcro onto the wood surface, ensuring it is firmly attached. Allow the adhesive to dry according to the manufacturer’s instructions.
Step 5: Prepare the Fabric
While the Velcro is drying, prepare your fabric. Cut the fabric to the desired size and shape, making sure it matches the dimensions of the Velcro on the wood. You can hem the edges of the fabric using a sewing machine or fabric glue to prevent fraying.
Step 6: Attach Fabric to Velcro
Once the Velcro is securely attached to the wood, it’s time to attach the fabric. Line up the loop side of the Velcro on the fabric with the matching hook side on the wood. Press the fabric firmly onto the Velcro to create a strong bond.
Step 7: Adjust and Secure
If necessary, adjust the fabric to ensure it is aligned correctly and evenly on the wood surface. Smooth out any wrinkles or creases for a neat and professional finish. Once you are satisfied with the positioning of the fabric, press it firmly onto the Velcro to secure it in place.
Step 8: Enjoy Your Fabric-Wood Combination
Now that you have successfully attached fabric to wood using Velcro, you can enjoy the benefits of this versatile solution. Whether you are creating upholstered furniture, wall hangings, or decorative panels, Velcro provides a convenient and removable option for attaching fabric to wood.
In summary, Velcro is a practical and reliable method for attaching fabric to wood. By following these simple steps, you can achieve a secure and temporary bond between the two materials. Remember to choose an adhesive suitable for both wood and fabric, and take the time to properly prepare and measure before attaching the Velcro. With Velcro, you can easily create and change fabric-wood combinations to suit your needs.
Tips and Tricks for Successfully Attaching Fabric to Wood
Attaching fabric to wood can be a rewarding and creative way to add a touch of personality to your furniture or other wooden surfaces. Whether you’re looking to reupholster a chair or create a custom headboard, here are some tips and tricks to help you successfully attach fabric to wood:
1. Choose the Right Fabric
The first step in successfully attaching fabric to wood is to choose the right fabric for your project. Consider the durability, color, and pattern of the fabric, as well as how it will complement your existing decor. Keep in mind that certain fabrics, such as upholstery-grade fabrics, are designed to withstand wear and tear better than others.
2. Prepare the Wood Surface
Before attaching fabric to wood, it’s important to prepare the wood surface properly. Start by cleaning the wood to remove any dust, dirt, or other debris. If the wood has any rough spots or imperfections, sand it lightly to create a smooth surface for the fabric to adhere to.
3. Use an Adhesive
To attach the fabric to the wood, you’ll need a suitable adhesive. There are various options available, including fabric glue, spray adhesive, and even hot glue. Choose an adhesive that is specifically designed for fabric-to-wood bonding and follow the manufacturer’s instructions for application and drying time.
4. Apply the Adhesive
Apply a thin and even layer of adhesive onto the wood surface using a brush or a roller. Make sure to cover the entire area where the fabric will be attached. Be cautious not to apply too much adhesive, as it may seep through the fabric or create a lumpy appearance.
5. Smoothly Attach the Fabric
Once the adhesive has been applied, carefully place the fabric onto the wood surface. Start from one end and gradually smooth it out with your hands or a clean cloth to remove any air bubbles or wrinkles. Work slowly and precisely to ensure that the fabric is aligned properly.
6. Secure the Fabric
To ensure that the fabric stays securely attached to the wood, use additional methods to secure it in place. You can use staples, upholstery tacks, or a staple gun to secure the fabric to the wood along the edges or underneath the surface. Be mindful of the placement to ensure that the fasteners are concealed and do not detract from the overall appearance.
7. Trim Excess Fabric
After the fabric has been securely attached, carefully trim any excess fabric using a sharp pair of scissors or a craft knife. Take your time to make precise cuts along the edges, ensuring a clean and professional finish.
8. Protect the Fabric
Lastly, consider applying a protective coating to the fabric to help preserve its appearance and durability. Depending on the type of fabric and the intended use of the wood surface, you may choose to apply a fabric protector spray or a clear sealant to help protect against stains, spills, and fading.
With these tips and tricks, you’ll be well on your way to successfully attaching fabric to wood and creating stunning, customized pieces that showcase your personal style. Remember to exercise patience and attention to detail throughout the process to achieve the best results.
FAQs
1. How can I attach fabric to wood?
To attach fabric to wood, you can use a staple gun or adhesive. If using a staple gun, stretch the fabric tightly over the wood surface and staple it in place along the edges. If using adhesive, apply a thin, even layer on the wood surface, then carefully press the fabric onto the adhesive. Allow it to dry completely before handling.
2. Is it possible to sew fabric onto wood?
No, sewing fabric directly onto wood is not recommended. Sewing is designed for flexible materials like fabrics, and trying to sew through wood can damage the material and potentially cause injury. It is best to use staples, adhesive, or other appropriate methods for attaching fabric to wood.
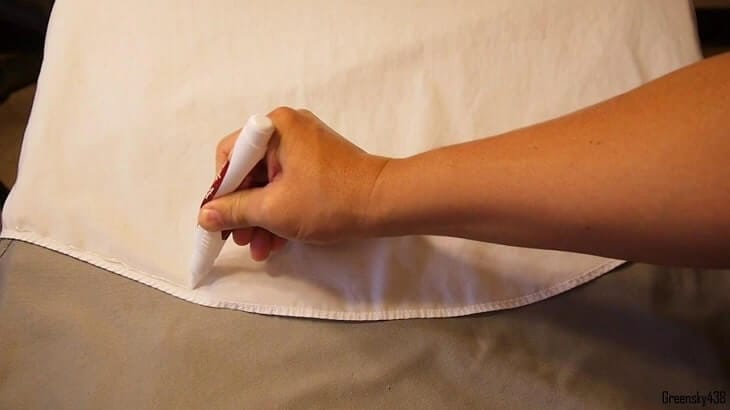
3. Can I use hot glue to attach fabric to wood?
Yes, hot glue can be used to attach fabric to wood. Apply a line of hot glue along the wood surface, then press the fabric onto the glue while it is still hot and pliable. Be careful not to burn yourself, and work in small sections to ensure proper adhesion. Allow the glue to cool and dry completely before handling.
Conclusion
In conclusion, attaching fabric to wood can be a simple and creative way to add color, texture, and personality to your wood projects. By following the right techniques and using the appropriate tools, you can achieve a seamless and long-lasting bond between fabric and wood.
Whether you are upholstering furniture, creating wall art, or designing custom home decor, the key is to ensure a secure and wrinkle-free attachment. Consider using adhesive sprays, fabric glue, or a staple gun depending on the project and fabric type.
Remember to properly prepare the wood surface, stretch the fabric tightly, and apply even pressure for optimal adhesion. With some practice and creativity, you can transform ordinary wood into stunning, fabric-covered masterpieces.