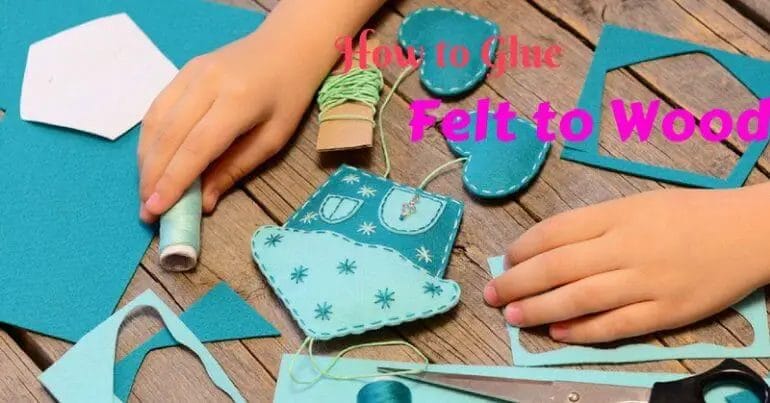
Attaching felt to wood is a simple and effective way to protect your furniture, prevent scratching, and reduce noise. With the right technique, you can easily adhere the felt to any wooden surface, whether it’s a table, chair, or cabinet. In this guide, we will walk you through the step-by-step process of attaching felt to wood, including the necessary materials and tips for a successful application. Say goodbye to unwanted scratches and enjoy a smooth and protected wood surface!
Step-by-Step Guide for Attaching Felt to Wood Surfaces
Attaching felt to wood surfaces is a simple and effective way to protect your furniture and floors from scratches and damage. Whether you want to add felt pads to the bottom of chairs or attach a larger piece of felt to a tabletop, this step-by-step guide will walk you through the process.

Materials You Will Need:
- Wood surface
- Felt pad or sheet
- Scissors
- Measuring tape
- Adhesive (such as glue, double-sided tape, or self-adhesive felt)
- Optional: Sandpaper
Step 1: Prepare the Wood Surface
Before attaching the felt, make sure the wood surface is clean and dry. If there are any rough patches or splinters, lightly sand them down with sandpaper to create a smooth surface.
Step 2: Measure and Cut the Felt
Measure the dimensions of the area you want to cover with felt. Use a measuring tape to ensure accuracy. Mark the measurements on the felt pad or sheet and cut it out using a pair of scissors.
Step 3: Apply Adhesive
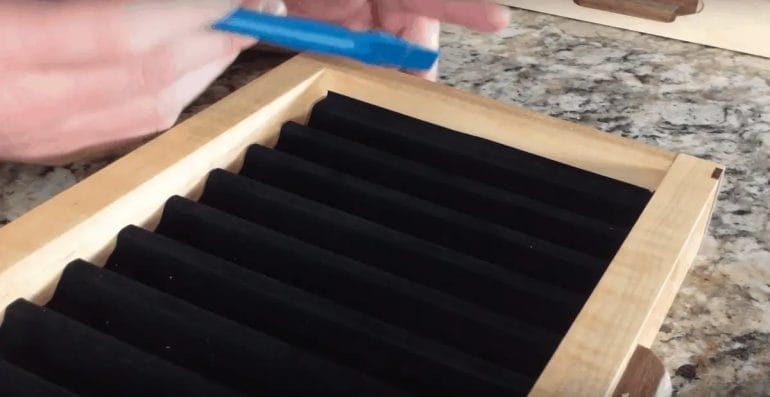
Choose your preferred adhesive method. If using glue, apply a thin and even layer of glue to the back of the felt. If using double-sided tape, cut the tape into smaller pieces and stick them to the back of the felt. For self-adhesive felt, simply peel off the backing.
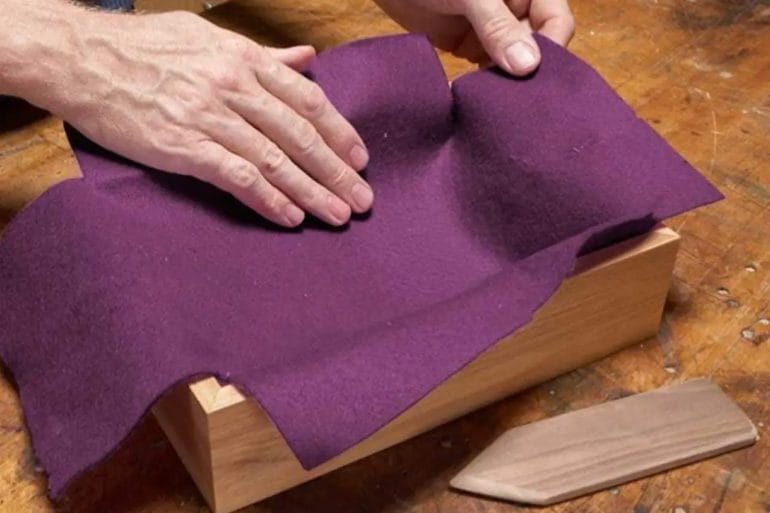
Step 4: Position and Press
Place the felt onto the desired area of the wood surface, making sure it is aligned properly. Press down firmly to ensure a strong bond between the felt and the wood.
Step 5: Allow Time to Dry
Depending on the adhesive used, allow the felt to dry and set for the recommended amount of time. This will ensure a secure and long-lasting attachment.
Step 6: Test the Attachment
Once the adhesive has fully dried, test the attachment by gently applying pressure or sliding the furniture across the floor. If the felt stays in place and provides a smooth glide, the attachment is successful.
Optional: Replace or Reattach
If the felt becomes worn or detached over time, simply remove the old piece and repeat the steps to replace or reattach the felt.
Attaching felt to wood surfaces is a simple DIY project that can greatly enhance the protection and longevity of your furniture and floors. It provides a cushioned barrier that reduces friction and prevents scratches. Follow this step-by-step guide for a seamless and effective attachment process.
Choosing the Right Adhesive for Attaching Felt to Wood
Attaching felt to wood can be a great way to protect surfaces from scratches and provide added cushioning. Whether you’re working on a DIY project or simply need to protect your furniture, choosing the right adhesive is essential for a successful and durable bond. In this section, we will explore the different types of adhesives available and provide tips for selecting the best one for your needs.
1. Contact Adhesive
Contact adhesive is a popular choice for attaching felt to wood surfaces. This adhesive creates a strong bond between the two materials and is resistant to heat and moisture. It is available in both spray and liquid forms, allowing for easy application. To use contact adhesive, simply apply it to both the wood surface and the felt, then press them together firmly. Allow the adhesive to dry according to the manufacturer’s instructions before handling the bonded materials.
When selecting a contact adhesive for attaching felt to wood, consider the specific requirements of your project. Look for an adhesive that is suitable for bonding porous surfaces, as wood can absorb the adhesive. Additionally, choose an adhesive that is flexible and durable, as this will ensure a long-lasting bond between the felt and wood.
2. Hot Glue
Another option for attaching felt to wood is hot glue. Hot glue guns are widely available and provide a quick and easy way to secure felt in place. Simply apply the hot glue to the desired area on the wood surface, then press the felt onto the glue. Hold the felt in place until the glue sets, which usually takes a few seconds.
Hot glue works well for smaller projects or temporary adhesion, as it may not provide the same level of durability as contact adhesive. However, it is a convenient option for projects that require immediate bonding or if you need to reposition the felt before it sets.
3. Fabric Adhesive
Fabric adhesive is another suitable option for attaching felt to wood. This type of adhesive is specifically designed for bonding fabric materials and is often water-resistant and flexible. Like contact adhesive, fabric adhesive creates a strong bond between the felt and wood surfaces.
To use fabric adhesive, apply a thin, even layer onto both the wood and the felt. Press the two together firmly and allow the adhesive to dry completely before handling. Fabric adhesive typically dries clear, ensuring that no visible residue is left behind.
4. Epoxy Resin
If you require an extremely strong bond between felt and wood, consider using epoxy resin. Epoxy resin is a two-part adhesive that creates a durable and long-lasting bond. It is resistant to moisture, heat, and chemicals, making it suitable for a variety of applications.
When using epoxy resin, follow the manufacturer’s instructions for mixing the adhesive. Apply a thin layer onto both the wood and the felt, then press them together firmly. Allow the epoxy resin to cure according to the instructions before handling the bonded materials.
Before selecting an adhesive for attaching felt to wood, consider factors such as durability, flexibility, and ease of application. Additionally, ensure that the adhesive is compatible with both the felt and the wood surface. By choosing the right adhesive, you can ensure a strong and long-lasting bond between the two materials, providing protection and cushioning for your woodworking projects.
Tips and Tricks for a Professional-Looking Felt Attachment on Wood
Adding felt attachments to wooden surfaces can not only protect the wood from scratches and dents, but it can also give your furniture a professional and polished look. Whether you are attaching felt pads to chair legs or using felt strips to line a jewelry box, following these tips and tricks will ensure a seamless and professional-looking result:
1. Clean and Prep the Surface
The first step to achieving a professional-looking felt attachment is to thoroughly clean and prep the surface of the wood. Remove any dust, dirt, or debris using a soft cloth or a mild cleaning solution. This will ensure that the felt adheres properly and securely to the wood.
2. Measure and Cut the Felt
Before cutting the felt, measure the dimensions of the area where you will be attaching it. Use a ruler or measuring tape to get accurate measurements. Once you have the measurements, cut the felt according to the size and shape needed. Use sharp scissors or a craft knife for clean and precise cuts.
3. Choose the Right Adhesive
Selecting the right adhesive is crucial for a professional-looking felt attachment. It should be strong enough to hold the felt securely in place but also safe for the wood surface. Double-sided adhesive pads or adhesive sheets specifically designed for wood are great options. Avoid using glue or adhesive sprays that may damage the wood.
4. Apply the Adhesive
Apply the adhesive directly onto the wood surface or onto the back of the felt, depending on the type of adhesive you are using. Follow the manufacturer’s instructions for proper application. Ensure that the adhesive is evenly spread and covers the entire area where the felt will be attached.
5. Press and Hold Firmly
Once the adhesive is applied, press the felt firmly onto the wood surface. Use your hand or a flat object, such as a credit card, to ensure proper adhesion and to remove any air bubbles. Hold the felt in place for a few seconds to allow the adhesive to bond securely.
6. Trim Excess Felt (If Necessary)
If there is any excess felt sticking out beyond the edges of the wood, carefully trim it using scissors or a craft knife. This will give the attachment a neater and more professional appearance.
7. Allow Proper Drying Time
Depending on the type of adhesive you used, it is important to allow sufficient drying time before using or moving the item. Refer to the adhesive manufacturer’s instructions for recommended drying time. Rushing this step can lead to the felt coming off or not adhering properly.
8. Regularly Check and Replace
Regularly check the condition of the felt attachments on your wood furniture or items. Over time, wear and tear may cause the felt to degrade or come loose. If you notice any signs of damage or detachment, replace the felt promptly to maintain the professional appearance and protection of your wood surfaces.
By following these tips and tricks, you can achieve a professional-looking felt attachment on wood surfaces. Not only will your furniture be protected, but it will also have a polished and refined look.
Common Mistakes to Avoid When Attaching Felt to Wood
Attaching felt to wood surfaces is a common practice to protect the wood from scratches and damage caused by furniture, decorative items, or other objects. However, if not done properly, it can lead to ineffective or short-lived results. To ensure a successful attachment of felt to wood, it’s essential to avoid the following common mistakes:
1. Using Low-Quality Felt
One of the most common mistakes is using low-quality felt. Poor-quality felt may not adhere well to the wood surface or may wear out quickly, requiring frequent replacements. It is important to invest in high-quality felt pads that are specifically designed for wood surfaces. These pads will provide better durability and effective protection for your furniture.
2. Not Cleaning the Wood Surface
Before attaching felt to wood, it’s crucial to clean the wood surface thoroughly. Dust, debris, and grease on the wood can prevent proper adhesion of the felt. Use a clean cloth or a mild cleaning solution to wipe the wood surface and remove any dirt or residue. Ensure that the surface is completely dry before attaching the felt.
3. Incorrect Placement of Felt Pads
Another mistake to avoid is incorrect placement of felt pads. Placing the pads unevenly or in the wrong areas can result in uneven or insufficient protection. Carefully measure and mark the areas where the felt pads should be placed to ensure equal distribution and complete coverage. Additionally, make sure the pads are centered and properly aligned with the furniture legs or other contact points.
4. Neglecting to Apply Pressure
Properly attaching felt pads to wood requires applying sufficient pressure. Neglecting this step can lead to weak adhesion and the pads may come off easily. After positioning the felt pads, firmly press them against the wood surface, applying even pressure for a few seconds. This will help the adhesive bond securely with the wood, ensuring long-lasting protection.
5. Overlooking Regular Maintenance
Even with properly attached felt pads, regular maintenance is necessary to keep them effective. Over time, the adhesive may weaken or the pads may collect dirt and lose their protective qualities. It’s important to periodically check the condition of the felt pads and replace any worn-out or damaged pads. Additionally, clean the pads and the wood surface to remove any debris that may hinder their performance.
In summary, attaching felt to wood can be a simple and effective way to protect your furniture and wood surfaces. By avoiding common mistakes such as using low-quality felt, not cleaning the wood surface, incorrect placement of felt pads, neglecting to apply pressure, and overlooking regular maintenance, you can ensure a successful attachment that provides long-lasting protection for your wood surfaces.
FAQs
1. How do I attach felt to wood?
To attach felt to wood, start by cleaning the wood surface and cutting the felt to the desired size. Apply an adhesive, such as contact cement or spray adhesive, evenly to the back of the felt and press it onto the wood surface. Allow it to dry and trim any excess felt for a clean finish.
2. What type of adhesive should I use to attach felt to wood?
You can use a variety of adhesives to attach felt to wood, such as contact cement, spray adhesive, or hot glue. The choice of adhesive depends on the specific project and personal preference. Make sure to use an adhesive that is suitable for both fabric and wood surfaces.
3. Can I remove felt from wood without damaging the surface?
Yes, you can remove felt from wood without damaging the surface. Start by gently peeling off the felt from one corner. If the adhesive is stubborn, use a heat gun or hairdryer to soften the adhesive and carefully peel it off. Use a mild adhesive remover or rubbing alcohol to remove any residue, and then clean the wood surface as needed.
Conclusion:
In conclusion, attaching felt to wood is a simple and effective way to protect your furniture and surfaces from scratches and damage. By following the right steps and using the proper tools, you can easily adhere felt pads or sheets to wood surfaces. Whether you are looking to add felt to the bottom of a chair, table, or any other wooden furniture, the process is quite straightforward.
Remember to clean the wood surface thoroughly before attaching the felt, and ensure that the adhesive you use is suitable for wood materials.
By taking these precautions, you can enjoy the benefits of felt protection while preserving the beauty and integrity of your wooden items.
