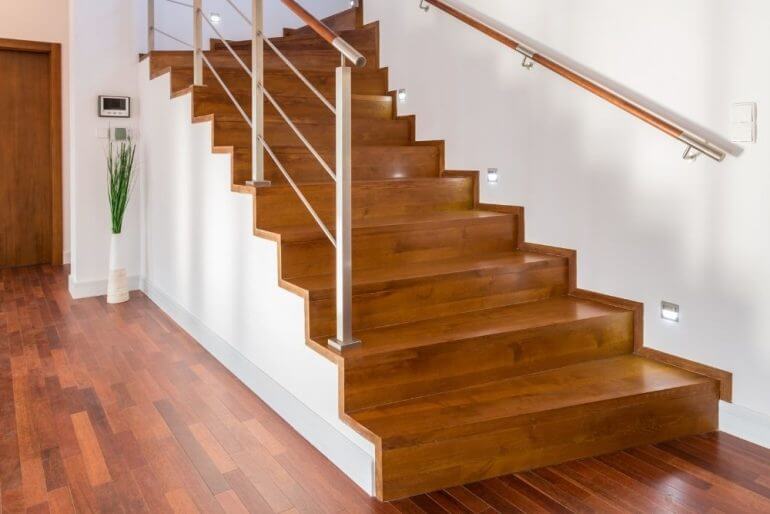
Are you tired of your old carpet stairs and looking to upgrade to a more elegant and timeless look? Transforming your carpeted stairs into beautiful wood stairs can completely change the aesthetic of your home. With the right tools and materials, you can easily make this transformation yourself. In this guide, we will show you step-by-step how to change carpet stairs to wood, giving your home a fresh and modern look that will impress your guests.
The first step in changing carpet stairs to wood is to carefully remove the existing carpet and padding. This may require some patience and elbow grease, but the end result will be worth it. Once the carpet is removed, you will need to assess the condition of the stairs and make any necessary repairs. This may include filling in any holes or cracks and sanding down any rough edges.

Next, it’s time to choose the type of wood you want to use for your stairs. There are many options available, including hardwoods like oak, maple, and mahogany. Consider the style of your home and your personal preferences when making this decision. Once you have chosen your wood, you will need to measure and cut the planks to fit your stairs. It’s important to take accurate measurements and use a saw with a fine tooth blade for clean cuts.
After cutting the wood planks, it’s time to install them on your stairs. You can use adhesive, nails, or screws to secure the wood
Choosing the Right Wood for Your Staircase Transformation
When it comes to transforming your staircase, one of the most important decisions you’ll make is choosing the right wood. The type of wood you choose will not only impact the overall look and feel of your staircase but also its durability and longevity. With so many options available, it’s essential to consider factors such as wood species, grain pattern, and finish. In this section, we’ll explore the different types of wood that are commonly used for staircase transformations and discuss their unique characteristics.
1. Oak
Oak is a popular choice for staircases due to its strength and durability. It is available in two main varieties: red oak and white oak. Red oak is known for its light reddish-brown color and distinctive grain pattern, while white oak has a slightly darker tone with a more subtle grain. Both varieties of oak are resistant to wear and tear, making them an excellent choice for high-traffic areas. Oak can also be stained in various shades to match your desired aesthetic.
2. Maple
Maple is another hardwood often used for staircases. It is known for its light, creamy color and smooth grain pattern. Maple is a dense and durable wood that can withstand heavy foot traffic. It has a consistent appearance and can be easily stained or painted to achieve the desired look. Maple staircases are popular in contemporary and modern designs.
3. Walnut
For those looking for a more luxurious and elegant staircase, walnut can be an excellent choice. Walnut is a dark hardwood with rich brown tones and a beautiful grain pattern. It is known for its strength and durability, making it ideal for long-lasting staircases. Walnut staircases add a touch of sophistication to any home and can be finished with a clear varnish to highlight the natural beauty of the wood.
4. Ash
Ash is a strong and resilient hardwood that is commonly used for staircase construction. It has a pale yellow to light brown color with a straight, pronounced grain. Ash staircases are durable and can withstand heavy use. They can be stained in various shades or finished with a clear coat to enhance the natural beauty of the wood.
5. Mahogany
Mahogany is a luxurious and richly colored hardwood that is often associated with high-end furniture and interiors. It has a deep reddish-brown color and a straight, fine grain. Mahogany staircases create a sense of elegance and warmth in any home. While mahogany is a more expensive option, it is highly durable and can last for generations with proper care.
6. Cherry
Cherry wood is known for its warm, reddish-brown color that deepens over time. It has a smooth, straight grain and a lustrous finish. Cherry staircases add a touch of natural beauty to any home and can be stained or left natural to develop a rich patina over time. Cherry wood is durable and can withstand daily wear and tear.
7. Hickory
Hickory is a strong and sturdy wood known for its unique grain pattern and variability in color. It ranges from creamy whites to medium browns with dark streaks. Hickory staircases offer a rustic and natural appeal, perfect for cabin-style or farmhouse interiors. It is highly durable and resistant to scratches and dents.
When selecting the right wood for your staircase transformation, consider the overall style of your home, the amount of foot traffic, and your personal preferences. Each type of wood has its own unique characteristics and can contribute to the overall aesthetic and durability of your staircase. Working with a professional staircase contractor can help you make an informed decision and ensure a successful transformation.
Step-by-Step Guide: Removing Carpet and Preparing the Steps
Removing carpet from your steps is a great way to update the look of your staircase while also improving its durability. Whether you’re planning to refinish the steps or install new treads, following a step-by-step guide will help you accomplish the task seamlessly.
Step 1: Gather the necessary tools
Before you start removing the carpet, gather all the tools you’ll need. This will ensure that you have everything on hand and won’t have to pause the process midway. Some essential tools include:
- Utility knife
- Pliers
- Crowbar
- Hammer
- Staple remover
- Safety goggles
- Dust mask
Step 2: Prepare the area
Prepare the area around the staircase by removing any furniture or obstacles that may hinder your progress. This will provide you with a clear working space and help prevent any accidents.
Step 3: Begin removing the carpet
Using a utility knife, cut along one edge of the carpet to create a straight line. Start pulling up the carpet from one corner using pliers. Gradually work your way across the step and remove the carpet completely. Repeat this process for each step.
Step 4: Remove any carpet padding
After removing the carpet, you may notice a layer of padding underneath. Use pliers or your hands to remove the padding from each step. Ensure that all remnants of the padding are completely removed.
Step 5: Deal with any remaining staples or nails
Inspect the steps for any staples or nails that may still be attached. Use a staple remover or pliers to carefully remove any remaining fasteners. This step is crucial to create a smooth surface for the next phase of the process.
Step 6: Clean the steps
Once all the carpet and padding are removed, thoroughly clean the steps. Sweep away any loose debris and vacuum the area to remove any remaining dust or dirt. This will ensure a clean surface for the upcoming steps.
Step 7: Assess the condition of the steps
Now that the steps are bare, take a moment to assess their condition. Look for any cracks, damage, or signs of wear and tear. Depending on the condition, you may need to repair or refinish the steps before continuing.
Step 8: Prepare the steps for the next phase
If you plan to refinish the steps, sand them down to remove any existing finish and create a smooth surface. Fill any cracks or holes with wood putty and allow it to dry completely. Sand the steps again to ensure an even finish.
Step 9: Install new treads (optional)
If you’re opting for new treads, measure each step accurately and cut the new treads to fit. Apply adhesive to the back of the treads and press them firmly onto the steps. Use clamps or weights to hold them in place until the adhesive dries.
Step 10: Finish the steps
Once the steps are ready, you can finish them according to your desired look. Apply stain or paint, following the manufacturer’s instructions. Allow sufficient drying time between coats and ensure proper ventilation in the area.
Step 11: Reattach any handrails
If you removed any handrails during the process, now is the time to reattach them. Ensure they are securely fastened and aligned properly with the newly updated steps.
Step 12: Clean up
Finally, clean up the work area by disposing of the old carpet, padding, and any other debris. Vacuum the steps once more to remove any dust or particles.
Summary
Removing carpet from your steps and preparing them for a new finish or installing new treads can enhance the aesthetic appeal of your staircase. By following this step-by-step guide, you can successfully remove the carpet, clean the steps, assess their condition, and prepare them for the next phase. Whether you choose to refinish the steps or install new treads, taking the time to properly prepare and execute the process will ensure a professional and long-lasting result.
Installing Wood Treads and Risers for a Stylish Staircase
When it comes to enhancing the aesthetics of your staircase, installing wood treads and risers can make a significant impact. Wood offers a timeless and elegant look that can elevate the overall design of your staircase. Whether you are remodeling an existing staircase or building a new one, this guide will walk you through the process of installing wood treads and risers for a stylish staircase.
1. Measure and Prepare
The first step in installing wood treads and risers is to measure your staircase accurately. Measure the width and depth of each step, as well as the height of each riser. This will ensure that you purchase the correct dimensions for your wood treads and risers.
Once you have your measurements, you can prepare the area by removing any existing carpet or flooring from the steps. Ensure that the surface is clean and free from any debris before proceeding.
2. Choose the Right Wood
Choosing the right type of wood is crucial for a stylish and durable staircase. Hardwood species such as oak, maple, or walnut are popular choices due to their strength and beauty. Consider the overall design of your home and select a wood species that complements your interior.
Additionally, decide on the finish you want for your wood treads and risers. You can choose to stain the wood to enhance its natural color or paint it to match your existing decor. Whatever finish you choose, make sure to apply a protective sealant to preserve the wood’s longevity.
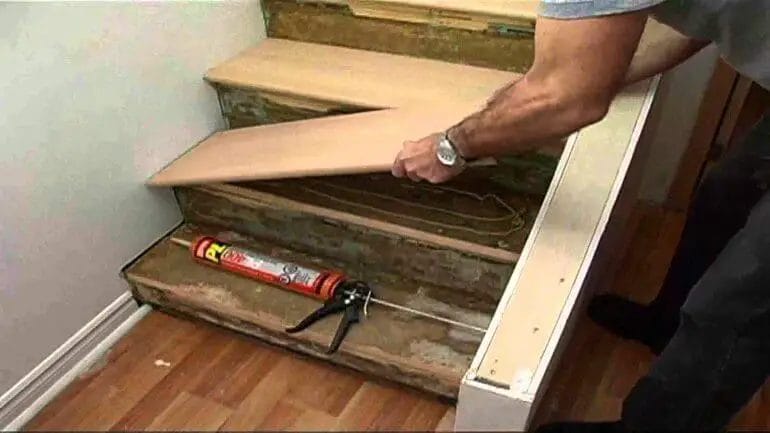
3. Cut and Install Treads
Using your measurements, cut the wood treads to the appropriate size. It’s important to cut them with precision to ensure a snug and secure fit on each step. You can use a circular saw or a miter saw to achieve clean and accurate cuts.
Apply a thin layer of construction adhesive to the surface of each step and carefully place the wood treads on top. Press down firmly to ensure proper adhesion. For added stability, you can also use finishing nails to secure the treads in place.
4. Install Risers
After installing the wood treads, it’s time to install the risers. Risers are the vertical boards that close off the back of each step and provide support. Measure and cut the risers to the appropriate size using your measurements.
Apply construction adhesive to the back of each riser and press it against the step’s vertical surface. Use a level to ensure that the risers are straight and plumb. You can also use finishing nails to secure the risers in place.
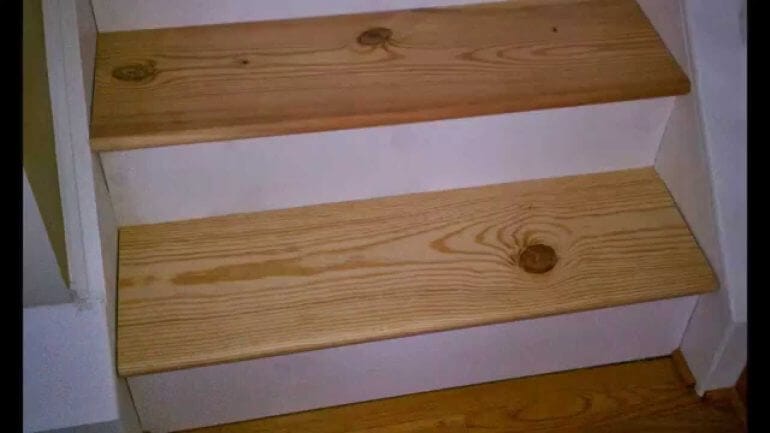
5. Finishing Touches
Once all the wood treads and risers are installed, it’s time to add the finishing touches to your stylish staircase. Fill any nail holes or gaps with wood putty and sand the surfaces to achieve a smooth finish.
If you have chosen to stain the wood, apply the stain evenly using a brush or cloth, following the manufacturer’s instructions. Allow the stain to dry completely before applying a protective sealant.
If you have decided to paint the wood, apply a primer first to ensure proper adhesion. Once the primer is dry, apply your chosen paint color in even coats, allowing each coat to dry before applying the next one.
Summary
Installing wood treads and risers can transform your staircase into a stylish focal point of your home. By measuring accurately, choosing the right wood, and following proper installation techniques, you can achieve a beautiful and durable staircase. Whether you prefer the natural beauty of stained wood or a painted finish to match your decor, wood treads and risers offer a timeless and elegant solution for a stylish staircase.
Finishing Touches: Staining and Sealing Your Wood Staircase
Now that you have successfully installed your wood staircase, it’s time to give it a finishing touch that will enhance its beauty and durability. Staining and sealing your wood staircase not only adds a touch of color but also protects the wood from damage and wear.
Choosing the Right Stain
Before you start staining your wood staircase, it is important to choose the right stain color that complements your overall interior design. There are a wide variety of stain colors available, ranging from light to dark shades. Take into consideration the color of your flooring and other elements in the space to ensure a cohesive look.
Preparing the Wood
Before applying the stain, it is crucial to properly prepare the wood surface. Start by sanding the entire staircase using a medium-grit sandpaper. This will help to smooth out any rough surfaces and remove any existing finishes or coatings. Once the sanding is complete, wipe down the staircase with a clean, damp cloth to remove any dust or debris.
Applying the Stain
When applying the stain, it is important to work in small sections to ensure an even application. Use a brush or a clean cloth to apply the stain, following the grain of the wood. Start from the top of the staircase and work your way down, carefully checking for any drips or excess stain along the way. Allow the stain to penetrate the wood for the recommended amount of time specified by the manufacturer.
Removing Excess Stain
After the recommended time has passed, use a clean cloth or sponge to gently remove any excess stain from the wood surface. Wipe in the direction of the grain to avoid streaks or uneven coloration. Take your time and ensure that all excess stain is removed before proceeding to the next step.
Sealing the Staircase
Once the stain has dried completely, it’s time to seal your wood staircase. The sealant not only protects the wood from spills, moisture, and scratches but also adds a beautiful sheen to the surface. There are two main types of sealants to choose from: polyurethane and varnish.
Polyurethane Sealant
Polyurethane sealant is a popular choice for sealing wood staircases due to its durability and resistance to wear and tear. It is available in both water-based and oil-based options. Apply the sealant using a brush or a foam applicator, following the manufacturer’s instructions. Allow each coat to dry completely before applying the next one. Depending on the desired level of protection, multiple coats may be necessary.
Varnish Sealant
Varnish sealant is another option for sealing your wood staircase. It provides a glossy finish and enhances the natural beauty of the wood. Apply the varnish using a brush or a clean cloth, following the manufacturer’s instructions. Allow each coat to dry completely before applying additional coats.
Maintaining Your Stained and Sealed Wood Staircase
Once your wood staircase is stained and sealed, it is important to maintain its beauty and longevity. Regularly clean the surface using a soft cloth or mop and a mild wood cleaner. Avoid using harsh chemicals or abrasive cleaners, as they can damage the stain and sealant. Additionally, consider using floor mats or rugs in high-traffic areas to protect the wood from scratches and wear.
In Summary
Staining and sealing your wood staircase is the final step in completing your staircase installation. Choose the right stain color, prepare the wood surface, apply the stain evenly, remove excess stain, and seal the staircase with the appropriate sealant. Regular maintenance will ensure that your wood staircase remains beautiful and protected for years to come.
FAQs
1. How can I change carpeted stairs to wood?
To change carpeted stairs to wood, you’ll need to remove the carpet and padding, check the condition of the existing stairs, secure any loose or squeaky steps, measure and cut the wood treads and risers, and install them using construction adhesive and screws. It’s important to follow proper safety measures and consider hiring a professional if you’re not experienced in carpentry.
2. What tools and materials do I need for this project?
You will need a few essential tools, including a pry bar, hammer, circular saw, tape measure, level, drill, and various woodwork tools for cutting and shaping the wood. Additionally, you’ll need the appropriate materials such as hardwood treads and risers, construction adhesive, screws, and finishing nails.
3. Can I install wood treads over existing carpeted stairs?
No, it’s not recommended to install wood treads directly over existing carpeted stairs. The carpet and padding should be completely removed to ensure a proper and secure installation. Installing wood treads over carpet can compromise the stability and safety of the stairs.
Conclusion
In conclusion, transforming carpeted stairs into elegant wood stairs is a great way to enhance the aesthetic appeal and add value to your home. By following the step-by-step process mentioned earlier, you can successfully make this conversion.
Replacing carpet with wood not only gives your stairs a more modern and timeless look but also provides durability and easy maintenance.
With a variety of wood species, finishes, and styles available, you can customize your stairs to match your personal taste and home decor.
Don’t hesitate to embark on this home improvement project to elevate the overall look and feel of your staircase.