If you’re passionate about woodworking and want to bring your creations to life, learning how to use wood carving tools is essential. Whether you’re a beginner or an experienced woodworker, having the right tools and techniques can make all the difference in transforming a simple piece of wood into a stunning work of art. In this guide, we’ll walk you through the basics of using wood carving tools, from choosing the right tools for the job to honing your carving skills. Let’s get started!
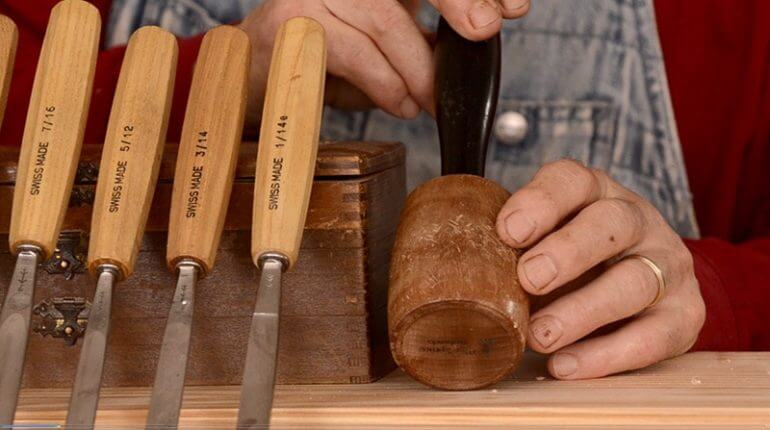
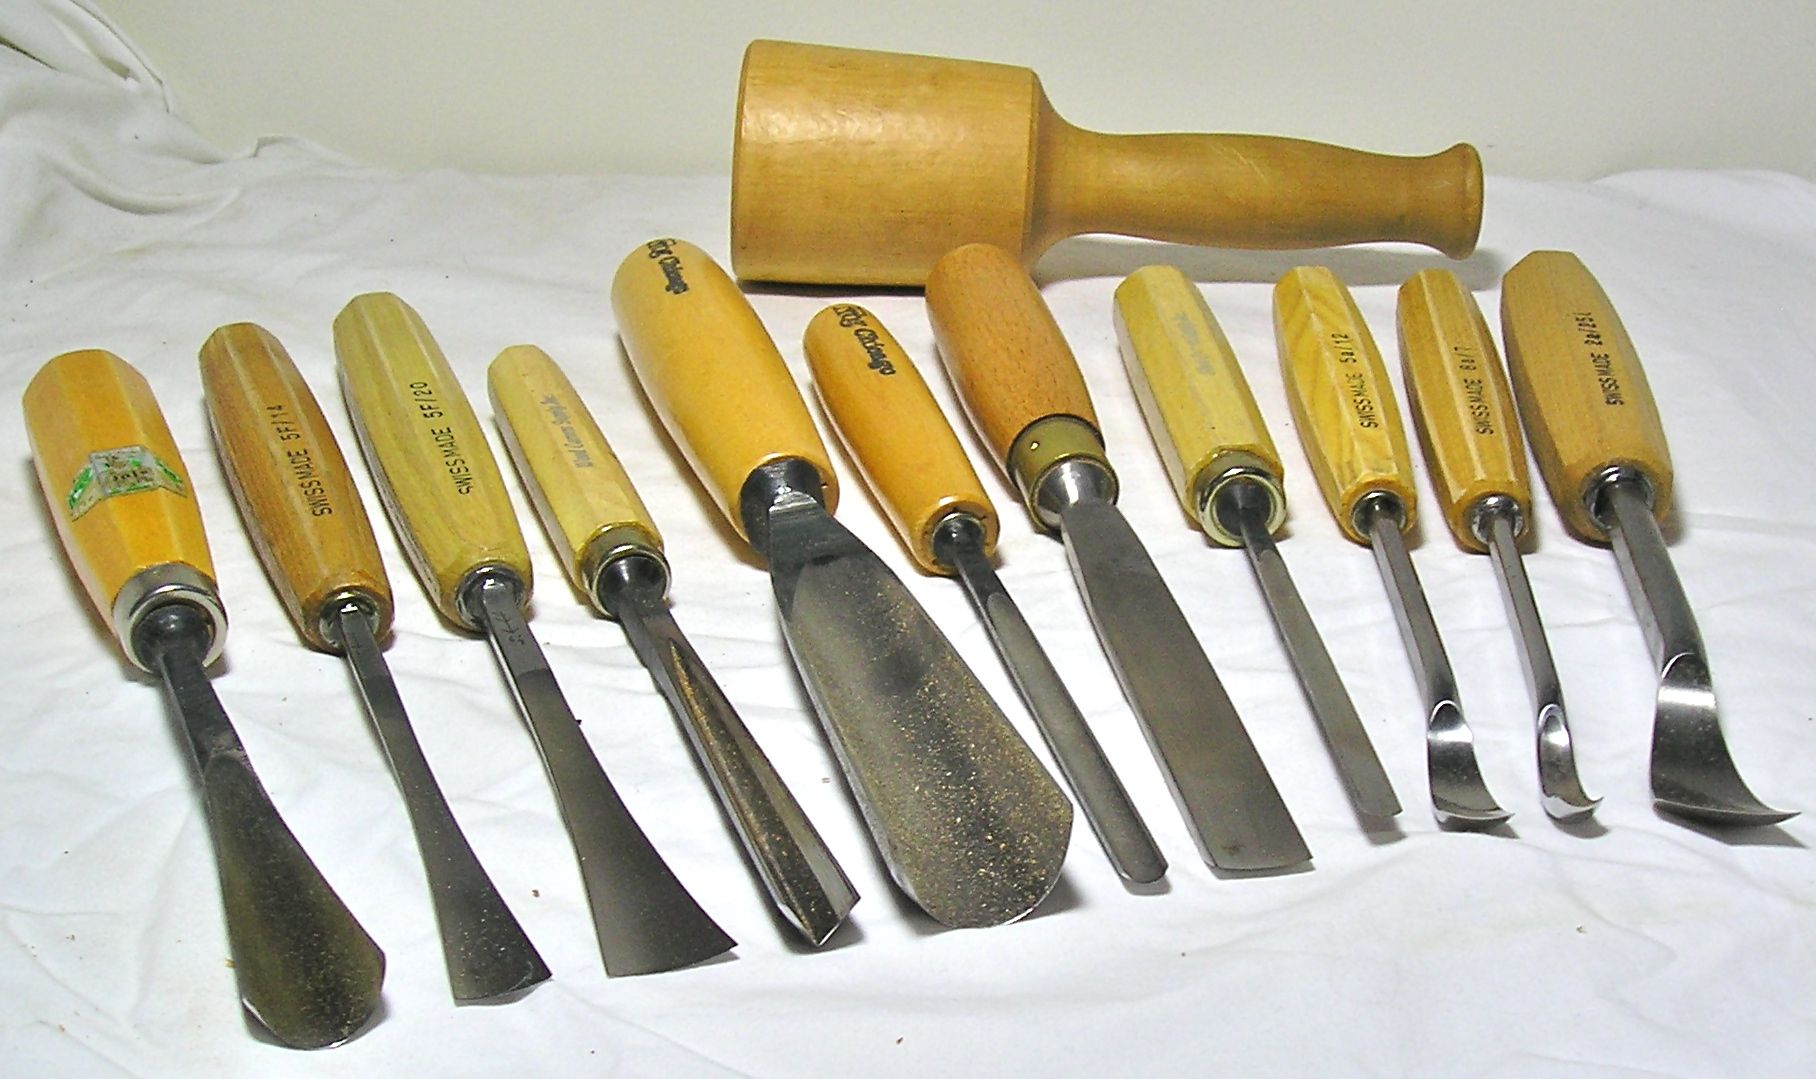
The first step in using wood carving tools is selecting the right ones for your project. There are a variety of carving tools available, including gouges, chisels, and knives, each designed for specific purposes. Consider the type of carving you’ll be doing, whether it’s intricate detail work or shaping larger forms, and choose your tools accordingly. It’s also important to invest in high-quality tools that are sharp, as they will make carving easier and more precise.

Once you have your tools, it’s time to familiarize yourself with their different parts and functions. Each carving tool has a handle, a shaft, and a cutting edge. Understanding how to hold the tool properly and how to position your hands and body will help you maintain control and avoid accidents. Practice different grips and angles to find what works best for you.
Before you start carving, it’s essential to prepare your wood. Choose a suitable piece of wood that is free from knots
Choosing the right wood for carving projects
When it comes to carving projects, selecting the right type of wood is crucial. The choice of wood can greatly impact the outcome of your carving, as different woods have distinct characteristics that can either enhance or hinder your carving abilities. In this section, we will explore the factors to consider when choosing the right wood for carving projects.
1. Hardness
The hardness of the wood is an important factor to consider in carving projects. Harder woods, such as oak or walnut, are more durable and can withstand intricate carving techniques. However, they can also be more challenging to work with, as they require more effort to carve and may dull your tools quicker. On the other hand, softer woods, like basswood or pine, are easier to carve, making them suitable for beginners or projects that require delicate details.
2. Grain Pattern
The grain pattern of the wood can significantly influence the overall appearance of your carving. Woods with distinctive grain patterns, such as mahogany or cherry, can add depth and character to your project. Consider the direction of the grain as well, as carving against the grain may result in splintering or chipping. It’s essential to choose a wood with a consistent grain pattern that complements the design you have in mind.
3. Density
The density of the wood affects the ease of carving and the level of detail you can achieve. Denser woods, like ebony or rosewood, are harder to carve but can hold intricate details exceptionally well. They are ideal for projects that require precision and fine detailing. Less dense woods, such as cedar or butternut, are easier to work with but may not hold fine details as effectively. Consider the level of detail you want to achieve in your project and choose a wood accordingly.
4. Availability
The availability of the wood is another factor to consider. Some wood species may be harder to find or may be more expensive, limiting your choices. It’s important to consider the accessibility and affordability of the wood you intend to use for your carving project. Local woodworking stores or online suppliers can provide a wide variety of wood options to choose from.
5. Stability
Stability is an important consideration, especially if your carving project will be exposed to different environmental conditions. Some woods, like cedar or teak, are known for their stability and resistance to warping or splitting. Others, like beech or maple, may be more prone to movement. Consider the intended use and location of your carving to ensure that the chosen wood will maintain its shape and structure over time.
6. Experimentation
Don’t be afraid to try new woods and experiment with different species for your carving projects. Each type of wood has its own unique qualities and characteristics, which can lead to exciting and unexpected results. By experimenting with different woods, you can broaden your skills and discover new possibilities in carving.
7. Safety Precautions
Lastly, it’s important to consider safety when choosing wood for carving. Some woods may release toxic fumes or cause allergic reactions when in contact with the skin. Always research the potential hazards associated with the wood you plan to use and take appropriate safety precautions, such as wearing protective gear and working in a well-ventilated area.
In summary, choosing the right wood for carving projects requires careful consideration of factors such as hardness, grain pattern, density, availability, stability, and safety. By understanding the characteristics of different woods and their suitability for your specific carving needs, you can ensure a successful and enjoyable carving experience.
Proper Safety Precautions When Using Wood Carving Tools
Wood carving is a popular and rewarding hobby, but it is important to prioritize safety when working with sharp tools. Whether you are a beginner or an experienced woodworker, following proper safety precautions is essential to prevent accidents and injury. In this section, we will discuss some key safety measures that should be taken when using wood carving tools.
1. Wear Appropriate Safety Gear
Before you begin carving, it is crucial to protect yourself by wearing the appropriate safety gear. This includes safety goggles or a face shield to protect your eyes from flying wood chips or debris. Additionally, wearing a dust mask will help prevent you from inhaling wood dust, which can be harmful to your respiratory system. It is also recommended to wear work gloves to protect your hands from accidental cuts.
2. Use Sharp Tools
Working with dull tools can be more dangerous as they are more likely to slip and cause accidents. Make sure your carving tools are sharp and well-maintained. Dull blades can also put more strain on your hands and increase the risk of injuries. Regularly inspect and sharpen your tools to ensure they are in good condition before each carving session.
3. Secure Your Workpiece
Before you start carving, securely fasten your workpiece to a stable surface or use a clamp to hold it in place. This will prevent the wood from moving while you are carving, reducing the risk of slips and accidental cuts. Avoid holding the wood with your hands as this can lead to injuries if the tool slips or goes off course.
4. Maintain a Clean and Organized Workspace
A cluttered workspace increases the risk of accidents. Keep your carving area clean and organized. Remove any unnecessary objects or tools from your workspace to avoid distractions and ensure proper handling of your carving tools. Make sure there is adequate lighting in your workspace to help you see clearly and minimize mistakes.
5. Practice Controlled and Proper Tool Techniques
When using wood carving tools, it is important to practice controlled and proper techniques. Always carve away from your body to prevent accidental slips that may result in self-inflicted injuries. Keep your fingers and other body parts clear of the tool’s path. Use the appropriate tool for the specific carving task you are performing. Avoid using excessive force or overextending your movements, as this can lead to accidents.
6. Take Breaks and Avoid Fatigue
Wood carving requires concentration and precision. It is important to take regular breaks to rest your hands and reduce the risk of fatigue. Fatigue can impair your judgment and increase the likelihood of accidents. Stretching exercises can help alleviate muscle tension and prevent strain injuries.
7. Learn from a Skilled Instructor
If you are new to wood carving, it is highly recommended to learn from a skilled instructor or join a carving class. They can guide you on proper tool handling techniques and teach you the best practices for safe carving. Learning from an experienced woodworker will help you avoid common mistakes and reduce the risk of accidents.
In summary, wood carving can be a fulfilling and enjoyable activity, but it is important to prioritize safety. By wearing appropriate safety gear, using sharp tools, securing your workpiece, maintaining a clean workspace, practicing proper techniques, taking breaks, and learning from skilled instructors, you can minimize the risk of accidents and injury while enjoying your wood carving journey.
Techniques and Tips for Getting Started with Wood Carving
If you have a passion for creating intricate designs and unique crafts, wood carving can be a fulfilling hobby to pursue. Whether you are a beginner or have some experience in woodworking, learning the right techniques and tips can help you get started on your wood carving journey. Here are some essential techniques and tips to help you get started with wood carving:
1. Choose the Right Wood:
One of the key considerations when starting wood carving is selecting the right type of wood for your project. Different types of wood have different characteristics and carving properties. Softwoods like pine are easier to carve and ideal for beginners, while hardwoods like oak and mahogany are more challenging but offer beautiful results. Research the characteristics of various woods and choose one that suits your skill level and project requirements.
2. Use the Right Tools:
Investing in high-quality carving tools is essential for achieving precise and intricate results. Start with a basic set of carving tools that includes a variety of gouges, chisels, and V-tools. Make sure your tools are sharp and properly maintained for optimal performance. As you gain experience, you can expand your collection and invest in more specialized carving tools.
3. Practice Proper Safety Measures:
Wood carving involves sharp tools and can be potentially hazardous if not practiced safely. Always wear safety goggles, gloves, and a dust mask to protect yourself from flying wood chips and dust. Secure your workpiece firmly to prevent it from moving unexpectedly, and carve away from your body to avoid accidents. Practice caution and take breaks when needed to avoid fatigue.
4. Start with Simple Projects:
When starting out, it’s best to begin with simple carving projects to develop your skills and gain confidence. Choose projects that have basic shapes and fewer intricate details. Gradually progress to more complex designs as you improve your carving techniques. Starting with small projects like spoons or figurines can be a great way to practice and refine your skills.
5. Learn Basic Carving Techniques:
Familiarize yourself with basic carving techniques that form the foundation of wood carving. Some common techniques include chip carving, relief carving, and carving in the round. Take the time to learn and practice these techniques to enhance your carving abilities and explore different styles of woodworking.
6. Utilize Reference Materials:
Using reference materials such as books, online tutorials, and carving patterns can be immensely helpful in learning new techniques and gaining inspiration. Study the work of experienced wood carvers and understand their techniques and approaches. By studying and practicing from reference materials, you can develop your own style and improve your wood carving skills.
7. Patience and Persistence:
Wood carving is a skill that takes time and practice to master. Be patient with yourself and give yourself room to make mistakes and learn from them. It’s normal for beginners to encounter challenges and setbacks, but with perseverance and persistence, you can overcome them and improve your abilities. Enjoy the process of learning and let each carving project be a learning experience.
8. Finish and Preserve Your Carvings:
Once you have completed a wood carving project, it’s important to finish and preserve it to protect the wood and enhance its appearance. Use appropriate finishes such as varnish, stain, or wax to seal and protect the wood. Follow the instructions provided by the manufacturer and take proper care of your finished carvings to ensure their longevity.
In summary, wood carving is a rewarding craft that requires practice, patience, and the right techniques. By choosing the right wood, using the right tools, practicing safety measures, starting with simple projects, learning basic techniques, utilizing reference materials, and cultivating patience and persistence, you can embark on a fulfilling wood carving journey and create beautiful works of art.
Maintenance and Care of Wood Carving Tools for Longevity
Wood carving is an art form that requires precision and skill. To achieve the best results, it is essential to properly maintain and care for your wood carving tools. By following a few simple practices, you can ensure the longevity of your tools and enjoy countless hours of carving.
Cleaning
After each carving session, it is important to clean your tools thoroughly. Remove any wood debris or residue from the blades using a brush or a soft cloth. Make sure to clean all the nooks and crannies of the tools. If there is any stubborn residue, you can use a mild soap and warm water solution to gently clean the blades. Be careful not to submerge the entire tool in water, as this can cause rusting.
Drying
After cleaning, it is crucial to ensure that your tools are completely dry before storing them. Wipe them down with a dry cloth to remove any remaining moisture. Leaving your tools wet can lead to rust formation, which can damage the blades and affect their performance. Additionally, moisture can cause wooden handles to swell or crack over time. To prevent this, place your tools in a well-ventilated area or use a fan to expedite the drying process.
Sharpening
Regular sharpening is essential to maintain the cutting efficiency of your wood carving tools. Dull blades not only make carving more difficult but can also cause accidents due to slipping. There are various sharpening methods available, including using a sharpening stone or a honing guide. Follow the manufacturer’s instructions or seek guidance from experienced woodcarvers to ensure you sharpen your tools correctly.
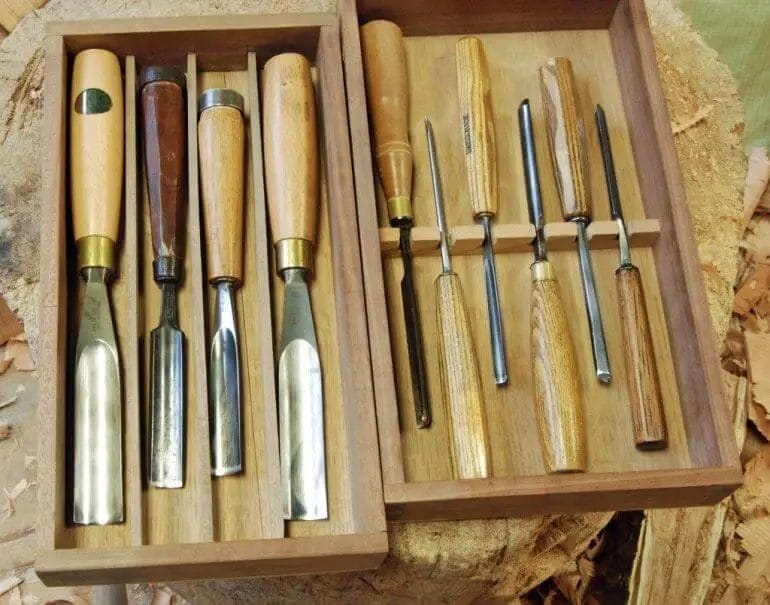
Storing
Proper storage is crucial to protect your wood carving tools from damage. After cleaning and drying, consider using a storage case or a tool roll to keep your tools organized and protected. Make sure your tools are securely stored to prevent them from rolling or knocking against each other, which can cause nicks or dull the edges. Keep your tools in a cool, dry place to minimize the risk of rust formation.
Preventive Measures
Preventive care can go a long way in preserving the longevity of your wood carving tools. Avoid exposing your tools to extreme temperatures or direct sunlight, as this can cause handles to warp and blades to lose their temper. When carving, try to use a cutting board or a soft surface to prevent unnecessary wear on your tools. It is also advisable to wear protective gloves to avoid injury and to keep the tools clean from oils and sweat.
Regular Inspections
Make it a habit to regularly inspect your wood carving tools for any signs of damage or wear. Check the blades for chips, cracks, or any deformities that can compromise their performance. Examine the handles for any looseness or signs of splitting. If you notice any issues, address them promptly to prevent further damage and ensure the safety of your carving projects.
In summary, proper maintenance and care of wood carving tools are essential for their longevity. By following a regular cleaning routine, drying your tools thoroughly, sharpening when necessary, storing them properly, taking preventive measures, and regularly inspecting for damage, you can ensure that your tools remain in optimal condition and continue to serve you well in your wood carving endeavors.
FAQs
1. How do I use wood carving tools?
When using wood carving tools, begin by selecting the appropriate tool for your desired cut. Hold the tool firmly but not too tightly, and let the tool’s sharp edge do the work. Start with light, controlled cuts and gradually increase pressure as needed. Always carve away from your body and follow proper safety precautions.
2. What are the essential wood carving tools for beginners?
For beginners, essential wood carving tools include a carving knife, a v-tool, a gouge, and a chisel. These tools provide a good foundation for basic wood carving techniques and can be used for various projects.
3. How do I maintain my wood carving tools?
To maintain wood carving tools, clean them after each use to remove any wood debris. Keep them dry and store them in a clean, dry place. Regularly sharpen the blades using a sharpening stone or honing guide to ensure optimal performance. Proper maintenance will prolong the lifespan of your tools.
Conclusion
In conclusion, learning how to use wood carving tools can open up a world of creativity and craftsmanship. By mastering the techniques and understanding the different types of carving tools, you can bring your artistic vision to life and create beautiful intricate designs on wood. Whether you are a beginner or an experienced woodworker, practicing with these tools will help you develop precision and control over your carvings. Remember to always prioritize safety when working with sharp tools and to start with simple projects before taking on more complex designs. So, grab your carving tools and let your imagination carve out stunning pieces of art!