Looking for a way to hide those unsightly screws in your wooden projects? We’ve got you covered!
Covering screws in wood not only enhances the aesthetics but also provides a polished and professional finish.

Whether you’re tackling a woodworking project or simply want to improve the appearance of existing furniture, there are several methods to conceal screws effectively.
From using wood plugs and screw hole fillers to utilizing countersink screws and decorative caps, we’ll guide you through the step-by-step process of hiding screws in wood effortlessly.
Discover the techniques that will take your woodworking game to the next level and achieve a flawless, seamless look for your projects.
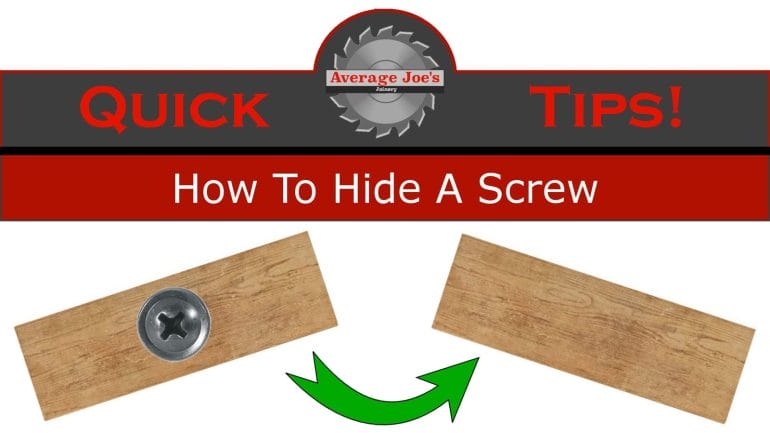
Hiding Screws in Wood: Pro Tips and Tricks
When it comes to woodworking projects, one common challenge is how to hide screws in wood. While screws are necessary for joining pieces together securely, they can detract from the overall aesthetic of the finished project. Luckily, there are several pro tips and tricks you can use to conceal screws and achieve a seamless look. In this section, we will explore some of the best methods for hiding screws in wood.
1. Countersinking
Countersinking is a technique that involves creating a recessed hole for the screw head to sit flush with the surface of the wood. This method is particularly effective when working with softer woods. To countersink screws, follow these steps:
- Mark the screw hole on the wood.
- Drill a pilot hole slightly smaller than the diameter of the screw.
- Use a larger drill bit or a countersink bit to create a wider hole at the top of the pilot hole.
- Insert the screw into the countersunk hole and tighten.
By countersinking the screws, you can easily cover them with wood filler or a wooden plug, creating a smooth and invisible finish.
2. Using Wood Plugs
Wood plugs are another excellent option for hiding screws. These small wooden pieces can be inserted into a pre-drilled hole to cover the screw head completely. Here’s how to use wood plugs:
- Drill a pilot hole for the screw.
- Apply wood glue to the sides of a wood plug.
- Insert the plug into the hole, aligning the grain direction with the surrounding wood.
- Allow the glue to dry, then sand the plug flush with the surface of the wood.
- Stain or finish the wood to match the rest of the piece.
Wood plugs not only hide the screws but also add a decorative touch to your project, enhancing its overall appearance.
3. Using Pocket Holes
Pocket hole joinery is a popular technique in woodworking that allows you to hide screws on the underside or back of a project. This method involves drilling angled holes and using special screws with a self-drilling tip. Here’s how to use pocket holes:
- Mark the location of the pocket holes on the wood.
- Use a pocket hole jig to create the angled holes.
- Insert the screws into the holes and tighten.
With pocket hole joinery, the screws are concealed inside the wood, ensuring a clean and professional-looking finish.
4. Utilizing Dowels
Dowels are cylindrical wooden rods that can be used to hide screws and provide additional reinforcement. Here’s how to use dowels:
- Drill pilot holes for the screws.
- Apply wood glue to the sides of a dowel.
- Insert the dowel into the hole, aligning it with the grain direction.
- Trim any excess dowel using a saw or flush-cut trimmer.
- Sand the dowel flush with the surface of the wood.
- Finish the wood to complete the project.
By using dowels, you can not only hide the screws but also add strength and stability to your woodwork.
5. Using Decorative Fasteners
If you want to go beyond simply hiding screws and create a unique and decorative element, consider using decorative fasteners. These specialty screws or bolts feature decorative heads that can add a touch of style to your project. Whether you opt for ornate brass screws or hammered iron bolts, decorative fasteners can elevate the look of your woodworking piece while still providing secure joinery.
In summary, hiding screws in wood is a skill that every woodworker should master. By employing techniques like countersinking, using wood plugs, utilizing pocket holes, using dowels, or opting for decorative fasteners, you can achieve a clean and seamless finish for your woodworking projects. Experiment with different methods to find the one that works best for your specific project and desired aesthetic.

DIY Solutions to Hide Unsightly Screws in Wood
When it comes to woodworking, screws are a necessary evil. While they serve the purpose of joining pieces of wood together, they can also detract from the overall aesthetic of a project. Unsightly screw heads can stand out and ruin the appearance of an otherwise beautiful piece. Fortunately, there are several DIY solutions you can try to hide those pesky screws and maintain the clean and polished look of your woodwork.
1. Wood Filler
One of the easiest and most common methods to hide screws in wood is by using wood filler. Wood filler is a putty-like substance that can be applied to the screw holes to create a smooth and seamless surface. To use wood filler, follow these steps:
- Start by selecting a wood filler that matches the color of your wood.
- Using a putty knife, press the wood filler into the screw holes, making sure to completely fill them.
- Smooth out the surface of the wood filler using the putty knife, removing any excess.
- Allow the wood filler to dry according to the manufacturer’s instructions.
- Once dry, sand the area to ensure a flush finish with the surrounding wood.
2. Wooden Plugs
Another effective method to conceal screw heads is by using wooden plugs. Wooden plugs are small pieces of wood that can be inserted into the screw holes, creating a seamless appearance. Here’s how to use wooden plugs:
- Drill a hole slightly larger than the diameter of the wooden plug into the surface of the wood where the screw is located.
- Apply wood glue to the sides of the wooden plug.
- Insert the plug into the hole and tap it in gently using a hammer.
- Allow the glue to dry completely.
- Trim any excess wood from the plug using a chisel or a flush-cut saw.
- Sand the area to achieve a smooth and seamless finish.
3. Countersinking & Wood Plug
If you want to hide the screw heads completely, you can use a combination of countersinking and wooden plugs. This method involves creating a larger hole for the screw and then covering it with a wooden plug. Here’s how to do it:
- Drill a countersink hole into the wood to accommodate the screw head.
- Drive the screw into the countersink hole, making sure it sits flush with the surface of the wood.
- Apply wood glue to the sides of a wooden plug.
- Insert the plug into the larger hole, covering the screw head.
- Tap the plug gently to ensure it is seated firmly in place.
- Allow the glue to dry, then trim and sand the plug for a seamless finish.
By using these DIY solutions, you can easily hide unsightly screws in wood and achieve a professional and polished look in your woodworking projects. Whether you opt for wood filler, wooden plugs, or a combination of both, the end result will be a seamless finish that enhances the overall appearance of your work.
Camouflaging Screws in Wood: Expert Guide
When it comes to woodworking projects, hiding screws can be a challenging task. Exposed screws can detract from the overall aesthetics of the piece and ruin its visual appeal. Thankfully, there are several expert techniques you can use to seamlessly camouflage screws in wood, allowing your craftsmanship to shine through without any distracting hardware. In this section, we will explore different methods to achieve a professional and seamless finish.
1. Countersinking
Countersinking is a commonly used technique to hide screws in wood. By creating a recessed hole for the screw head, you can then cover it up with wood filler or a wooden plug, ensuring a smooth and flush surface. Here’s a step-by-step guide:
- Choose the appropriate drill bit size for the screw head.
- Mark the location where you want to insert the screw.
- Drill a hole slightly larger than the screw head on the surface of the wood.
- Use a larger drill bit to create a countersink hole, ensuring the screw head will sit below the surface.
- Insert the screw into the countersink hole, leaving it slightly raised.
- Fill the hole with wood filler or insert a wooden plug, matching the wood grain for a seamless appearance.
- Sand the area until it is smooth and flush with the surrounding wood.
2. Pilot Holes and Wood Plugs
Another effective method to hide screws is by using pilot holes and wood plugs. This technique is commonly used in furniture making and cabinetry. Follow these steps to achieve a professional finish:
- Determine the screw size and choose an appropriate drill bit for the pilot hole.
- Mark the location for the screw and drill a pilot hole into the wood.
- Apply wood glue to a wooden plug and insert it into the pilot hole.
- Allow the glue to dry and then trim the excess plug material using a chisel or flush-cut saw.
- Sand the area to ensure a smooth surface, blending the plug seamlessly with the surrounding wood.
3. Pocket-Hole Joinery
Pocket-hole joinery is a technique that allows you to hide screws on the underside or hidden parts of a woodworking project. It involves drilling an angled hole into one piece of wood and joining it to another using a screw. Here’s how to use pocket-hole joinery:
- Set up a pocket-hole jig to the appropriate angle and screw size.
- Position the jig on the wood, ensuring it is secure.
- Drill a pocket hole using the jig.
- Apply glue on the joint surface and secure the pieces together using a screw.
- Ensure that the screw head is fully recessed into the pocket hole.
- Sand the area to achieve a seamless finish.
In summary, camouflaging screws in wood is essential to achieve a professional and visually appealing finish in woodworking projects. By utilizing techniques such as countersinking, pilot holes with wood plugs, and pocket-hole joinery, you can effectively hide screws and maintain the integrity of your craftsmanship. Experiment with these methods and choose the one that best suits your project’s requirements. With practice, you’ll be able to seamlessly conceal screws and showcase the beauty of your woodworking skills.
5. Invisible Screw Covers: Enhancing Woodwork Aesthetics
Invisible screw covers are a revolutionary solution in the world of woodwork aesthetics. These small, discreet covers are designed to conceal the heads of screws, creating a seamless finish that enhances the overall look of wooden surfaces. Whether you are working on furniture, cabinets, or any other woodworking project, invisible screw covers can take your craftsmanship to the next level.
Woodworking is a meticulous craft that demands attention to detail. Each joint, each piece of wood, and each screw plays a vital role in the final outcome. Traditional methods of concealing screws, such as wood putty or decorative caps, have limitations. Wood putty can crack or shrink over time, compromising the overall appearance. Decorative caps, on the other hand, can detract from the natural beauty of the wood, interrupting the flow of the design.
This is where invisible screw covers shine. These covers are typically made from high-quality materials like brass or stainless steel, ensuring durability and longevity. They are available in various finishes, allowing you to match them seamlessly with different wood types and stain colors.
How Do Invisible Screw Covers Work?
Invisible screw covers are ingeniously designed to create a flush surface over the screw heads. They consist of two main components: the base and the cover. The base is installed into the wood surface, while the cover fits snugly over the base.
The installation process is straightforward and can be done with minimal effort. Firstly, a hole is pre-drilled into the wood, ensuring it matches the diameter of the screw cover base. Then, the base is inserted into the hole using a screwdriver or a specialized installation tool. Finally, the cover is snapped onto the base, concealing the screw head completely.
Once installed, invisible screw covers provide a clean, seamless finish that elevates the aesthetics of any woodworking project. The covers are specifically designed to be flush with the surface, ensuring there are no protrusions or unevenness. This attention to detail creates a visually pleasing result that showcases the craftsmanship and enhances the overall appeal of the woodwork.
The Benefits of Invisible Screw Covers
Using invisible screw covers offers several advantages for woodwork aesthetics:
- Enhanced Visual Appeal: Invisible screw covers create a flawless and uninterrupted surface, making the woodwork look polished and professional.
- Long-lasting Solution: Unlike wood putty or decorative caps, invisible screw covers are highly durable and resistant to wear and tear. They can withstand the test of time, maintaining their appearance for years to come.
- Easy Installation: The installation process is quick and simple, requiring basic tools and minimal effort. Even DIY enthusiasts can achieve professional-looking results.
- Wide Range of Options: Invisible screw covers come in various sizes, finishes, and materials, allowing you to choose the perfect option for your specific woodworking project.
- Versatility: Whether you are working on interior furniture, outdoor structures, or any wooden surface, invisible screw covers can be used to enhance the aesthetics across different applications.
With invisible screw covers, you can elevate the quality of your woodworking projects and showcase your attention to detail. These small, yet significant, accessories provide a finishing touch that sets your work apart. Say goodbye to unsightly screw heads and embrace the seamless beauty of invisible screw covers for a truly remarkable woodwork aesthetic.
FAQs
1. How can I cover screws in wood?
To cover screws in wood, you can use several methods. One option is to use wood filler or putty to fill the screw holes, then sand and paint over them. Another option is to use wooden plugs or buttons that match the wood grain and glue them over the screws. Alternatively, you can use decorative screw covers or caps specifically designed for this purpose.
2. What is the best way to hide screws in wood?
The best way to hide screws in wood is to use a combination of wood filler and sanding. Apply wood filler into the screw holes using a putty knife, then allow it to dry. Once dry, sand the filled areas smooth, blending them with the surrounding wood. Afterward, finish the wood surface with paint, stain, or clear finish for a seamless look.
3. Are there any alternative methods to cover screws in wood?
Yes, besides using wood filler or plugs, you can also use other techniques to conceal screws. One option is to countersink the screws below the wood surface and cover them with wooden dowels or decorative trim pieces. Another approach is to use a router or chisel to create recessed areas where the screws can be placed, then cover them with wood veneer or inlay patterns.
Conclusion
In conclusion, finding an effective way to cover screws in wood can greatly enhance the overall appearance of your project or furniture. Whether you want a seamless and clean finish or simply want to hide unsightly screws, there are various options available. Using wood plugs or dowels can provide a natural and inconspicuous solution, while using wood filler or putty can help camouflage the screws. Additionally, you can explore decorative options such as using screw caps or covers that match the wood’s finish. Remember to carefully consider the aesthetic requirements and durability when choosing the method to cover screws in wood.