Learning how to cut notches in wood is a valuable skill for any woodworking enthusiast. Notches serve various purposes, like joining pieces together or creating a decorative effect. By using the right tools and techniques, you can easily create clean and precise notches in wood. Whether you’re a beginner or an experienced woodworker, this guide will provide you with step-by-step instructions to help you master the art of cutting notches in wood.
Firstly, it’s important to select the appropriate tool for cutting the notches. A table saw, chisel, or jigsaw are commonly used tools for this task. Once you have the right tool, mark the location and size of the notch on the wood using a straightedge and pencil. Take your time to ensure accurate measurements and markings.

Next, if you’re using a table saw, adjust the blade height to match the depth of the notch you want to cut. Ensure that the blade is securely locked in place before proceeding. For hand tools like chisels or jigsaws, choose the appropriate blade or chisel size that matches the width of the notch.
Before making the cut, it’s a good idea to practice on a scrap piece of wood to familiarize yourself with the tool and its cutting action. This will help you gain confidence and ensure smoother cuts on the actual project piece.
When you’re ready to cut the notch, position the wood securely

Essential Tools for Cutting Notches in Wood
When it comes to woodworking, cutting notches in wood is a common task that often requires precision and the right tools. Notches are typically used to create joints, hooks, or decorative features in various woodworking projects. Whether you are a professional woodworker or a DIY enthusiast, having the essential tools for cutting notches in wood is essential to achieve accurate and clean results. In this section, we will discuss the must-have tools that will make your notching tasks easier and more efficient.
1. Chisels
Chisels are versatile tools that are indispensable for cutting notches in wood. They come in various sizes and shapes, allowing you to choose the appropriate one for the specific notch you need to create. Beveled edge chisels are commonly used for making clean, precise cuts. They can be used to remove wood in a controlled manner, creating notches of different depths and widths. Make sure to keep your chisels sharp for optimal performance.
2. Saw
A saw is another essential tool for cutting notches in wood. There are different types of saws you can use depending on the size and type of notch you need to make. A coping saw or a dovetail saw is ideal for making intricate and precise cuts. For larger notches, a handheld circular saw or a jigsaw can be used. Remember to choose a saw with the appropriate blade for cutting wood to ensure clean and accurate results.
3. Router
A router is a versatile power tool that can be used for a wide range of woodworking tasks, including cutting notches. It allows you to create precise and consistent notches by removing wood with a spinning bit. Routers come with different types of bits, such as straight, spiral, and dovetail, which can be used to achieve various notch designs. When using a router, make sure to secure your workpiece properly and follow safety guidelines.
4. Mallet or Hammer
A mallet or hammer is an essential tool for driving chisels and other cutting tools when creating notches in wood. It provides the necessary force to make clean and accurate cuts. A wooden or rubber mallet is preferred over a metal hammer, as it reduces the risk of damaging the cutting edge or leaving marks on the wood. Choose a mallet or hammer that is comfortable to hold and has a suitable weight for your needs.
5. Marking Tools
Marking tools are crucial for accurately laying out the dimensions and positions of notches on your woodwork. A combination square, a marking gauge, and a pencil or marking knife are commonly used marking tools. They help ensure that your notches are positioned correctly and have the desired dimensions. Take your time to accurately mark the notch before cutting to avoid any mistakes or inaccuracies.
6. Safety Gear
Lastly, do not forget to prioritize your safety when working with tools for cutting notches in wood. Wear safety goggles to protect your eyes from flying debris, especially when using power tools. Consider using ear protection if you are working with loud tools for an extended period. Additionally, have a dust mask or respirator on hand to protect yourself from any airborne particles that may be generated during the cutting process.
By having these essential tools in your woodworking arsenal, you will be well-equipped to cut notches in wood with precision and ease. Remember to prioritize safety and take your time to ensure accurate measurements and clean cuts. With the right tools and techniques, you can create beautifully crafted notches that enhance the overall quality and aesthetic of your woodworking projects.
Step-by-Step Guide: Hand Saw Method for Cutting Notches in Wood
When working with wood, there are often times when you need to create notches for various purposes such as joining pieces together or accommodating other structures. While there are different tools and methods available for cutting notches, using a hand saw is a simple and effective approach. In this section, we will provide a step-by-step guide on how to use a hand saw to cut notches in wood.
Materials and Tools Needed:
- Wood – the piece you want to cut notches into
- Hand saw – choose a saw that is appropriate for the thickness of the wood
- Measuring tape or ruler – for accurate measurements
- Pencil or marking tool – to mark the cutting lines
- Square or angle guide – for ensuring straight and precise cuts
- Chisel – for removing material within the notch (optional)
- Safety goggles and gloves – to protect yourself
Step 1: Measure and Mark the Notch
Start by measuring and marking the location and dimensions of the notch on the wood. Use a measuring tape or ruler to determine the length, width, and depth of the notch. Once you have the measurements, mark the lines on the wood using a pencil or marking tool. Make sure to double-check the measurements before moving on to the next step.
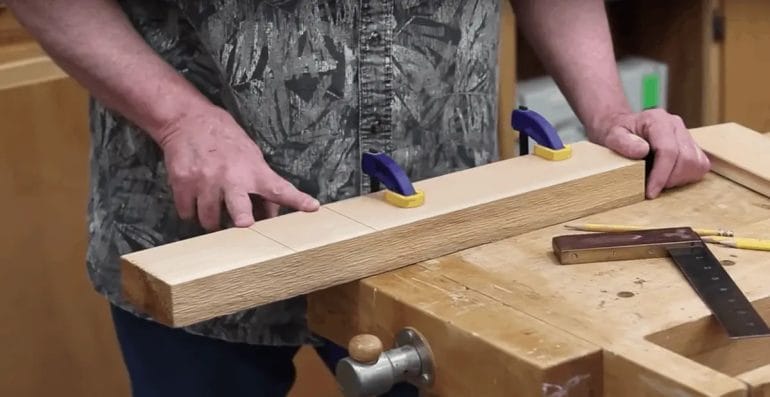
Step 2: Prepare the Wood
Before cutting the notch, it’s essential to secure the wood piece that you will be working on. Place it on a stable surface or use clamps to hold it in place. This will prevent the wood from moving or slipping during the cutting process, ensuring more accurate results.
Step 3: Start Cutting
Position the hand saw on one of the marked cutting lines, aligning it with the edge of the wood. Hold the saw firmly with one hand on the handle and the other hand on the top of the saw blade. Apply gentle pressure and start cutting along the line using long and smooth strokes. Remember to maintain a steady pace and let the saw do the work. Avoid forcing the saw, as it can result in inaccurate cuts or damage the wood.
Step 4: Repeat the Cutting Process
Continue cutting along the marked lines until you reach the desired depth of the notch. Take your time and be patient, especially if the wood is thick or if you need to make intricate cuts. If you are cutting a wide notch, consider using a chisel to remove the excess material within the notch. This can help achieve a cleaner and more precise result.
Step 5: Test the Fit
Once you have completed the cutting process, test the fit of the notched wood piece with the other components or structures it needs to join or accommodate. Make any necessary adjustments by refining the notch with the saw or chisel until you achieve a snug and secure fit.
Step 6: Sand and Finish
After the notch fits correctly, you can sand the edges and the surface of the wood to smoothen any roughness and remove any splinters. This will not only improve the aesthetics but also ensure a safer handling of the wood. Additionally, you can apply a suitable finish or treatment to protect the wood and enhance its appearance.
In summary, cutting notches in wood using a hand saw is a straightforward process that can be accomplished with the right tools and techniques. By following this step-by-step guide, you can create precise and clean notches for a variety of woodworking projects.

Efficient and Precise: Using a Router to Cut Notches in Wood
When it comes to woodworking, creating precise and clean notches in wood is essential for a variety of projects. Whether you’re building furniture, constructing cabinets, or working on a DIY project, using a router can help you achieve accurate results with ease. In this section, we will explore the process of using a router to cut notches in wood and discuss the benefits of this technique.
1. Choosing the Right Router Bit
Before you begin cutting notches, it’s important to select the right router bit for the job. There are different types of router bits available, each designed for specific cuts and purposes. For cutting notches, a straight bit or a spiral bit can be used.
A straight bit is a versatile option that can create clean and accurate notches. It’s ideal for cutting shallow notches or trimming the edges of the wood. On the other hand, a spiral bit is designed for more intricate cuts and can create deep and precise notches. Consider the depth and width of the notch you need to cut to choose the appropriate router bit.
2. Marking and Measuring
Precision is key when cutting notches, so before you start using the router, mark the location and dimensions of the notch on the wood. Use a measuring tape and a pencil to ensure accurate measurements. The markings will serve as a guide for cutting the notch and help you maintain consistency throughout the process.
3. Setting Up the Router
Now that you have the right router bit and have marked the wood, it’s time to set up your router. Start by securing the wood firmly in place using clamps or a vice. This will prevent any movement or slippage while you work.
Next, adjust the depth of the router bit. The depth should match the desired depth of the notch. Use the router’s depth adjustment system to set the appropriate depth. It’s recommended to start with a shallower depth and make multiple passes to achieve the desired notch depth. This approach allows for greater control and precision.
4. Cutting the Notch
Once the router is set up, you’re ready to cut the notch. Hold the router firmly with both hands and position it at the starting point of the marked notch. Turn on the router and slowly plunge it into the wood. Move the router along the marked lines, following the desired shape of the notch.
It’s important to maintain a steady and consistent pace while cutting the notch. Avoid rushing or applying too much pressure, as this can lead to uneven cuts or splintering. Take your time, let the router do the work, and guide it smoothly along the marked lines.
If you’re cutting a deep notch, it’s advisable to make multiple passes, gradually increasing the depth with each pass. This technique ensures cleaner and more precise results. Remember to turn off the router only after it is clear of the wood to avoid any accidental damage or injuries.
5. Finishing Touches
After cutting the notch, you may need to do some finishing touches to ensure a smooth and professional-looking result. Use sandpaper or a chisel to remove any rough edges or imperfections. Take your time to refine the notch until it meets your desired level of perfection.
Summary
Using a router to cut notches in wood offers efficiency and precision in woodworking projects. By choosing the right router bit, marking and measuring accurately, setting up the router properly, and following a steady cutting technique, you can achieve clean and precise notches in wood. Remember to take your time and make multiple passes for deep notches, and don’t forget the finishing touches for a polished end result. Happy woodworking!
Perfect Fit: Using a Chisel to Cut Notches in Wood
When it comes to woodworking, achieving a perfect fit is essential for creating strong and visually appealing structures. One technique that can help you achieve this level of precision is using a chisel to cut notches in wood. In this section, we will discuss the process of cutting notches with a chisel and how it can enhance your woodworking projects.
1. Selecting the Right Chisel
Before you can start cutting notches in wood, it is important to choose the right chisel for the job. Chisels come in various shapes and sizes, and selecting the appropriate one will depend on the size and depth of the notches you intend to create. A bench chisel or a mortise chisel are common choices for cutting notches, as they offer the necessary strength and control.
2. Marking the Notch
Once you have the correct chisel, the next step is to mark the area where you want to cut the notch. Use a pencil or a marking knife to make precise marks on the wood, indicating the length and position of the notch. Taking the time to accurately mark the notch will help ensure that you make clean, accurate cuts.
3. Preparing the Wood
Before you start cutting, it is important to prepare the wood by creating relief cuts. These cuts will help prevent any potential splitting when you start chiseling. Use a saw to make several parallel cuts within the marked area. These cuts should be slightly wider than the final width of the notch.
4. Cutting the Notch
With the wood prepared, it’s time to start cutting the notch. Hold the chisel firmly in your dominant hand and position it at the edge of the relief cut closest to the waste (the portion of wood that will be removed). Use a mallet or a hammer to tap the chisel gently, gradually working your way along the marked area.
Apply controlled force with each tap to remove small amounts of wood at a time. Be patient and avoid rushing the process, as this can lead to mistakes or uneven cuts. Take breaks to check your progress and ensure that the notch is being cut to the desired depth and shape.
5. Cleaning and Finishing
Once the bulk of the wood has been removed, use the chisel to clean up the notch and refine its shape. Take care to remove any rough edges or uneven surfaces, aiming for a clean and precise finish. You can also use sandpaper or a file to further smooth and refine the notch.
After the notch has been cut and cleaned, it is important to check its fit. Test the notch by placing the corresponding piece of wood into the notch and checking for a snug fit. Make any necessary adjustments by further refining the notch until the pieces fit together perfectly.
6. Safety Precautions
When using a chisel to cut notches in wood, it is important to prioritize safety. Always wear appropriate safety gear, including goggles to protect your eyes from flying debris and gloves to protect your hands. Take care to use the chisel correctly and avoid applying excessive force, as this can lead to accidents or injury.
In summary, using a chisel to cut notches in wood is a valuable technique for achieving precise and strong joinery in woodworking projects. By selecting the right chisel, marking the notch accurately, and using controlled and patient cuts, you can create notches that fit perfectly and enhance the overall quality of your work.
Simplified Approach: Using a Table Saw to Cut Notches in Wood
When working on woodworking projects, it is often necessary to cut notches in wood to accommodate joints or other design elements. While there are various methods to achieve this, using a table saw can provide a simplified approach that ensures accuracy and efficiency. In this section, we will explore the step-by-step process of using a table saw to cut notches in wood.
Materials and Tools Needed
Before you begin, gather the following materials and tools:
- Wood sheets or boards
- Table saw with a sharp blade
- Ruler or measuring tape
- Pencil or marking tool
- Clamps
- Safety goggles
Step 1: Measure and Mark
The first step is to measure and mark the location and dimensions of the notches on your wood pieces. Use a ruler or measuring tape to accurately determine the length, width, and depth of the notches. Mark these measurements on the wood using a pencil or marking tool.
Step 2: Set Up the Table Saw
Next, set up your table saw for the desired cut. Adjust the height of the blade to match the depth of the notch. Make sure the blade is securely attached and properly aligned. Additionally, ensure that the fence is set at the correct distance from the blade to achieve the desired width of the notch.
Step 3: Secure the Wood
It is important to securely hold the wood in place during the cutting process to prevent any accidents. Use clamps to secure the wood piece firmly against the fence and on the table saw’s surface. This will ensure stability and accuracy during the cutting process.
Step 4: Make the Cuts
With the wood properly secured, it’s time to make the cuts. Slowly and steadily push the wood through the blade, following the marked lines for the notch. Maintain a firm grip on the wood and use a push stick or push block to keep your hands safely away from the blade. Take your time and let the saw do the work.
Step 5: Test and Refine
After making the initial cut, carefully remove the wood from the table saw and test the fit of the notch. If needed, make any necessary adjustments by refining the dimensions of the notch with additional cuts. It is always better to err on the side of caution and cut slightly smaller notches, as it is easier to remove more material if needed.
Step 6: Safety First
Throughout the entire process, it is important to prioritize safety. Always wear safety goggles to protect your eyes from any flying wood chips or debris. Keep your hands away from the blade and use push sticks or blocks to maintain a safe distance. If you are new to using a table saw, consider seeking guidance from a more experienced woodworker.
In summary, using a table saw to cut notches in wood offers a simplified approach that can save time and ensure precise results. By following the step-by-step process outlined above and prioritizing safety, you can confidently incorporate notches into your woodworking projects.
FAQs
1. How do I cut notches in wood?
To cut notches in wood, you can use a saw, chisel, or a router with a straight bit. Measure and mark the notch location, then make multiple cuts along the marked lines. Use a chisel or router to remove the excess wood between the cuts and create the desired notch shape.
2. What tools do I need to cut notches in wood?
To cut notches in wood, you will need tools such as a measuring tape, pencil, saw (such as a handsaw or jigsaw), chisel, and a hammer. Optionally, you can also use a router with a straight bit for more precise and efficient notching.
3. Are there any safety precautions to consider when cutting notches in wood?
When cutting notches in wood, always wear safety goggles to protect your eyes from flying wood particles. Additionally, make sure to secure the wood firmly in place before making any cuts, and keep your hands clear of the cutting area to avoid accidents.
Conclusion
In conclusion, cutting notches in wood can be a challenging task, but with the right tools and techniques, it becomes much easier. Whether you are a DIY enthusiast or a professional carpenter, knowing how to cut notches in wood is a valuable skill that opens up a world of possibilities in woodworking projects.
By using tools like a chisel, saw, or router, you can create precise and clean notches that fit seamlessly into your woodwork. Remember to measure and mark your wood accurately and take proper safety precautions to avoid accidents. With practice and patience, you’ll be able to master the art of cutting notches in wood and add a professional touch to your woodworking projects.
So, don’t be afraid to experiment and explore different techniques. Cutting notches in wood is a creative process that allows you to showcase your craftsmanship and create unique designs. Whether you’re building furniture, shelves, or decorative pieces, incorporating notches adds structural integrity and visual appeal to your creations. So, grab your tools and start cutting notches in wood today!