If you’re looking for an alternative to wood filler for filling holes in wood, you’re in luck. There are several DIY methods you can try that don’t require traditional wood fillers. One option is to mix sawdust with wood glue to create a paste-like mixture that can be used to fill the holes. Another option is to use a mixture of baking soda and super glue to create a hardened filler. Additionally, you can try using a wax crayon or a soap bar to fill small holes. These methods offer a cost-effective and creative solution for filling holes in wood without using wood filler.

DIY Wood Hole Fillers: Homemade recipes for filling wood holes without traditional fillers
Wooden furniture and objects can develop holes over time due to wear and tear, insect damage, or other factors. While traditional wood fillers are readily available in stores, they often contain chemicals and may not match the natural color of the wood. If you prefer a more natural and cost-effective solution, you can create your own wood hole fillers using simple household ingredients. In this section, we will explore several DIY recipes for filling wood holes without traditional fillers.

1. Sawdust and Wood Glue Mixture
One of the simplest and most effective wood hole fillers can be made by combining sawdust with wood glue. Here’s how:
- Gather fine sawdust from the same type of wood as the object or furniture you need to repair.
- In a small container, mix the sawdust with wood glue until you achieve a thick paste-like consistency.
- Apply the mixture to the wood hole using a putty knife or a similar tool.
- Smooth out the surface of the filler and let it dry completely.
- Once dry, sand the filled area to ensure a smooth finish that blends with the surrounding wood.
This DIY wood filler provides a natural and seamless repair, as the sawdust used matches the wood’s color and texture.
2. Baking Soda and Super Glue Solution
If you need a quick and strong wood hole filler, a combination of baking soda and super glue can do the trick. Follow these steps:
- Clean the wood hole thoroughly, removing any debris or loose material.
- Fill the hole halfway with baking soda, ensuring it is evenly distributed.
- Add a few drops of super glue to the baking soda-filled hole. The glue will react with the baking soda and create a hard filler.
- Continue adding baking soda and super glue until the hole is completely filled.
- Allow the filler to dry and harden for a few minutes.
- Once hardened, sand the surface of the filled hole to achieve a smooth finish.
This DIY filler is ideal for small to medium-sized holes and provides a durable repair that can be painted or stained to match the surrounding wood.
3. Coffee Grounds and Vinegar Paste
If you are looking for a wood filler with a natural stain-like finish, using coffee grounds and vinegar can yield excellent results. Here’s how:
- Mix equal parts of coffee grounds and vinegar to create a thick paste.
- Apply the paste to the wood hole using a putty knife or your fingers.
- Make sure the paste is firmly packed into the hole.
- Allow the filler to dry completely.
- Once dry, sand the surface to achieve a smooth finish.
The coffee grounds and vinegar mixture not only fill the hole but also create a natural stain that blends with the wood, making it an excellent choice for repairing furniture or wooden objects with visible grain patterns.
4. Epoxy Resin and Wood Shavings Blend
If you are dealing with larger wood holes or cracks, a combination of epoxy resin and wood shavings can provide a strong and durable repair. Follow these steps:
- Gather the same type of wood shavings as the object or furniture you are repairing.
- In a container, mix the wood shavings with epoxy resin according to the manufacturer’s instructions.
- Ensure the mixture has a thick consistency that can be easily applied and shaped.
- Apply the mixture to the wood hole or crack, pressing it firmly to ensure proper adhesion.
- Allow the filler to cure for the recommended time mentioned on the epoxy resin packaging.
- Once cured, sand the surface of the repaired area for a smooth finish.
This DIY wood filler provides a strong and long-lasting repair, making it ideal for structural repairs on wooden furniture or objects.
By utilizing these DIY wood hole filler recipes, you can save money, avoid harmful chemicals, and achieve natural-looking repairs that seamlessly blend with the wood. Whether your project involves small holes or larger cracks, these homemade fillers offer a
Epoxy Resin Solutions: Using epoxy resin as an effective alternative for filling wood holes
Wood is a versatile and widely used material in various applications. However, one common issue with wood is the presence of holes, whether they are natural voids or caused by insects or decay. These holes not only compromise the structural integrity of the wood but also affect its aesthetic appeal. Fortunately, there is a solution – epoxy resin.
Epoxy resin is a durable and versatile material that can be used for a wide range of applications, including filling wood holes. Its unique properties make it an effective alternative to traditional wood fillers. Let’s explore why epoxy resin is a great solution for filling wood holes and how it can be used.
The Advantages of Epoxy Resin
Epoxy resin offers several advantages over traditional wood fillers. Here are some key benefits:
- Strength and Durability: Epoxy resin is known for its exceptional strength and durability. Once cured, it forms a hard and durable surface that can withstand impact, moisture, and temperature changes.
- Flexibility: Unlike some wood fillers that can shrink or crack over time, epoxy resin remains flexible. This flexibility allows it to expand and contract with the wood, preventing further damage or cracking.
- Adhesion: Epoxy resin bonds exceptionally well with wood surfaces, creating a strong and long-lasting bond. It forms a tight seal, preventing any further degradation or moisture penetration.
- Versatility: Epoxy resin can be easily tinted or stained to match the color of the surrounding wood. This makes it an ideal choice for filling holes in both natural and stained wood surfaces.
Using Epoxy Resin to Fill Wood Holes
Now that we understand the advantages of epoxy resin, let’s explore how it can be used to effectively fill wood holes:
- Preparing the Wood Surface: Start by cleaning the wood surface around the hole. Remove any loose debris, dust, or old filler. Sand the area gently to create a smooth and clean surface for the epoxy resin to adhere to.
- Mixing the Epoxy Resin: Follow the manufacturer’s instructions to mix the epoxy resin and hardener in the correct ratio. Mixing is crucial to ensure proper curing and optimal bonding.
- Applying the Epoxy Resin: Use a small brush or spatula to carefully apply the epoxy resin into the wood hole. Make sure to fill the hole completely, leaving no gaps or air bubbles.
- Leveling and Smoothing: After filling the hole, use a putty knife or scraper to level the epoxy resin surface with the surrounding wood. Smooth out any excess resin to create a seamless finish.
- Curing and Finishing: Allow the epoxy resin to cure according to the manufacturer’s instructions. Once cured, sand the surface to achieve a smooth finish. You can further refine the appearance by staining or sealing the wood as desired.
Recommended Epoxy Resin Products
There are several epoxy resin products available in the market specifically formulated for filling wood holes. Here are a few recommendations:
| Product | Features |
|---|---|
| Product A | – Fast curing time – Excellent adhesion – Available in various colors |
| Product B | – High strength and durability – Self-leveling formula – Suitable for large or deep holes |
| Product C | – UV-resistant – Waterproof – Can be used for both indoor and outdoor applications |
Note: Always refer to the manufacturer’s instructions and safety guidelines when using any epoxy resin product.
In Summary
Epoxy resin provides a durable and versatile solution for filling wood holes. With its exceptional strength, flexibility, and adhesion, it offers numerous advantages over traditional wood fillers. By following the proper application techniques and using recommended epoxy resin products, you can effectively restore and enhance the appearance of wood surfaces. Say goodbye to unsightly holes and enjoy the beauty and
Sawdust and Glue Technique: Step-by-step guide on filling wood holes using sawdust and glue
If you have ever worked with wood, you know that over time, small holes and gaps can appear. These imperfections can be unsightly and even affect the structural integrity of your projects. Fortunately, there is a simple and cost-effective solution to fill these holes using sawdust and glue. In this section, we will provide you with a step-by-step guide on how to use the sawdust and glue technique to fill wood holes effectively.
Materials you will need:
- Wood glue
- Clean sawdust (same type of wood as the project)
- Putty knife or scraper
- Sandpaper (various grits)
- Paint or finish (optional)
Step 1: Gather the materials and prepare the wood surface
Before starting the filling process, ensure that you have all the necessary materials at hand. Additionally, clean the surface of the wood around the holes or gaps to remove any dirt or debris that may interfere with the adhesion.
Step 2: Collect sawdust
Collect sawdust from the same type of wood as your project. If you do not have any readily available, you can create your own by sanding a small piece of the same wood using coarse sandpaper. Remember to collect an adequate amount of sawdust to fill the holes completely.
Step 3: Mix sawdust and wood glue
In a clean container, mix the collected sawdust with wood glue. Start with a small amount of sawdust and gradually add the glue until you achieve a thick paste-like consistency. Mix well to ensure that the sawdust is evenly coated with the glue.
Step 4: Apply the mixture to the wood holes
Using a putty knife or scraper, apply the sawdust and glue mixture to the wood holes or gaps. Press the mixture firmly into the holes, ensuring that they are completely filled. Smooth out the surface of the filled areas with the putty knife or scraper to create a level finish.
Step 5: Allow the filler to dry and sand
Allow the filled areas to dry completely according to the manufacturer’s instructions. Once dry, use sandpaper of various grits to sand down the filled areas until they are flush with the surrounding wood surface. Start with a coarser grit and gradually move to finer grits for a smooth finish.
Step 6: Optional finishing touches
If desired, you can further enhance the appearance of the filled areas by applying paint or finish that matches the color of the wood. This step is particularly useful when working on visible surfaces where a seamless blend is desired.
Summary
The sawdust and glue technique offers a simple and effective way to fill wood holes and gaps. By following the step-by-step guide outlined above, you can easily restore the appearance and structural integrity of your wood projects. Remember to gather the necessary materials, prepare the wood surface, mix sawdust and wood glue, apply the mixture to the holes, allow it to dry, sand, and optionally apply a finish. With this technique, you can achieve professional-looking results without breaking the bank.
5. Sanding and Staining: Techniques to blend and conceal wood holes without using wood filler
Wood holes can be a common issue when working with wooden surfaces, such as furniture or flooring. While wood fillers are commonly used to fill and conceal these holes, there are alternative techniques that can be used to achieve a seamless finish without the need for fillers. Sanding and staining are two effective techniques that can blend and conceal wood holes, providing a natural and cohesive appearance to the wood surface.
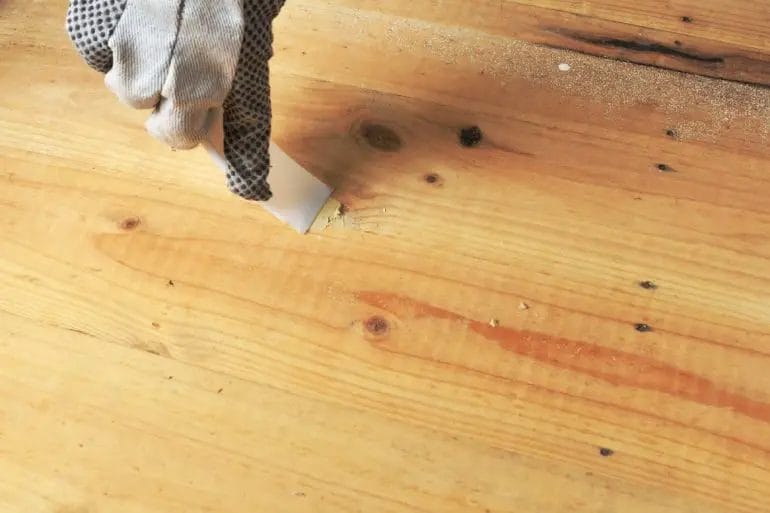
Sanding
Sanding is a crucial step in preparing wood surfaces for blending and concealing wood holes. It helps to smooth out the surface and remove any imperfections or rough edges. When sanding, it is important to use the right grit sandpaper and follow the grain of the wood to achieve the best results.
Start by selecting an appropriate grit sandpaper. For smoothing out the surface and preparing it for staining, a medium to fine grit sandpaper (such as 120-220 grit) is recommended. Begin sanding the entire surface, focusing on the areas with wood holes. Use gentle, even strokes to avoid creating uneven patches or further damaging the wood. Pay attention to the edges of the holes to ensure they are properly smoothed out.
As you sand, periodically wipe away the dust with a clean cloth or vacuum to keep the surface clear. This will help you assess the progress and identify any areas that may require additional sanding. Continue sanding until the surface feels smooth and the wood holes are adequately blended with the surrounding wood.
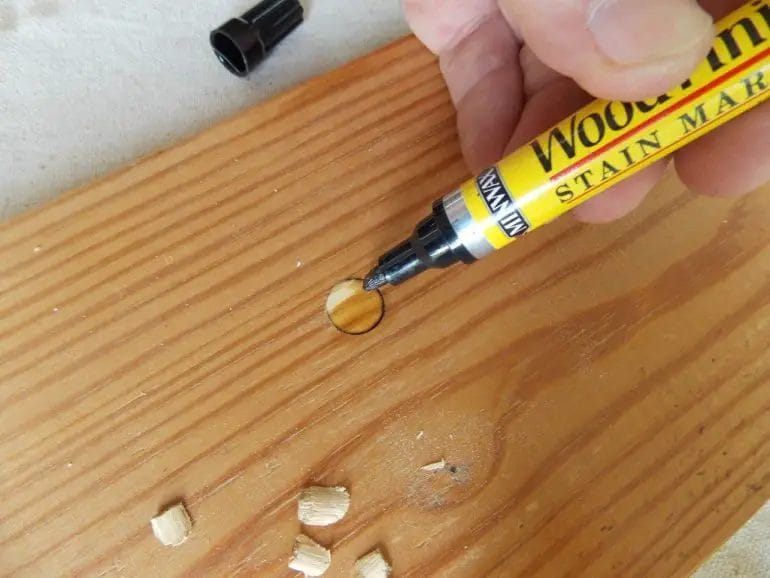
Staining
Staining is an effective technique to further blend and conceal wood holes. By applying a stain that matches the color of the wood, you can create a seamless finish that disguises the presence of the holes. Here are steps to follow when staining wood:
- Prepare the wood surface: Ensure the wood surface is clean and free from any dust or debris. Sand the surface if necessary to ensure a smooth and even finish.
- Select the right stain: Choose a stain that matches the color and tone of the surrounding wood. Test the stain on a small, inconspicuous area to ensure it provides the desired result.
- Apply the stain: Using a brush or cloth, apply the stain to the entire surface, including the areas with wood holes. Apply the stain evenly, following the grain of the wood. Allow the stain to penetrate the wood for the recommended time indicated on the product’s instructions.
- Remove excess stain: After the recommended time has passed, use a clean cloth to wipe away any excess stain. Make sure to remove any buildup or pooling of the stain to achieve an even finish.
- Allow drying and assess: Let the stain dry completely according to the product’s instructions. Once dry, assess the results and determine if additional coats or touch-ups are needed to further blend and conceal the wood holes.
By utilizing the sanding and staining techniques outlined above, you can effectively blend and conceal wood holes without relying on wood fillers. These techniques not only provide a seamless finish but also maintain the natural appearance and integrity of the wood surface.
FAQs
1. How can I fill holes in wood without using wood filler?
To fill small holes in wood without using wood filler, you can try mixing sawdust from the same type of wood with a two-part epoxy resin. Create a thick paste by combining the sawdust and the epoxy resin, then press it into the holes using a putty knife. Allow it to fully cure before sanding and finishing.
2. Is there an alternative to wood filler for filling larger holes in wood?
If you have larger holes to fill in wood and don’t want to use wood filler, you can consider making your own filling mixture using a combination of sawdust, wood glue, and a hardening agent like gypsum powder or flour. Mix these ingredients to form a thick paste and use it to fill the holes, then sand and finish as needed.
3. Can I use other materials instead of wood filler to fill holes in wood?
Absolutely! There are several alternatives to wood filler that you can use to fill holes in wood. Some options include using putty made from epoxy resin or using a mixture of wood glue and sawdust. Each alternative has its own advantages and limitations, so it’s best to experiment and find the method that works best for your specific project.
Conclusion
In conclusion, filling holes in wood without wood filler is possible and can be done with alternative materials and techniques. By using common household items such as toothpicks, wooden dowels, or even soap, you can effectively fill small holes or gaps in wood surfaces. Additionally, using wood glue mixed with sawdust can create a homemade wood filler that matches the color and texture of the wood. These DIY methods not only save money but also offer creative solutions for repairing wood without relying on traditional wood fillers. So, the next time you encounter a hole in wood, remember these handy alternatives to fill the gap.