Are you tired of seeing a hole in your wood floor? Don’t worry, we have the solution for you. Fixing a hole in a wood floor may seem like a daunting task, but with the right tools and techniques, it can be a simple and satisfying DIY project. Whether you have a small nail hole or a larger gap, we’ll guide you through the step-by-step process to restore the beauty and functionality of your wood floor. Say goodbye to that unsightly hole and hello to a smooth and flawless wood floor.
DIY Techniques for Fixing Wood Floor Holes
If you have wooden floors in your home, you may have encountered the problem of holes at some point. Whether caused by furniture legs, pets, or other factors, these unsightly holes can be a real eyesore. The good news is that you don’t have to live with them or spend a fortune on professional repairs. With a few simple DIY techniques, you can fix those wood floor holes yourself and restore the beauty of your flooring.

1. Wood Filler
One of the easiest and most common ways to fix small to medium-sized wood floor holes is by using wood filler. Wood filler is a putty-like substance that you can apply to the hole to fill it in and create a smooth surface. To use wood filler, follow these steps:
- Clean the area around the hole using a soft brush or vacuum to remove any dust or debris.
- Take a small amount of wood filler and apply it to the hole using a putty knife or your fingers.
- Smooth out the filler and remove any excess using the putty knife.
- Allow the filler to dry completely according to the manufacturer’s instructions.
- Sand down the dried filler until it is level with the surrounding floor.
- Finish by staining or painting the repaired area to match the rest of the floor.
Wood filler is a versatile option that can be used on both hardwood and engineered wood floors. However, it may not be suitable for large or deep holes.
2. Wood Plugs
For larger or deeper holes, another DIY technique you can try is using wood plugs. Wood plugs are small pieces of wood that can be used to fill in holes and create a seamless look. Here’s how you can use wood plugs to fix wood floor holes:
- Measure the diameter and depth of the hole.
- Select a wood plug that matches the size and species of your floor.
- Apply a small amount of wood glue to the hole.
- Insert the wood plug into the hole, making sure it is flush with the surrounding floor.
- Allow the glue to dry completely.
- Sand down the wood plug until it is level with the floor.
- Finish by staining or sealing the repaired area.
This method may require some woodworking skills and tools, but it can provide a more durable and long-lasting solution for larger holes.
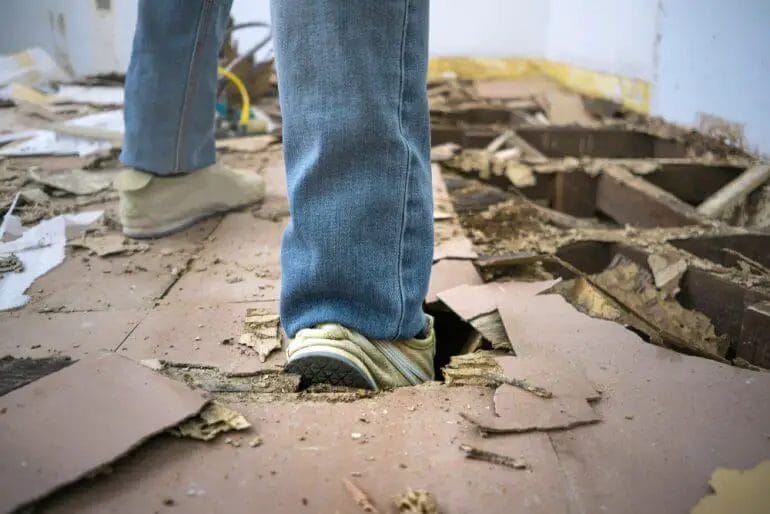
3. Floorboard Replacement
If the wood floor hole is too large or extensive to be fixed by wood filler or wood plugs, you may need to consider replacing the damaged floorboards. While this method requires more time and effort, it can result in a seamless and professional-looking repair. Here’s how you can replace a damaged floorboard:
- Identify the damaged floorboard and mark its location.
- Use a circular saw or a handsaw to cut out the damaged section of the floorboard.
- Measure and cut a new piece of flooring to fit the opening.
- Apply adhesive or wood glue to the back of the new piece of flooring.
- Insert the new piece of flooring into place, making sure it is snug and level with the surrounding floor.
- Secure the new piece of flooring with nails or screws.
- Finish by sanding, staining, and sealing the repaired area to match the rest of the floor.
This method requires some advanced woodworking skills and tools, so it may be best suited for more experienced DIYers or professionals.
In Summary
Wood floor holes can be a common problem, but they don’t have to be a permanent eyesore. With the right DIY techniques, you can easily fix those holes and restore the beauty of your wooden floors. Whether you choose to use wood filler, wood plugs, or replace damaged floorboards, remember to follow the proper steps and take your time to ensure a professional-looking repair. Now you can enjoy your flawless wood floors once again!
Effective Methods to Repair Holes in Wood Floors
Wood floors are a popular choice for homeowners due to their natural beauty and durability. However, over time, these floors can develop holes or gaps due to wear and tear or other damage. Fortunately, there are effective methods available to repair holes in wood floors and restore their pristine condition. In this section, we will discuss some of the most reliable techniques to repair holes in wood floors.
1. Wood Filler
Wood filler is a common solution for repairing small to medium-sized holes in wood floors. It is a putty-like substance that can be used to fill in the gaps and create a smooth surface. To use wood filler, start by cleaning the hole and removing any debris or loose particles. Then, apply the wood filler generously to the hole using a putty knife, ensuring that it is level with the surrounding floor. Allow the filler to dry completely before sanding it down and applying a finish to match the rest of the floor.
2. Wood Patch
For larger holes or areas of damage in wood floors, a wood patch may be a more suitable option. A wood patch is essentially a replacement piece of wood that can be cut to fit the damaged area. To repair the hole with a wood patch, first, measure the size of the hole and cut a piece of wood to match. Then, remove any debris and apply wood glue to the edges of the hole. Insert the wood patch into the hole and press it firmly to ensure a secure bond. Once the glue has dried, sand the patched area smooth and finish it to blend with the rest of the floor.
3. Epoxy Resin
Epoxy resin is a versatile option for repairing holes in wood floors, especially those with irregular shapes or larger sizes. It is a strong, durable substance that can be used to fill the hole and create a seamless finish. To use epoxy resin, clean the hole thoroughly and mix the resin according to the manufacturer’s instructions. Fill the hole with the epoxy resin, ensuring that it is level with the surrounding floor. Allow the resin to cure and harden before sanding it down and finishing the floor.
4. Wood Plugs
Wood plugs are small, cylindrical pieces of wood that can be used to fill and conceal small holes in wood floors. They are available in various wood species and sizes to match the floor’s color and dimensions. To use a wood plug, drill a slightly larger hole than the size of the plug in the damaged area. Apply wood glue to the hole and insert the plug, tapping it gently with a hammer until it is flush with the floor surface. Sand the plug smooth and finish it to blend seamlessly with the surrounding floor.
5. Professional Repair
In some cases, particularly for extensive or complex damage, it may be best to seek the assistance of a professional wood floor repair specialist. These professionals have the expertise and specialized tools to assess and repair the holes in wood floors effectively. They can provide tailored solutions and ensure a seamless repair that matches the original floor’s appearance.
In summary, repairing holes in wood floors is achievable with the right techniques and materials. Whether using wood filler, wood patches, epoxy resin, wood plugs, or seeking professional help, it is possible to restore the beauty and functionality of damaged wood floors. Regular maintenance and timely repairs can prolong the lifespan of wood floors and keep them looking their best for years to come.
Step-by-Step Guide to Fixing a Hole in a Wood Floor
Wood floors are a classic and beautiful addition to any home. They provide a warm and inviting atmosphere, but they are not immune to damage. Whether it’s due to heavy furniture, scratches, or accidents, it’s not uncommon for a wood floor to develop a hole over time. But don’t worry, fixing a hole in a wood floor is a relatively straightforward process that you can tackle on your own. In this guide, we will walk you through the step-by-step process of fixing a hole in a wood floor.
Materials You’ll Need:
- Wood filler
- Putty knife
- Sandpaper
- Stain or paint (optional)
- Varnish or polyurethane
- Paintbrush
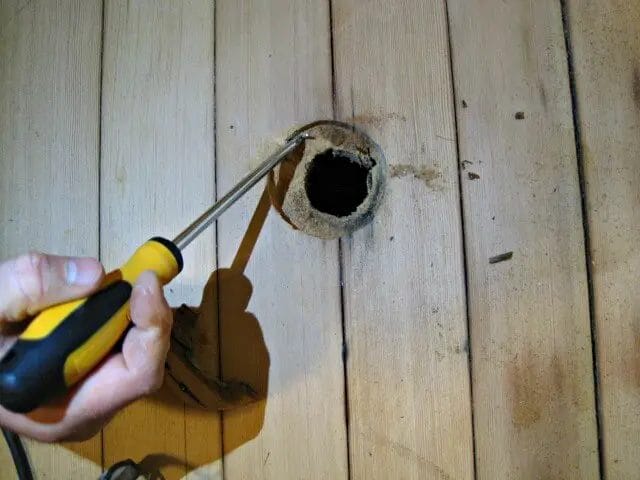
Step 1: Prepare the Hole
The first step in fixing a hole in a wood floor is to prepare the damaged area. Start by removing any loose debris, dirt, or dust from the hole. Use a vacuum or a brush to clean the area thoroughly. This will ensure that the wood filler adheres properly and provides a seamless finish.
Step 2: Apply Wood Filler
Once the hole is clean, it’s time to apply the wood filler. Take a small amount of wood filler on a putty knife and press it into the hole. Make sure to fill the hole completely and level it with the surrounding floor. Use the putty knife to smooth out the surface of the filler and remove any excess.
Step 3: Let the Filler Dry
Allow the wood filler to dry completely according to the manufacturer’s instructions. This usually takes a few hours. Avoid walking on the repaired area until the filler is fully dry to prevent any damage or indentations.
Step 4: Sand the Filled Area
Once the wood filler is dry, use sandpaper to smooth the filled area. Start with a coarse-grit sandpaper to level the surface and then switch to a finer-grit sandpaper for a smoother finish. Sand in a circular motion to blend the repaired area with the rest of the floor seamlessly.
Step 5: Apply Stain or Paint (Optional)
If the repaired area stands out from the rest of the floor due to color differences, you can apply a stain or paint to match the wood floor. Choose a stain or paint color that closely matches the existing floor. Apply the stain or paint using a paintbrush and allow it to dry completely before proceeding to the next step.
Step 6: Apply Varnish or Polyurethane
To protect the repaired area and ensure its longevity, apply a layer of varnish or polyurethane. This will also help to blend the repaired area with the rest of the floor and provide a consistent finish. Use a paintbrush to apply the varnish or polyurethane evenly and allow it to dry according to the manufacturer’s instructions.
Step 7: Regular Maintenance
Once you have successfully fixed the hole in your wood floor, it’s important to maintain it properly to prevent further damage. Regularly clean the floor and avoid dragging heavy furniture or sharp objects across the surface. If you notice any new scratches or damage, address them promptly to avoid larger repairs in the future.
Summary
Fixing a hole in a wood floor may seem daunting, but with the right tools and materials, it can be a manageable DIY project. Remember to prepare the hole, apply wood filler, let it dry, sand the filled area, and optionally apply stain or paint to match the floor. Finally, apply a protective layer of varnish or polyurethane. By following these steps and maintaining your wood floor, you can enjoy its beauty for years to come.
Expert Tips for Patching Holes in Wood Floors
Wood floors can add a touch of elegance and warmth to any home. However, over time, they can develop holes due to wear and tear, accidents, or insect infestations. These holes not only compromise the appearance of the floor but can also become a tripping hazard if left unaddressed. Fortunately, patching holes in wood floors is a fairly simple process that can be done by any homeowner. In this section, we will provide you with expert tips on how to patch holes in wood floors effectively.
1. Assess the Size and Depth of the Hole
The first step in patching a hole in a wood floor is to assess the size and depth of the hole. Smaller holes, such as those caused by nails or small insects, can be easily filled with wood filler. However, larger holes may require a more extensive repair process.
2. Gather the Necessary Materials
Before you begin patching the hole, make sure you have all the necessary materials on hand. These may include wood filler, sandpaper, a putty knife, a chisel, and matching stain or paint for finishing.
3. Clean the Hole
Start by cleaning the hole and removing any debris or loose wood particles. Use a vacuum or a brush to ensure the hole is clean and free of any dirt or dust.
4. Fill the Hole with Wood Filler
Apply a generous amount of wood filler to the hole using a putty knife. Make sure to press the filler firmly into the hole to ensure a tight bond. Smooth out the surface of the filler using the putty knife, and remove any excess filler.
5. Allow the Filler to Dry
Allow the wood filler to dry completely according to the manufacturer’s instructions. This may take several hours or overnight, depending on the type of filler used.
6. Sand the Patched Area
Once the filler is dry, use sandpaper to smooth the patched area. Start with a coarse-grit sandpaper and gradually move to a finer-grit paper for a smooth finish. Sand in the direction of the wood grain to blend the patch with the surrounding area.
7. Stain or Paint the Patched Area
If necessary, apply stain or paint to the patched area to match the color of the surrounding wood floor. Use a small brush or a cloth to carefully apply the stain or paint, following the manufacturer’s instructions.
8. Apply a Protective Finish
To protect the patched area and ensure its longevity, apply a protective finish such as polyurethane or wax. Follow the instructions on the product label for the best results.
9. Regular Maintenance
After patching the hole, it’s important to maintain the wood floor properly to prevent further damage. Regularly clean the floor using a soft broom or vacuum cleaner, and avoid dragging heavy furniture or sharp objects across the surface.
In summary, patching holes in wood floors is a relatively straightforward process that can be done by any homeowner. By following these expert tips, you can effectively repair holes and restore the beauty of your wood floor. Remember to assess the size and depth of the hole, gather the necessary materials, clean the hole, fill it with wood filler, allow it to dry, sand the patched area, stain or paint if needed, apply a protective finish, and maintain the floor regularly. With these steps, your wood floors will look flawless and enhance the overall aesthetics of your home.
FAQs
How can I fix a hole in a wood floor?
To fix a hole in a wood floor, start by cleaning the area and removing any debris. Fill the hole with a wood filler or putty that matches the color of the floor. Smooth out the filler with a putty knife and let it dry. Sand the area, if needed, and finish by applying a wood sealant or stain to match the rest of the floor.
Conclusion
In conclusion, fixing a hole in a wood floor is a task that can be easily accomplished with the right tools and techniques. By following the steps mentioned earlier, such as cleaning the area, preparing the filler, and applying it carefully, you can restore the beauty and functionality of your wood floor. Remember to choose a filler that matches the color and grain of your floor for a seamless repair. Regular maintenance and prompt repair of any damages will help prolong the lifespan of your wood floor and keep it looking its best for years to come.
With a little patience and attention to detail, you can successfully fix a hole in your wood floor and avoid the need for costly replacements. So, don’t let a hole in your floor be a cause for worry. Take action and enjoy the satisfaction of a well-repaired wood floor that adds charm and value to your home.
