If you’re looking to add a touch of Celtic craftsmanship to your decor, why not try making a wooden Celtic cross? These unique and intricate symbols are rich in history and can be a beautiful addition to any space.
Creating a wooden Celtic cross requires a few basic woodworking skills and tools, but with some patience and creativity, you can craft your very own masterpiece. Start by selecting a piece of high-quality wood that suits your preferences, and sketch out the design of the cross.

Once you have a design in mind, use a jigsaw or a coping saw to carefully cut out the shape of the cross from the wood. Take your time and follow the lines precisely to ensure a clean and precise cut.
Once the cross shape is cut out, use a sander or sandpaper to smooth the edges and surface of the wood. This will give your Celtic cross a polished and professional look.
Now comes the fun part – adding the intricate Celtic knotwork or other designs to your wooden cross. You can use woodcarving tools or a wood burning pen to carefully etch or carve the designs into the wood.
Take your time with this step, as the details are what make a wooden Celtic cross truly special. If you’re not confident in your carving skills, you can also consider using stencils or decals to add the designs.
Once you’re satisfied with the design, apply
Tools and Materials Needed for Making a Wooden Celtic Cross
Creating a wooden Celtic cross can be a rewarding and fulfilling woodworking project. To successfully complete this project, you will need a variety of tools and materials. Here is a list of the essential items you will need:
Tools:
- Electric or hand saw
- Chisel set
- Router
- Sanding block or sandpaper
- Drill
- Clamps
- Wood glue
- Woodworking vice
- Measuring tape or ruler
Materials:
- Wood – preferably a hardwood such as oak, maple, or walnut
- Pencil or marker
- Stain or paint (optional)
- Clear varnish or sealant (optional)
- Screws or nails (if desired for additional support)
Before you begin, it is essential to make sure you have all the necessary tools and materials. One of the first tools you will need is an electric or hand saw, which will allow you to cut the wooden board or plank into the desired shape and size for your Celtic cross. A chisel set will come in handy for carving out intricate details on the cross.
A router is another useful tool that can help create smooth and clean edges on the wood. Sanding the wooden surface with a sanding block or sandpaper will provide a smooth finish and get rid of any rough edges or imperfections before moving forward with the project.
Drilling holes may be necessary for attaching different parts of the cross, and clamps will help hold the pieces together while the glue dries. Wood glue is an essential material for securing the joints and ensuring the cross remains sturdy.
A woodworking vice will come in handy when you need to hold the wooden piece firmly in place while working on it. You will also need a measuring tape or ruler to ensure accurate measurements and proportions throughout the project.
Once you have assembled the cross, you can choose to stain or paint it to enhance its appearance. Applying a clear varnish or sealant will protect the wood and give it a polished look. If desired, you can also use screws or nails to reinforce the joints for added stability.
Remember to use a pencil or marker to outline the design on the wood before you begin cutting or carving. This will help guide your work and ensure the final product reflects the beauty of a traditional Celtic cross.
In summary, creating a wooden Celtic cross requires a selection of tools and materials. It is important to have the right tools, such as a saw, chisel set, router, and drill, to shape and carve the wood effectively. Additionally, wood glue, clamps, and a woodworking vice are necessary for joining the pieces securely. Choose a hardwood for the project, and consider adding stain, paint, or a clear varnish for a finished look. By following these guidelines and using the appropriate tools and materials, you can successfully make your own wooden Celtic cross.
Step-by-Step Guide to Carving a Wooden Celtic Cross
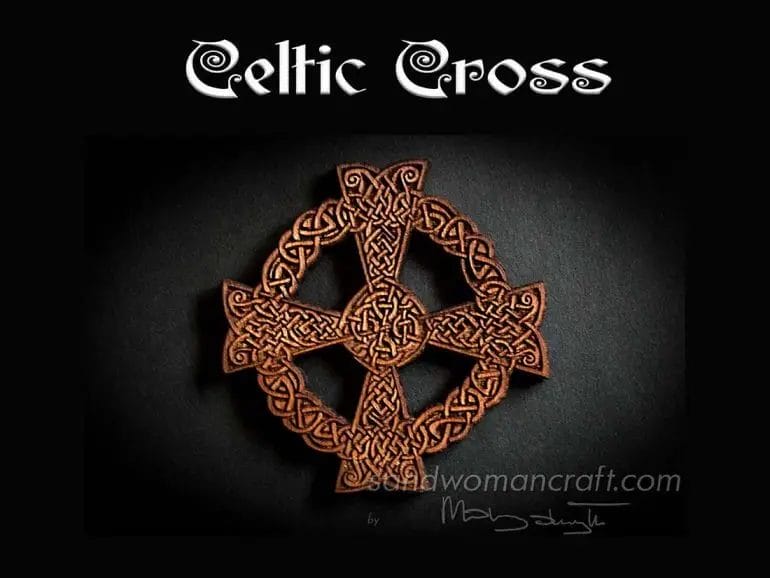
Carving a wooden Celtic cross can be a rewarding and creative project for woodworking enthusiasts. The Celtic cross is a symbol of Irish and Celtic heritage, known for its intricate patterns and symbolism. In this step-by-step guide, we will walk you through the process of carving your own wooden Celtic cross. Let’s get started!
Materials Needed:
Step 1: Design and Template
The first step in carving a wooden Celtic cross is to create a design and template. You can find various Celtic cross designs online or create your own. Once you have your design, transfer it onto a piece of paper or cardboard to create a template.
Step 2: Prepare the Wood
Choose a wooden block that is suitable for carving. Hardwood such as oak, maple, or walnut is recommended for its durability. Cut the wooden block to the desired size of your Celtic cross using a saw.
Step 3: Transfer the Template
Place the template onto the prepared wooden block and secure it with tape. Use a pencil or pen to trace the outline of the design onto the wood.
Step 4: Rough Carving
Begin the rough carving process by removing excess wood around the outline of the Celtic cross. Start with larger carving tools such as chisels or gouges to remove the bulk of the wood.
Step 5: Refine the Shape
Once the rough carving is complete, use smaller carving tools and knives to refine the shape of the Celtic cross. Pay attention to the intricate details and patterns of the design, gradually working your way towards the desired shape.
Step 6: Smoothing and Sanding
Smooth the surface of the carved cross using sandpaper of various grits. Start with a coarser grit to remove any rough areas, then progress to finer grits for a smooth and polished finish.
Step 7: Finishing Touches
If desired, you can apply a wood stain or paint to enhance the appearance of your Celtic cross. Choose a color that complements the wood and allows the intricate details to stand out.
Step 8: Final Steps
Once the finish has dried, inspect your wooden Celtic cross for any imperfections or rough edges. Use sandpaper or carving tools to make any necessary adjustments. Finally, apply a coat of protective finish to preserve the wood and give it a polished look.
Summary
Carving a wooden Celtic cross is a creative and fulfilling woodworking project. By following this step-by-step guide, you can create your own unique piece of art that showcases the beauty of Celtic design. Remember to take your time, pay attention to detail, and enjoy the process of bringing your wooden Celtic cross to life.
Adding Intricate Details to Your Wooden Celtic Cross
Creating a wooden Celtic cross can be a rewarding and artistic endeavor. This unique symbol holds deep cultural and spiritual significance, and adding intricate details can enhance its beauty and meaning. In this section, we will explore various techniques and approaches to bring life and intricacy to your wooden Celtic cross.
1. Carving Techniques
One of the most common ways to add intricate details to a wooden Celtic cross is through carving. Carving can create raised designs and textures that add depth and visual interest. There are different carving techniques you can use, depending on your skill level and desired outcome.
For beginners, relief carving is a great technique to start with. This involves removing wood from the surface of the cross to create raised patterns. With the use of carving tools such as gouges and chisels, you can carve intricate knotwork, interlacing patterns, or animal motifs onto the wooden surface.
For more advanced carvers, intricate chip carving can be employed. Chip carving involves removing small chips of wood from the surface to create geometric patterns or intricate designs. This technique requires precision and control to achieve finely detailed results.
2. Wood Burning
Wood burning, also known as pyrography, is another technique to add intricate details to your wooden Celtic cross. It involves using a heated metal tip to burn designs onto the wood’s surface. The versatility of wood burning allows you to create intricate knotwork, intricate Celtic symbols, or even depictions of animals and nature.
When using this technique, it is essential to choose the right temperature for your wood burning tool to prevent scorching or burning beyond intended lines. Practice on scrap wood and experiment with different tips to achieve the desired level of intricacy in your designs.
3. Inlay and Intarsia
Inlay and intarsia are techniques that involve incorporating different types of wood or other materials into the surface of the wooden Celtic cross. These techniques allow you to add intricate details and vibrant colors to your cross.
With inlay, you can create incredibly detailed designs by cutting out recessed areas and fitting them with contrasting wood, metal, or other materials. This technique can be used to create intricate interlacing patterns or Celtic knots, adding a visually stunning element to your cross.
Intarsia, on the other hand, involves using different types of wood to create mosaic-like designs. By carefully shaping and fitting the pieces together, you can achieve intricate and colorful patterns. This technique requires patience and precision but can result in breathtaking and unique wooden Celtic crosses.
4. Painting and Staining
Painting and staining are additional methods to add intricate details and visual interest to your wooden Celtic cross. Using a combination of colors, you can highlight specific areas, add shading, or create realistic effects.
When painting or staining your cross, it is important to consider the type of wood you are working with. Some woods may absorb stain differently, resulting in uneven coloring. It is recommended to test the stain on a small area of the wood before applying it to the entire cross.
For a more natural look, you can opt for transparent stains that enhance the natural beauty and grain of the wood while adding subtle hues. Alternatively, acrylic paints can be used for more vibrant and detailed designs.
5. Finishing Touches
Once you have added intricate details to your wooden Celtic cross, it is essential to give it a suitable finish that protects the wood and enhances its appearance. Applying a clear varnish or sealant can help preserve the intricate details and provide a polished and professional look.
Consider the type of finish you want for your cross, whether it be glossy, satin, or matte. Test the finish on a small area or scrap wood to ensure it achieves the desired effect before applying it to the entire cross.
By employing these techniques and approaches, you can transform a simple wooden Celtic cross into a work of art. Whether you choose to carve, burn, inlay, paint, or a combination of these methods, adding intricate details will elevate your wooden Celtic cross and make it a cherished symbol of spirituality and craftsmanship.
Finishing and Sealing Your Wooden Celtic Cross
Once you have successfully carved your wooden Celtic cross, the next step is to finish and seal it. This will not only enhance the appearance of the cross but also protect it from damage and wear over time. In this section, we will guide you through the process of finishing and sealing your wooden Celtic cross to ensure its longevity and beauty.
1. Sanding
The first step in finishing your wooden Celtic cross is to sand it. This will help smooth out any rough edges and imperfections in the wood, creating a polished and professional look. Start by using coarse sandpaper to remove any large bumps or uneven areas. Then, gradually move on to finer grit sandpaper to achieve a smooth surface.
Make sure to sand both the front and back of the cross, as well as the sides and edges. Take your time and pay attention to detail to ensure a flawless finish.
2. Staining
Once you have sanded your wooden Celtic cross, you can choose to stain it to enhance the natural beauty of the wood. Staining not only adds color but also helps to bring out the grain patterns and textures of the wood.
Start by applying a thin coat of wood stain with a brush or cloth, following the direction of the grain. Allow the stain to penetrate the wood for a few minutes, and then wipe off any excess with a clean cloth. Repeat this process if you desire a darker or richer color.
Remember to wear gloves and work in a well-ventilated area when applying wood stain, as it can be toxic and may have strong fumes.
3. Applying a Finish
After staining, it’s time to protect and enhance the appearance of your wooden Celtic cross by applying a finish. There are several options to choose from, including varnish, polyurethane, and lacquer.
Before applying the finish, make sure the stain is completely dry. Then, using a brush or cloth, apply a thin and even coat of your chosen finish to the entire surface of the cross. Allow it to dry according to the manufacturer’s instructions.
If necessary, lightly sand the dried finish with a fine grit sandpaper to smooth out any imperfections. Repeat the process of applying the finish and sanding until you achieve the desired result. Finally, wipe off any dust or debris with a clean cloth.
4. Sealing
Sealing your wooden Celtic cross is essential to protect it from moisture, humidity, and other environmental factors that can cause damage. It also helps to prevent the wood from warping or splitting over time.
Using a brush, apply a coat of clear wood sealer or varnish to the entire surface of the cross. Make sure to cover both the front and back, as well as the sides and edges. Allow the sealer to dry according to the manufacturer’s instructions, and then apply additional coats if recommended.
Once the sealer is completely dry, your wooden Celtic cross is ready to be displayed or gifted. It will now have a beautiful, polished appearance and be protected for years to come.
In summary, finishing and sealing your wooden Celtic cross is an important step to enhance its appearance and protect it from damage. By following the steps outlined above, you can achieve a professional and long-lasting finish that will preserve the beauty of your cross for generations.
Frequently Asked Questions (FAQs)
1. How can I make a wooden Celtic cross?
To make a wooden Celtic cross, you will need a piece of wooden board, a saw, sandpaper, wood glue, and some paint or varnish. First, sketch the design of the cross on the board. Use the saw to cut out the cross shape. Sand the edges and surfaces smooth. Then, assemble the different parts of the cross using wood glue. Allow it to dry, and then paint or varnish the cross for a finishing touch.
2. What tools do I need to make a wooden Celtic cross?
To make a wooden Celtic cross, you will need a saw, sandpaper, wood glue, and some paint or varnish. Optionally, you can also use carving tools to add intricate details to the cross. These tools will help you shape and refine the wood to create a beautiful Celtic cross.
3. Are there any specific design considerations for a wooden Celtic cross?
When designing a wooden Celtic cross, you may consider incorporating traditional Celtic knotwork, spirals, or other intricate patterns. It’s also important to ensure that the proportions of the cross are aesthetically pleasing. You can find inspiration in existing Celtic cross designs or create your own unique interpretation.
Conclusion
In conclusion, making a wooden Celtic cross can be a rewarding and creative project that allows you to showcase your woodworking skills and embrace the rich symbolism and history of the Celtic tradition. By following the necessary steps such as selecting the right type of wood, creating a design, cutting and shaping the wood, and finishing it with appropriate techniques, you can create a unique and beautiful wooden Celtic cross. Whether you choose to display it in your home, give it as a gift, or use it as a spiritual symbol, the process of making a wooden Celtic cross can be a fulfilling and enjoyable experience.
Remember to pay attention to the details and take your time when working on this project. It is important to use proper safety equipment and techniques to ensure a successful and safe outcome. By immersing yourself in the craftsmanship and symbolism of the Celtic cross, you can create a piece that is not only aesthetically pleasing but also holds deep significance. Start your woodworking journey today and create a timeless wooden Celtic cross that will be cherished for years to come.
