Water damaged wood veneer can be a frustrating problem, but with the right steps, it can be repaired. Whether it’s a small blemish or a larger area of damage, addressing the issue promptly is key to preventing further deterioration. In this guide, we will walk you through the process of repairing water damaged wood veneer, from assessing the damage to applying the necessary repairs. By following these steps, you can restore the beauty and integrity of your wood veneer and prolong its lifespan.
Assessing the Damage: Identifying the Severity of Water Damage
Water damage can have devastating effects on a property, causing structural damage, mold growth, and health hazards. It is crucial to assess the severity of water damage accurately to develop an effective restoration plan. In this section, we will discuss the steps involved in identifying the severity of water damage.

1. Visual Inspection
The first step in assessing water damage is conducting a visual inspection of the affected area. Look for signs of water intrusion, such as water stains, discoloration, peeling paint, and warping of materials. Pay close attention to the flooring, walls, ceilings, and any other areas where water may have penetrated.
During the visual inspection, it is essential to determine the source of the water damage. Whether it is a leaky pipe, roof damage, or flooding, identifying the source will help in addressing the root cause of the problem.
2. Moisture Detection
Water damage is not always visible to the naked eye. Moisture detection tools, such as moisture meters and thermal imaging cameras, can help identify hidden water damage. These tools can detect moisture levels within materials and identify areas of potential moisture buildup.
Using a moisture meter, measure the moisture content of affected materials, such as drywall, insulation, and wood. High moisture levels indicate the severity of water damage and the need for immediate action.
Thermal imaging cameras are effective in identifying hidden moisture behind walls or under flooring. These cameras detect temperature variations caused by moisture, allowing for targeted restoration efforts.
3. Category and Class of Water Damage
Water damage is categorized based on the level of contamination, while its class is determined by the extent of the damage and the materials affected. Understanding the category and class of water damage helps determine the appropriate restoration methods.
The three categories of water damage are:
- Category 1: Clean Water – Water originates from a clean source, such as a broken pipe or supply line. This water is not harmful and does not pose a significant health risk.
- Category 2: Gray Water – Water contains some level of contamination and may cause illness if ingested. It can come from sources like dishwasher overflow or washing machine leaks.
- Category 3: Black Water – Highly contaminated water that poses severe health risks. It can contain sewage, chemicals, or other hazardous substances. Black water can result from sewage backups, flooding, or standing water.
The four classes of water damage are:
- Class 1: Minimal Damage – Water has only affected a small area, and materials have absorbed minimal moisture.
- Class 2: Significant Damage – Water has affected an entire room or area, and materials have absorbed moderate moisture.
- Class 3: Extensive Damage – Water has saturated walls, ceilings, and floors, leading to significant damage and absorption.
- Class 4: Specialty Drying Situations – Water has penetrated deeply into materials with low vapor permeance, such as concrete or hardwood.
4. Documenting the Damage
Accurate documentation of the water damage is essential for insurance claims and restoration purposes. Take photos and videos of the affected areas, noting the extent of the damage and any visible signs of moisture or mold growth. Keep detailed records of the assessment findings, including moisture readings and observations.
Proper documentation will help in communicating the severity of the water damage to insurance providers and restoration professionals, ensuring a smooth and efficient restoration process.
Summary
Assessing the severity of water damage is a crucial step in the restoration process. By visually inspecting the affected area, using moisture detection tools, determining the category and class of water damage, and documenting the findings, property owners and restoration professionals can develop an effective plan to mitigate the damage and restore the property to its pre-loss condition.
Drying Techniques: Removing Moisture from Water Damaged Wood Veneer
Water damage can wreak havoc on wood veneer, causing it to warp, swell, and lose its original shape. If not addressed promptly, this can lead to further damage and even the growth of mold. To prevent these issues and salvage your water damaged wood veneer, it’s essential to remove the moisture effectively. In this section, we will explore different drying techniques that can help restore the integrity of your wood veneer.
1. Air Drying
Air drying is one of the simplest and most natural methods for removing moisture from wood veneer. Start by gently wiping off any excess water using a dry cloth. Then, place the affected wood veneer in a well-ventilated area with good air circulation. Ensure that the veneer is placed on a flat surface and not in direct contact with any other materials. This will allow the air to circulate around the wood, gradually evaporating the moisture.
It’s important to monitor the drying process regularly. Check the veneer for any signs of warping or mold growth. If warping occurs, place a weight, such as a book or a board, on top of the veneer to help it regain its original shape.
2. Dehumidification
If the water damage is extensive or if air drying is not sufficient, using a dehumidifier can expedite the drying process. A dehumidifier helps to reduce the humidity in the air, allowing the moisture in the wood veneer to evaporate more quickly.
Place the dehumidifier in the same room as the water-damaged wood veneer. Ensure that the area is properly sealed off to prevent any further moisture from entering. Set the dehumidifier to the appropriate humidity level recommended by the manufacturer and let it run until the veneer is thoroughly dry.
3. Heat Gun
A heat gun can be an effective tool for drying water damaged wood veneer, especially in cases where quick drying is required. However, caution must be exercised when using a heat gun, as excessive heat can damage the veneer.
Start by setting the heat gun to a low or medium heat setting. Hold the heat gun about 6 to 8 inches away from the surface of the veneer and move it in a slow and sweeping motion. This allows the heat to evenly distribute across the wood, promoting evaporation without causing damage. Be sure to continuously monitor the veneer to prevent overheating.
4. Moisture Absorbent Materials
Using moisture absorbent materials can also aid in drying out water damaged wood veneer. Silica gel packets or desiccant packs, which are commonly found in product packaging, can help absorb excess moisture from the veneer.
Place the silica gel packets on the affected wood surface, ensuring that they are evenly distributed. Cover the veneer with a plastic sheet or tarp to create a seal and prevent further moisture from entering. Leave the packets in place for a few days until the wood veneer is dry.
5. Professional Assistance
If you are unsure about the best drying technique to use or if the water damage is extensive, it is advisable to seek professional assistance. Professional restoration services have the expertise and equipment to effectively remove moisture from water damaged wood veneer. They can assess the damage and recommend the most suitable drying method to restore your wood veneer to its original condition.
In summary, drying techniques play a crucial role in removing moisture from water damaged wood veneer. Whether you choose air drying, dehumidification, heat guns, moisture absorbent materials, or seek professional assistance, it’s important to act promptly and monitor the drying process. By effectively removing the moisture, you can salvage your water damaged wood veneer and prevent further damage or mold growth.
Repairing Techniques: Restoring the Appearance of Water Damaged Wood Veneer
Water damage can be a frustrating and unsightly problem, especially when it affects the wood veneer surfaces in your home. Whether it’s caused by a leaky roof, a plumbing issue, or an accidental spill, water can quickly penetrate the porous wood veneer and cause discoloration, swelling, and warping. However, with the right techniques and a little bit of effort, you can restore the appearance of water damaged wood veneer and bring it back to its former beauty.
1. Assess the extent of the damage: Before you begin the repair process, it’s important to evaluate the extent of the water damage. This will help you determine the best course of action and whether professional help is needed. Look for signs of discoloration, swelling, and warping on the wood veneer surface.
2. Dry the affected area: The first step in repairing water damaged wood veneer is to thoroughly dry the affected area. Use a dry cloth or paper towels to soak up any excess water. You can also use a fan or dehumidifier to speed up the drying process. It’s important to ensure that the wood veneer is completely dry before proceeding to the next step.
3. Sand the damaged area: Once the wood veneer is dry, gently sand the damaged area using a fine-grit sandpaper. This will help remove any rough edges, discoloration, or uneven surfaces caused by the water damage. Make sure to sand in the direction of the wood grain to avoid further damage.
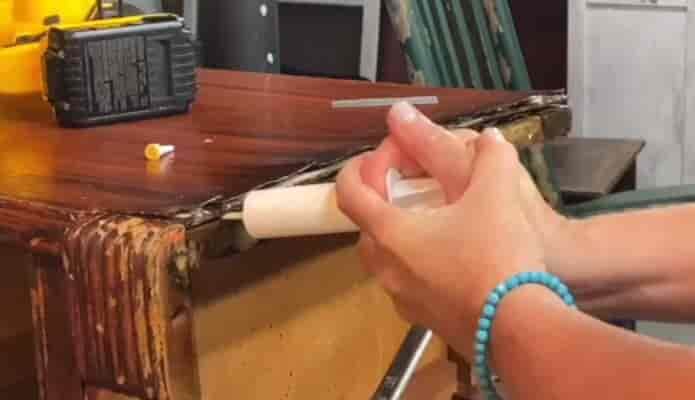
4. Apply wood filler: After sanding, fill any cracks, chips, or holes in the wood veneer with a suitable wood filler. Choose a filler that matches the color of the wood veneer for a seamless repair. Use a putty knife to apply the filler and smooth it out evenly. Allow the filler to dry completely before proceeding to the next step.
5. Sand and smooth the repair area: Once the wood filler has dried, gently sand the repair area to blend it with the surrounding wood veneer. Start with a coarse-grit sandpaper and gradually switch to a finer grit for a smooth finish. Be careful not to sand too vigorously, as this can damage the veneer.
6. Stain or paint the repaired area: Depending on the finish of your wood veneer, you may need to stain or paint the repaired area to match the rest of the surface. Choose a stain or paint that closely matches the color and finish of the surrounding wood veneer. Apply it evenly using a small brush or sponge and allow it to dry completely.
7. Seal and protect the surface: To prevent future water damage, it’s important to seal and protect the wood veneer surface. Apply a clear coat of varnish, lacquer, or polyurethane to seal the repaired area and enhance its durability. Follow the manufacturer’s instructions for the recommended number of coats and drying time.
8. Maintain proper care: After repairing water damaged wood veneer, it’s essential to maintain proper care to prevent further damage. Avoid placing hot or wet objects directly on the surface, use coasters or mats to protect against spills and scratches, and regularly clean and dust the veneer with a soft cloth.
In summary, repairing water damaged wood veneer requires a systematic approach and attention to detail. By assessing the extent of the damage, drying the affected area, sanding and filling the damaged surface, and applying the appropriate finish, you can restore the appearance of water damaged wood veneer and prolong its lifespan. Remember to maintain proper care to prevent future damage and enjoy the beauty of your restored wood veneer surfaces for years to come.
Prevention Tips: Protecting Wood Veneer from Future Water Damage
Wood veneer is a popular choice for adding a touch of elegance to furniture and interiors. However, it is vulnerable to water damage, which can cause warping, swelling, and discoloration. To keep your wood veneer looking its best and prevent future water damage, follow these prevention tips:
1. Use a Protective Finish
Applying a protective finish to your wood veneer is the first line of defense against water damage. There are various types of finishes available, such as lacquer, polyurethane, or wax. Choose a finish that is suitable for your specific type of veneer and apply it according to the manufacturer’s instructions. The finish will create a barrier that repels water and prevents it from seeping into the wood.
2. Avoid Excessive Moisture
One of the best ways to prevent water damage is to avoid exposing your wood veneer to excessive moisture. Keep it away from areas with high humidity, such as bathrooms or kitchens, where water spills are more likely to occur. Additionally, use coasters or placemats under glasses and other items that may leave moisture rings on the surface.
3. Wipe up Spills Immediately
If a spill does happen, it’s important to act quickly. Use a clean, dry cloth to wipe up any liquid immediately. Avoid using wet or damp cloths, as they can further saturate the wood and increase the risk of damage. Once the spill is cleaned up, make sure to thoroughly dry the area to prevent any residual moisture from causing harm.
4. Use Protective Pads
When placing objects on your wood veneer, such as vases or decorative items, use protective pads or felt under them. This will help prevent scratches and reduce the risk of water damage from condensation or moisture buildup.
5. Avoid Direct Sunlight
Direct sunlight can fade and discolor wood veneer over time. To prevent this, position your furniture or objects with wood veneer away from windows or use curtains or blinds to filter out the sun’s harmful UV rays.
6. Regular Maintenance
Keeping your wood veneer clean and well-maintained is essential for preventing water damage. Dust regularly with a soft, lint-free cloth or use a vacuum cleaner with a brush attachment to remove any dirt or debris that could potentially trap moisture. Avoid using harsh cleaning products that can strip away the protective finish.
7. Monitor Humidity Levels
Fluctuations in humidity can cause wood veneer to expand and contract, leading to potential water damage. Use a hygrometer to monitor the humidity levels in your home and use a dehumidifier or humidifier to maintain a stable environment if necessary. This will help prevent the wood veneer from absorbing excess moisture.
8. Professional Restoration
If your wood veneer does suffer water damage despite preventative measures, it’s crucial to seek professional restoration services. Attempting DIY repairs can often worsen the damage and result in costly repairs. Professional restorers have the expertise and specialized tools to assess the extent of the damage and restore the wood veneer to its original condition.
In summary, protecting wood veneer from future water damage requires proactive measures such as applying a protective finish, avoiding excessive moisture, wiping up spills immediately, using protective pads, avoiding direct sunlight, regular maintenance, monitoring humidity levels, and seeking professional restoration when needed. By following these prevention tips, you can enjoy the beauty of wood veneer without the worry of water damage.
5. Hiring Professionals: When and Why to Seek Professional Help for Repairing Water Damaged Wood Veneer
Water damage to wood veneer can be a frustrating problem to deal with. Whether it’s caused by a leaky roof, a burst pipe, or a flood, water can quickly ruin the appearance and structural integrity of wood veneer surfaces. While it may be tempting to tackle the repair yourself, there are situations where hiring professionals is the best course of action. In this section, we will explore when and why you should seek professional help for repairing water damaged wood veneer.
1. Extensive Damage
If the water damage to your wood veneer is extensive, it is advisable to hire professionals. Extensive damage may involve warped or buckled veneer, deep stains, or even mold growth. These issues require specialized knowledge and equipment to properly address. Professionals have the expertise to assess the extent of the damage and recommend the most appropriate repair methods.
2. Structural Integrity Concerns
Water damage can compromise the structural integrity of wood veneer. When this happens, it is crucial to seek professional help. Professionals can assess the damage and determine if any structural repairs are necessary. They have the skills and experience to reinforce weakened areas and ensure the wood veneer is stable and safe.
3. Preservation of Aesthetic Appeal
Wood veneer is prized for its beauty and aesthetic appeal. If your water damaged wood veneer is in a highly visible area, such as a tabletop or cabinetry, it is essential to hire professionals to restore its original appearance. Professionals have access to specialized tools and techniques to remove stains, repair discoloration, and match the finish to the surrounding wood.
4. Preventing Future Damage
Repairing water damaged wood veneer is not just about restoring its current state, but also preventing future damage. Professionals can identify the underlying causes of the water damage and recommend measures to prevent recurrence. This may involve fixing leaks, improving ventilation, or applying protective coatings to the wood veneer surface.
5. Saving Time and Effort
Repairing water damaged wood veneer can be a time-consuming and labor-intensive task, especially for those without experience. Hiring professionals can save you time and effort, as they have the necessary skills and tools to complete the job efficiently. They can also ensure that the repair is done correctly, minimizing the risk of further damage or the need for future repairs.
In summary, hiring professionals for repairing water damaged wood veneer is advisable in situations where the damage is extensive, there are concerns about the structural integrity, the preservation of aesthetic appeal is important, preventing future damage is necessary, or to save time and effort. Professionals have the expertise and resources to assess the damage, perform the necessary repairs, and provide guidance on preventing future issues. By seeking professional help, you can ensure that your water damaged wood veneer is restored to its original beauty and quality.
FAQs
How to repair water damaged wood veneer?
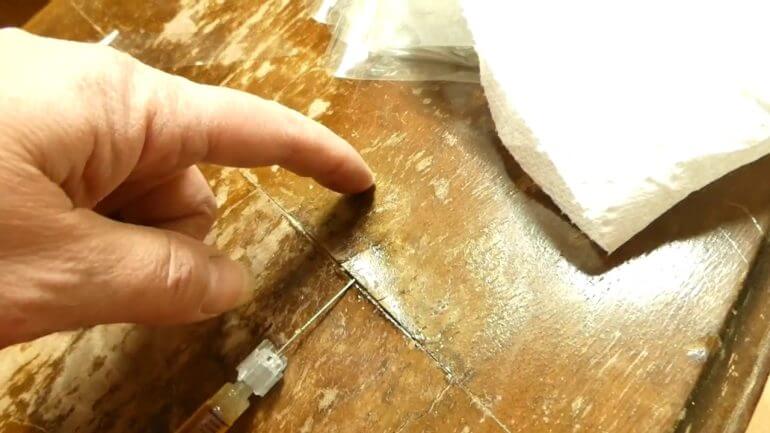
To repair water-damaged wood veneer, start by sanding the damaged area with fine-grit sandpaper until smooth. Then, apply a wood veneer patch using wood glue, and press it firmly into place. Allow the glue to dry, and then sand the patch until it is flush with the surrounding veneer. Finally, stain or paint the repaired area to match the rest of the wood surface.
Conclusion:
In conclusion, repairing water-damaged wood veneer can be a straightforward process if approached with proper care and attention. By following the steps outlined in this guide, you can restore the beauty and functionality of your wood veneer furniture or surfaces.
Remember to start by assessing the extent of the damage and determining if the veneer can be salvaged or needs to be replaced. Clean and dry the affected area thoroughly before applying the appropriate repair method, such as using wood filler or replacing the damaged section.
Lastly, ensure that you protect your wood veneer from future water damage by employing preventive measures, such as using coasters or applying protective finishes.
With patience and the right techniques, you can successfully repair water-damaged wood veneer and enjoy its natural beauty for years to come.
