If you have recently painted a wooden surface and want to protect the paint from chipping or fading, sealing the paint is essential. Sealing the paint on wood not only adds a layer of protection but also enhances the longevity and durability of the paint job.
One of the most effective ways to seal paint on wood is by applying a clear coat or varnish. This clear protective layer not only seals the paint but also provides a glossy or satin finish, depending on your preference.

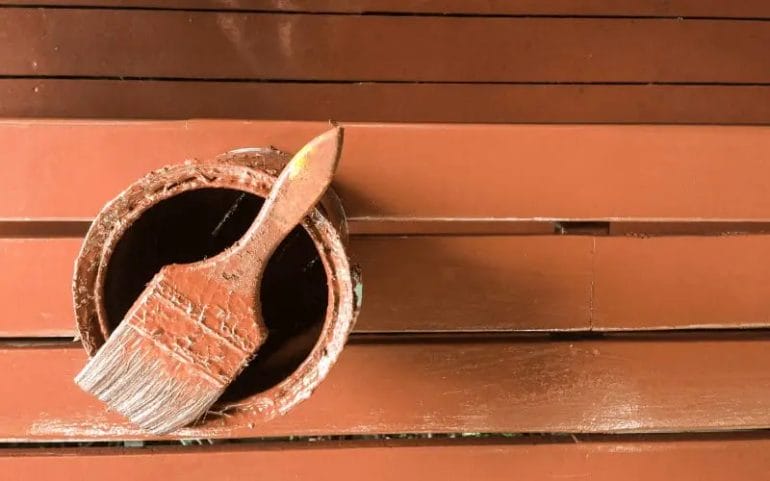
Before sealing the paint, make sure the painted surface is clean and free from any dust or debris. Sanding the surface lightly can also help in creating a smooth base for the sealant.
Using a high-quality paintbrush or a foam brush, apply an even coat of clear coat or varnish over the painted surface. Allow the first coat to dry completely before applying additional coats for added protection.
Once you have applied the desired number of coats, let the sealant dry according to the manufacturer’s instructions. This drying process will ensure that the sealant forms a strong and durable barrier over the painted wood surface.
Sealing the paint on wood is a crucial step in maintaining the appearance and integrity of your painted wooden surfaces. With proper sealing, you can enjoy the beauty of your painted wood for years to come.

Step-by-Step Guide: Sealing Paint on Wood
If you have recently painted a wooden surface and want to protect the paint from damage, sealing it is a crucial step. Sealing paint on wood helps to preserve its color and durability over time. In this guide, we will walk you through the step-by-step process of sealing paint on wood to ensure a long-lasting finish.
Step 1: Prepare the Surface
The first step is to prepare the painted surface for sealing. Make sure the paint is completely dry before you begin. Clean the surface using a mild detergent and water to remove any dirt or debris. If there are any imperfections, such as rough spots or drips, sand them down using fine-grit sandpaper.
Step 2: Choose the Right Sealer
Next, you need to choose the appropriate sealer for your project. There are several types of sealers available, including varnishes, polyurethanes, and lacquers. Consider factors such as the desired finish (matte, satin, or glossy), the level of durability required, and the type of paint you used.
Step 3: Apply the Sealer
Before applying the sealer, ensure you are working in a well-ventilated area. Stir the sealer thoroughly to mix any settled particles. Using a clean brush or foam applicator, apply an even coat of sealer onto the painted surface. Work in small sections, applying the sealer in long, smooth strokes, following the wood grain.
Step 4: Allow Drying Time
After applying the first coat of sealer, allow it to dry according to the manufacturer’s instructions. This may take a few hours or overnight, depending on the type of sealer used. Avoid touching or placing any objects on the surface while it is drying to prevent marks or damage.
Step 5: Sand and Repeat
Once the first coat is dry, lightly sand the surface using fine-grit sandpaper. This helps to smooth out any imperfections and provides a better surface for the subsequent coats of sealer. Remove any dust or debris with a clean, dry cloth. Repeat the application process by adding additional coats of sealer, following the same technique as before.
Step 6: Cure and Protect
After applying the final coat of sealer, allow it to cure completely. This typically takes a few days or as recommended by the manufacturer. During this curing period, avoid exposing the sealed surface to excessive moisture or heavy objects. Once cured, the sealer will provide a protective barrier against moisture, UV rays, and general wear and tear.
Step 7: Maintenance
To maintain the sealed paint on wood, regularly clean the surface using a mild soap and water solution. Avoid using abrasive cleaners or scrub brushes that may damage the sealer. If the surface becomes dull over time, you can apply a fresh coat of sealer to restore its shine and protection.
By following these step-by-step instructions, you can ensure that the paint on your wood surface is properly sealed, providing long-lasting protection and enhancing its appearance. Enjoy your beautifully sealed painted wood for years to come!
Common Mistakes to Avoid When Sealing Paint on Wood
Sealing paint on wood is an essential step to protect the surface and prolong the lifespan of your painted wood projects. However, if not done correctly, it can lead to undesirable results such as peeling, cracking, or an uneven finish. To ensure a successful sealing process, it’s important to be aware of common mistakes and avoid them. In this section, we will discuss some of the most common mistakes people make when sealing paint on wood and provide tips on how to prevent them.
1. Not Preparing the Surface Adequately
One of the biggest mistakes people make when sealing paint on wood is failing to prepare the surface properly. Before applying any sealant, it’s crucial to ensure that the painted surface is clean, dry, and free from any dust, dirt, or grease. Start by removing any loose paint or debris using a scraper or sandpaper. Then, clean the surface thoroughly using a mild detergent and water solution. Allow it to dry completely before proceeding with the sealing process. By neglecting this preparation step, you risk poor adhesion of the sealant and the paint not being properly protected.
2. Choosing the Wrong Type of Sealant
Another common mistake is using the wrong type of sealant for the painted wood surface. There are various types of sealants available, such as polyurethane, varnish, lacquer, or wax. Each type has its own characteristics and is suitable for different applications. It’s important to choose a sealant that is compatible with the type of paint you have used and the level of durability required. For example, if you have used water-based paint, opt for a water-based sealant to avoid any compatibility issues. Always read the instructions and consult with an expert if you’re unsure about the right sealant for your project.
3. Applying Too Many or Too Few Coats
Applying an incorrect number of sealant coats is another mistake to avoid. Applying too many coats can result in a thick, uneven finish that can crack or peel over time. On the other hand, applying too few coats may not provide adequate protection against moisture, UV rays, or wear and tear. It’s important to follow the manufacturer’s instructions regarding the number of coats recommended for the specific sealant you are using. Typically, two to three thin coats are sufficient for most applications. Apply each coat evenly and allow proper drying time between coats for optimal results.
4. Rushing the Drying Time
Patience is key when it comes to sealing paint on wood. Rushing the drying time can lead to issues such as uneven drying, bubbling, or a sticky finish. It’s essential to allow each coat of sealant to dry thoroughly before applying the next coat or using the sealed surface. Follow the recommended drying time mentioned on the sealant product label and avoid exposing the freshly sealed surface to excessive heat or moisture during the drying process. Taking the time to allow proper drying will ensure a smooth, durable finish.
5. Neglecting Maintenance and Reapplication
Once the paint on wood is sealed, it’s important to regularly maintain and reapply the sealant as needed. Neglecting this step can result in the sealant wearing off over time, leaving the painted surface vulnerable to damage. Keep an eye for any signs of wear or deterioration, such as peeling or discoloration, and take prompt action to address them. Regularly clean the sealed surface using a mild detergent and water solution, and apply a fresh coat of sealant as recommended by the manufacturer to ensure ongoing protection.
In summary, avoiding these common mistakes when sealing paint on wood can help you achieve a professional-looking, long-lasting finish for your painted wood projects. Remember to adequately prepare the surface, choose the right type of sealant, apply the correct number of coats, allow sufficient drying time, and maintain and reapply the sealant as needed. By following these tips, you can ensure that your painted wood surfaces are well-protected and maintain their beauty for years to come.

Benefits of Sealing Paint on Wood
When it comes to painting wood surfaces, one important step that is often overlooked is sealing the paint. Sealing paint on wood provides several benefits that can enhance the longevity and appearance of the painted surface. In this section, we will explore some of the key advantages of sealing paint on wood.
1. Protection against Moisture
Wood is a porous material that can easily absorb moisture. When paint is applied to bare wood, there is a risk of water seeping into the wood fibers, which can lead to warping, swelling, and rot over time. By sealing the paint, a protective barrier is created that prevents moisture from penetrating into the wood. This helps to maintain the integrity of the wood and prolong its lifespan.
2. Enhanced Durability
Sealing paint on wood adds an extra layer of protection that can increase its durability. The sealant acts as a shield, preventing the paint from chipping, cracking, or peeling. This is especially important for wood surfaces that are exposed to harsh weather conditions or high levels of traffic. By sealing the paint, you can ensure that it remains intact and retains its vibrant color for longer periods of time.
3. Improved Resistance to Stains
Painted wood surfaces are prone to staining, particularly when exposed to substances such as oil, grease, or water-based liquids. Sealing the paint creates a barrier that makes it easier to clean and prevents the absorption of stains. This is particularly advantageous in areas such as kitchens or bathrooms where spills and splatters are common. Regular cleaning becomes easier, and the painted wood maintains its aesthetic appeal.
4. UV Protection
Exposure to sunlight can cause paint to fade and lose its vibrancy over time. Sealing the paint on wood helps to protect it from the damaging effects of UV rays. The sealant acts as a barrier, reflecting UV light and preventing it from penetrating the paint layer. This helps to maintain the color integrity of the paint and prevents it from becoming dull or discolored due to sun exposure.
5. Easy Maintenance
One of the major benefits of sealing paint on wood is its ease of maintenance. Sealed paint surfaces are less likely to accumulate dust, dirt, or grime. Any dirt or stains can be easily wiped away with a damp cloth, making it convenient to keep the painted wood looking clean and fresh. Additionally, the sealant helps to prevent the growth of mold or mildew, further reducing the need for extensive cleaning.
6. Aesthetic Appeal
Sealing paint on wood not only provides practical benefits but also enhances the overall aesthetic appeal of the painted surface. The sealant creates a smooth and even finish, enhancing the appearance of the paint. It also helps to bring out the natural grain and texture of the wood, adding depth and character to the painted surface.
In summary, sealing paint on wood offers numerous benefits, including protection against moisture, enhanced durability, improved resistance to stains, UV protection, easy maintenance, and enhanced aesthetic appeal. By taking the time to seal the paint, you can ensure that your painted wood surfaces maintain their beauty and longevity for years to come.
Tips for Maintaining Sealed Paint on Wood Surfaces
Painting wood surfaces can give them a fresh and vibrant look, but it’s essential to properly maintain the sealed paint to ensure its longevity. Whether it’s a wooden fence, deck, or furniture, following these tips will help preserve the beauty and protect the paint from damage.
Clean Regularly
Regular cleaning is crucial for maintaining sealed paint on wood surfaces. Dust, dirt, and grime can accumulate over time, leading to a dull and dirty appearance. Use a soft-bristled brush or a cloth to remove surface debris. For tougher stains, mild soap or a gentle wood cleaner can be used. Avoid using harsh chemicals or abrasive scrubbers as they can damage the paint.
Avoid Moisture Exposure
Moisture is the enemy of sealed paint on wood surfaces, as it can lead to mold, mildew, and paint deterioration. Protect your painted wood from excessive moisture by keeping it away from sprinklers, water sources, and areas prone to high humidity. If the wood does get wet, promptly dry it using a clean cloth or allow it to air dry.
Inspect for Damage
Regularly inspect the painted wood surfaces for any signs of damage. Look for cracks, peeling, or chipping paint. If you notice any issues, address them promptly to prevent further damage. Sand down the affected area and apply touch-up paint to maintain a seamless look. It’s important to fix any damage as soon as possible to prevent water penetration and subsequent wood rot.
Protect from Sun Exposure
Direct sunlight can cause the paint on wood surfaces to fade and deteriorate over time. To protect your painted wood, consider providing shade or using protective coverings, such as awnings or umbrellas. Additionally, applying a quality UV-resistant sealer or topcoat can help prolong the life of the paint by blocking harmful UV rays.
Avoid Scratching or Abrasion
Prevent scratches and abrasions on painted wood surfaces by using proper care and handling techniques. Avoid dragging heavy objects directly on the surface and use furniture pads or felt protectors under furniture legs. Regularly check for any signs of wear and tear, and touch up the paint as needed.
Reapply Sealant as Needed
Over time, the protective sealant on painted wood surfaces may wear off. To maintain the integrity of the paint, regularly inspect the wood for any signs of diminished sealant. Depending on the exposure and use, you may need to reapply sealant every few years. Follow the manufacturer’s instructions for the specific sealant product you choose.
Store Properly during Winter
If you live in an area with harsh winters, it’s important to store outdoor painted wood surfaces properly to prevent damage. Clean the surfaces thoroughly, allow them to dry, and apply a protective coat of sealant before storing. Store the items in a dry and climate-controlled area to prevent moisture damage.
Summary
Maintaining sealed paint on wood surfaces requires regular cleaning, protection from moisture and sunlight, prompt repairs, and reapplication of sealant. By following these tips, you can keep your painted wood surfaces looking beautiful and well-maintained for years to come.
FAQs
How do I seal paint on wood?
To seal paint on wood, follow these steps:
1. Make sure the paint is completely dry.
2. Use a clear sealant or varnish specifically made for wood.
3. Apply the sealant evenly using a brush or roller.
4. Allow the sealant to dry completely according to the instructions.
5. Apply a second coat if desired.
6. Let the sealant cure fully before using or touching the painted surface.
Conclusion:
In conclusion, sealing paint on wood is a crucial step to protect and preserve your project. Whether it’s a furniture piece, a wooden deck, or a DIY craft, sealing the paint provides a durable and long-lasting finish, preventing it from chipping, fading, or peeling over time.
By applying a suitable sealant, you can enhance the appearance of the painted wood and ensure its longevity. Additionally, sealing the paint on wood helps to resist moisture, UV rays, and other environmental factors that could potentially damage the surface.
Remember to properly prepare the wood surface before sealing, ensuring it is clean and smooth. Choose a high-quality sealant that is compatible with your paint type for the best results. With the right technique and products, you can achieve a beautifully sealed and protected painted wood surface that will stand the test of time.
