If you’re looking to protect and enhance the beauty of your wood furniture, sealing it is a crucial step.
Sealing wood furniture helps to prevent moisture damage, stains, and fading, extending its lifespan and maintaining its appearance over time.

Whether you have a new piece of furniture or want to refurbish an old one, sealing it will provide an effective barrier against everyday wear and tear.
There are different methods to seal wood furniture, including using varnish, lacquer, or polyurethane. Each option has its own benefits and considerations, so it’s important to choose the right one based on your needs and preferences.
By understanding how to seal wood furniture properly, you can ensure that it remains in excellent condition and continues to be a beautiful addition to your home for years to come.
Step-by-Step Guide: Preparing Wood Furniture for Sealing
When it comes to preserving and protecting your wood furniture, sealing is an essential step. Properly preparing the wood before sealing ensures that the sealant adheres well and provides long-lasting protection. In this section, we will provide you with a step-by-step guide on how to prepare your wood furniture for sealing.
1. Clean the Surface
The first step in preparing wood furniture for sealing is to clean the surface thoroughly. Use a mild detergent mixed with warm water to remove any dirt, grime, or grease. Scrub the surface gently using a soft brush or sponge. Rinse off the soap residue with clean water and allow the furniture to dry completely.
2. Sand the Wood
After the furniture has dried, it’s time to sand the wood. Sanding helps to smooth out any rough or uneven surfaces and also removes any existing finish or sealant. Start with a coarse-grit sandpaper (around 80-100 grit) to remove the old finish. Then, switch to a finer-grit sandpaper (around 120-150 grit) to achieve a smoother surface. Sand in the direction of the wood grain to avoid damaging the surface.
3. Fill in Any Cracks or Gaps
If your wood furniture has any cracks, holes, or gaps, it’s important to fill them in before sealing. Use a wood filler or putty that matches the color of your furniture. Apply the filler to the affected areas and smooth it out with a putty knife. Allow the filler to dry completely according to the manufacturer’s instructions. Once dry, sand the filled areas lightly to achieve a seamless finish.
4. Remove Dust
Before applying the sealant, make sure to remove any dust or debris from the sanded surface. Use a clean, dry cloth or a tack cloth to wipe away the dust. This step is crucial to ensure a smooth and flawless application of the sealant.
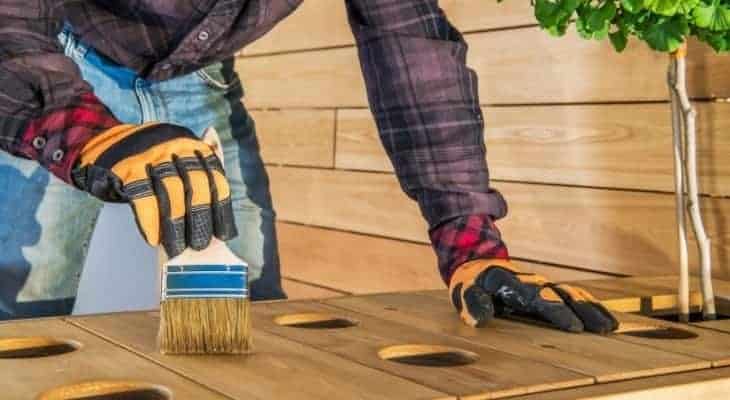
5. Apply the Sealant
Now it’s time to apply the sealant to your wood furniture. Choose a high-quality wood sealant that is suitable for the type of wood you are working with. Use a brush or a clean cloth to apply an even coat of the sealant, following the direction of the wood grain. Allow the first coat to dry according to the manufacturer’s instructions, and then apply additional coats as needed for optimal protection.
6. Let the Furniture Cure
After applying the sealant, it’s important to let the furniture cure properly. This typically involves allowing the sealant to dry and harden for at least 24 hours. Keep the furniture in a well-ventilated area during this time to ensure proper curing.
7. Optional: Apply a Topcoat
If desired, you can apply a topcoat to further enhance the durability and appearance of your sealed wood furniture. A clear polyurethane topcoat provides an extra layer of protection against scratches and stains. Apply the topcoat following the manufacturer’s instructions, and allow it to dry completely before using the furniture.
In summary, preparing your wood furniture for sealing is a crucial step in ensuring its longevity and protection. By following this step-by-step guide, you can effectively clean, sand, fill, and seal your furniture to maintain its beauty and integrity for years to come.

Best Practices for Applying Wood Furniture Sealer: Tips and Tricks
When it comes to preserving and enhancing the beauty of your wood furniture, applying a wood furniture sealer is essential. A wood furniture sealer acts as a protective layer, shielding your furniture from moisture, stains, and other damage. To ensure the best results, it’s important to follow some best practices for applying wood furniture sealer. In this section, we will discuss some tips and tricks that will help you achieve a professional finish.
1. Prepare the Surface
Before applying any sealer, it’s crucial to properly prepare the surface of your wood furniture. Start by cleaning the furniture thoroughly to remove any dust, dirt, or grease using a mild detergent and water. Once the surface is clean, use fine-grit sandpaper to smooth out any rough spots or imperfections. This will create a smooth and even surface for the sealer to adhere to.
2. Choose the Right Sealer
There are different types of wood furniture sealers available in the market, such as oil-based sealers, water-based sealers, and polyurethane sealers. Each type has its own advantages and characteristics. Consider factors like durability, ease of application, and the desired finish when choosing the right sealer for your furniture. It’s always a good idea to test the sealer on a small, inconspicuous area of the furniture before applying it to the entire piece.
3. Apply Thin and Even Coats
When applying the sealer, it’s important to remember that less is more. Instead of applying a thick coat, it’s better to apply thin and even coats. This allows the sealer to penetrate the wood and ensures a smoother finish. Use a brush or a lint-free cloth to apply the sealer in the direction of the wood grain. Avoid excessive brushing or rubbing, as it can cause the sealer to bubble or streak. Allow each coat to dry completely before applying the next one.
4. Sand between Coats
After each coat of sealer has dried, lightly sand the surface with fine-grit sandpaper. This helps to smooth out any imperfections or bubbles and improves the adhesion of subsequent coats. Be careful not to sand too vigorously, as it can remove the sealer. Wipe away the sanding dust with a clean cloth before applying the next coat.
5. Follow Proper Drying and Curing Time
Proper drying and curing time is crucial for achieving a durable and long-lasting finish. Follow the manufacturer’s instructions regarding the drying and curing time for the specific sealer you are using. Avoid placing any objects or using the furniture before it has fully cured, as it can lead to imprints or damage to the surface.
6. Maintain Regular Maintenance
Once the sealer has fully cured, it’s important to maintain regular maintenance to keep your wood furniture looking its best. Clean the furniture regularly with a soft cloth to remove any dust or debris. Avoid using harsh chemicals or abrasive cleaners, as they can damage the sealer. Additionally, consider applying a fresh coat of sealer every few years to ensure ongoing protection.
By following these best practices for applying wood furniture sealer, you can enhance the beauty of your wood furniture and protect it for years to come. Remember to always read and follow the instructions provided by the manufacturer for the specific sealer you are using. With proper preparation, application, and maintenance, your wood furniture will stay looking beautiful and withstand the test of time.

How to Achieve a Smooth and Long-Lasting Seal on Your Wood Furniture
When it comes to woodworking, achieving a smooth and long-lasting seal on your wood furniture is essential. Not only does it enhance the beauty of the piece, but it also protects the wood from moisture, stains, and other damage. In this section, we will discuss some expert tips and techniques to help you achieve a flawless seal on your wood furniture.
1. Prepare the Surface
Before applying any sealant, it is important to prepare the surface of the wood. Start by sanding the furniture with progressively finer grit sandpaper to smooth out any imperfections or rough spots. This will create a smooth surface for the sealant to adhere to and ensure better coverage.
2. Choose the Right Sealant
There are various types of sealants available, such as polyurethane, varnish, lacquer, and shellac. Each has its own advantages and disadvantages, so it is important to choose the right one for your specific needs. Consider factors like durability, ease of application, and the desired finish before selecting a sealant.
3. Test in an Inconspicuous Area
Before applying the sealant to the entire piece of furniture, it is a good idea to test it in a small, inconspicuous area. This will allow you to see how the sealant interacts with the wood and ensure that you are satisfied with the final result.
4. Apply Multiple Coats
To achieve a smooth and long-lasting seal, it is recommended to apply multiple thin coats of sealant rather than a single thick coat. This allows each layer to dry and cure properly, resulting in a stronger and more durable finish. Be sure to lightly sand between each coat to remove any imperfections.
5. Use a Quality Brush or Applicator
The tool you use to apply the sealant can greatly affect the final result. It is important to use a high-quality brush or applicator that is appropriate for the type of sealant you are using. This will ensure an even and smooth application, minimizing the chances of brush marks or uneven coverage.
6. Follow the Manufacturer’s Instructions
Always refer to the manufacturer’s instructions for the specific sealant you are using. Different sealants have different application and drying times, so it is important to follow the guidelines provided to achieve the best results.
7. Allow Sufficient Drying Time
After applying the final coat of sealant, it is crucial to allow sufficient drying time before using or handling the furniture. This will ensure that the sealant has fully cured and hardened, providing maximum protection and durability.
8. Maintain and Refresh the Seal
Over time, the seal on your wood furniture may start to wear off or show signs of damage. To maintain the integrity of the seal, it is important to regularly clean and refresh it. This can be done by gently cleaning the surface and applying a thin coat of the same sealant. This will help protect the wood and keep it looking beautiful for years to come.
In summary, achieving a smooth and long-lasting seal on your wood furniture requires proper preparation, choosing the right sealant, applying multiple coats, using quality tools, following instructions, allowing sufficient drying time, and maintaining the seal over time. By following these expert tips and techniques, you can ensure that your wood furniture remains protected and beautiful for years to come.
5. Maintenance Tips: Extending the Lifespan of Your Sealed Wood Furniture
Sealed wood furniture adds warmth and elegance to any space. Whether you have a dining table, coffee table, or cabinets, proper maintenance is key to preserving their beauty and extending their lifespan. In this section, we will provide you with some essential maintenance tips to keep your sealed wood furniture looking its best for years to come.
1. Regular Dusting
Dusting your sealed wood furniture regularly is the first step in maintaining its beauty. Use a soft, lint-free cloth or a feather duster to gently remove dust and debris from the surface. Avoid using abrasive materials or harsh chemicals as they can damage the sealant.
2. Cleaning Spills Immediately
Accidental spills are bound to happen, but it’s important to clean them up promptly to prevent any damage to the wood. Use a soft cloth or paper towel to blot the spill gently. Avoid rubbing the surface vigorously as it can cause the stain to spread. If needed, you can dampen the cloth slightly with water or a mild wood cleaner specifically formulated for sealed wood furniture.
3. Avoid Excessive Moisture
Wood is sensitive to moisture, so it’s essential to avoid excessive exposure to water or liquid. Be cautious while placing drinks, flower vases, or any other items that may contain liquid on the surface of your sealed wood furniture. Always use coasters and placemats to protect the wood from moisture and heat.
4. Use Protective Pads
To prevent scratches and dents, it’s recommended to use protective pads or felt under items that come into direct contact with the sealed wood furniture. For example, place felt pads under chair legs, vases, or decorative objects. This will help distribute the weight evenly and protect the surface from damage.
5. Avoid Direct Sunlight
Direct sunlight can cause the wood to fade and lose its luster over time. To protect your sealed wood furniture from sun damage, it’s best to position it away from windows or use curtains, blinds, or UV-resistant window film to filter out harmful UV rays. This will help maintain the color and integrity of your furniture.
6. Periodic Sealing
Although sealed wood furniture already has a protective sealant, it’s a good idea to periodically reseal it to ensure its longevity. Consult the manufacturer’s recommendations or seek professional advice on the appropriate sealing products and frequency for your specific furniture.
7. Regular Polishing
Polishing your sealed wood furniture can help restore its shine and remove minor scratches or blemishes. Use a high-quality wood polish or furniture wax recommended for sealed wood surfaces. Apply the polish with a soft cloth following the manufacturer’s instructions, and buff the surface gently for a beautiful, glossy finish.
8. Proper Storage
If you need to store your sealed wood furniture temporarily or during a move, it’s crucial to do so properly. Clean the furniture thoroughly, apply a protective wax coat, and cover it with a breathable fabric or furniture cover. Avoid storing it in damp or humid areas, as moisture can cause warping or mold growth.
By following these maintenance tips, you can protect and prolong the lifespan of your sealed wood furniture. Regular cleaning, avoiding excessive moisture and sunlight, and using protective measures will ensure that your furniture remains in excellent condition for years to come. Remember, prevention and proactive care are the keys to preserving the beauty and durability of your sealed wood furniture.
FAQs
1. How to seal wood furniture?
To seal wood furniture, start by cleaning the surface and sanding it lightly. Next, apply a coat of wood sealant using a brush or cloth, following the direction of the grain. Allow the sealant to dry completely before applying additional coats, if desired. Finally, buff the surface with a soft cloth to achieve a smooth finish.
2. What type of sealant should I use for wood furniture?
The type of sealant you should use for wood furniture depends on the desired outcome. For indoor furniture, polyurethane or varnish provides a durable and glossy finish. For outdoor furniture, choose a sealant specifically designed for exterior use, such as spar varnish or marine-grade sealant, to protect against moisture and UV damage.
3. How many coats of sealant should I apply to wood furniture?
The number of coats of sealant to apply to wood furniture depends on the type of sealant and the desired level of protection. Typically, 2 to 3 coats are recommended, allowing each coat to dry completely before applying the next. However, follow the manufacturer’s instructions for the specific sealant you are using.
Conclusion
In conclusion, knowing how to seal wood furniture is essential for maintaining its beauty and longevity. By following the proper sealing techniques, you can protect your furniture from damage caused by moisture, UV rays, and everyday wear and tear. Whether you choose to use a varnish, lacquer, or oil-based sealer, it is important to prepare the wood surface by sanding it and removing any dirt or residue. Applying multiple thin coats of the sealer and allowing ample drying time between coats will ensure a smooth and durable finish. Regular maintenance, such as dusting and using furniture wax, will also help to prolong the life of your sealed wood furniture. So go ahead, seal your wood furniture and enjoy its beauty for years to come!