Attaching leather to wood can be a great way to add a touch of elegance and sophistication to your furniture or crafts. Whether you’re working on a DIY project or repairing an existing piece, knowing how to properly attach leather to wood is essential. In this guide, we’ll explore different methods such as using adhesive, upholstery nails, or stitching techniques to secure the leather to the wood surface. Read on to discover the step-by-step process and tips for a successful leather-to-wood attachment.
Preparing the Surfaces for Leather Attachment on Wood
When it comes to attaching leather to wood, proper surface preparation is essential to ensure a strong and durable bond. Whether you’re creating a leather-wrapped handle for a wooden tool or upholstering a wooden chair, following these steps will help you achieve the best results:

Clean the Wood Surface
Start by cleaning the wood surface thoroughly to remove any dust, dirt, or grease that may hinder the adhesive’s effectiveness. Use a mild detergent or wood cleaner and a soft cloth to gently wipe down the wood, ensuring that it is completely clean and dry before proceeding.
Sand the Wood
Next, sand the wood surface to create a rough texture that will enhance the adhesion of the leather. Use medium-grit sandpaper and sand in the direction of the wood grain, applying even pressure. Be sure to sand all areas where the leather will be attached, including any curved or rounded edges.
After sanding, remove any dust or debris by wiping the wood surface with a clean cloth or using a vacuum with a brush attachment.
Apply a Wood Primer
Applying a wood primer can further improve the bond between the wood and leather. Choose a primer that is suitable for the type of wood you are working with and follow the manufacturer’s instructions for application. Allow the primer to dry completely before moving on to the next step.
Condition the Leather
Before attaching the leather to the wood, it’s important to condition the leather to ensure its flexibility and longevity. Apply a leather conditioner or a combination of beeswax and neatsfoot oil to the leather, following the product instructions. This will help prevent the leather from drying out and cracking over time.
Apply Leather Adhesive
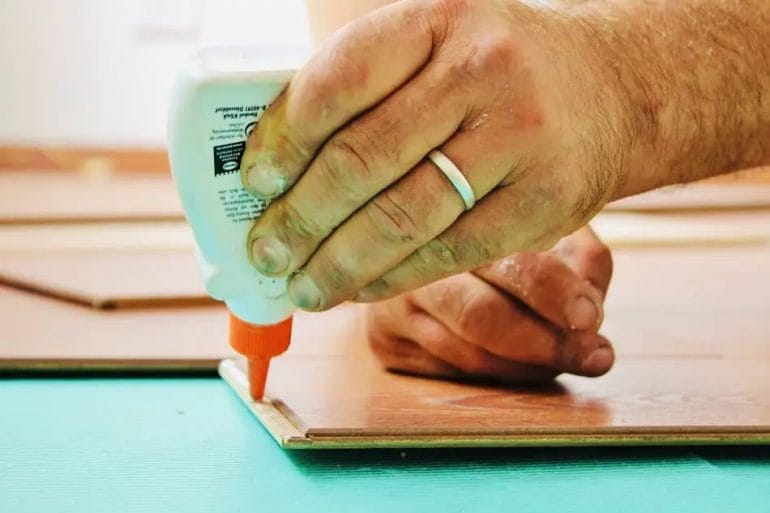
Once the wood surface is prepped and the leather is conditioned, it’s time to apply the adhesive. Choose a high-quality adhesive specifically designed for bonding leather to wood. Apply a thin, even layer of adhesive to both the wood and the back of the leather, using a small brush or a sponge applicator.
Allow the adhesive to become tacky according to the manufacturer’s instructions, usually for a few minutes. Then carefully press the leather onto the wood, ensuring proper alignment and smooth application. Apply gentle, even pressure to help the adhesive bond securely.
Trim Excess Leather
After the adhesive has dried completely, trim any excess leather using sharp scissors or a utility knife. Be careful not to cut into the wood surface while trimming. Take your time and make precise cuts to achieve a clean and professional-looking finish.
In summary, preparing the surfaces for leather attachment on wood involves cleaning the wood surface, sanding it to create a rough texture, applying a wood primer, conditioning the leather, applying a leather adhesive, and trimming any excess leather. By following these steps, you can ensure a strong and durable bond between the leather and wood, resulting in a professional and long-lasting finished product.
Step-by-Step Guide: Attaching Leather to Wood
Attaching leather to wood can be a useful skill for various DIY projects and furniture upholstery. Whether you want to restore an old chair or create a custom headboard, knowing how to properly attach leather to wood is essential. In this step-by-step guide, we will walk you through the process of attaching leather to wood, ensuring a secure and professional-looking result.
Step 1: Gather the Materials
Before you begin, gather all the necessary materials. You will need:
- Leather piece
- Wood surface
- Measuring tape
- Utility knife or scissors
- Adhesive suitable for leather and wood
- Clamps or weights
Step 2: Prepare the Surfaces
Start by preparing both the leather piece and the wood surface. Measure and cut the leather to fit the desired area, leaving a small allowance for trimming later if needed. Clean the wood surface from any dust or debris to ensure proper adhesion.
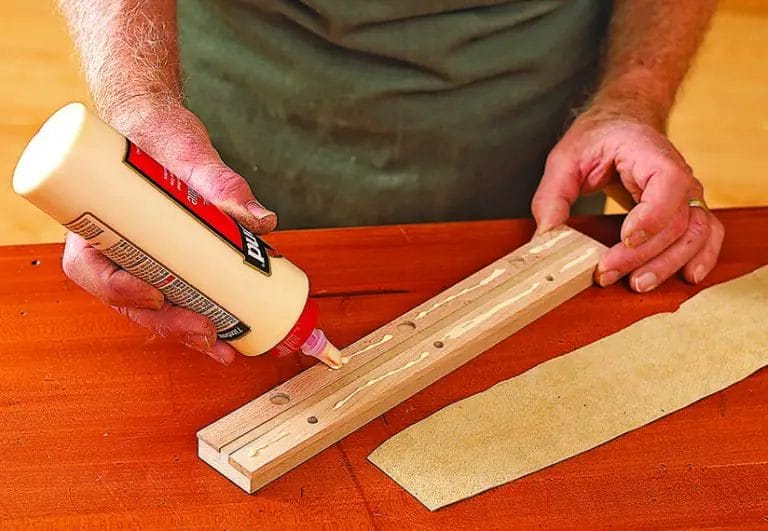
Step 3: Apply Adhesive
Apply a thin and even layer of adhesive to both the leather and the wood surface. Make sure to use an adhesive that is suitable for both materials to ensure a strong bond. Follow the instructions provided by the adhesive manufacturer for the best results.
Step 4: Press and Secure
Once the adhesive is applied, carefully align the leather piece with the wood surface. Press down firmly to ensure good contact between the two. Use clamps or place weights on top of the leather to apply even pressure and help the adhesive bond properly.
Step 5: Allow to Dry
Allow the adhesive to dry completely according to the manufacturer’s instructions. This may take several hours or overnight, depending on the type of adhesive used. Avoid disturbing or moving the leather piece during the drying process to prevent any shifting or loosening.
Step 6: Trim Excess Leather
Once the adhesive is fully dried, carefully trim any excess leather using a utility knife or scissors. Take your time and make precise cuts to achieve a clean and professional-looking edge.
Step 7: Finishing Touches
After trimming, inspect the attached leather and wood surface for any imperfections or loose edges. If needed, apply a leather conditioner or sealant to enhance the appearance and durability of the leather.
Summary
Attaching leather to wood can be a rewarding DIY project, allowing you to add a touch of elegance and sophistication to your furniture and decor. By following this step-by-step guide and using the right materials, you can achieve a secure and visually pleasing result. Remember to take your time, follow the instructions provided by the adhesive manufacturer, and make precise cuts for a professional finish. With practice and attention to detail, you can master the skill of attaching leather to wood and create stunning pieces.
Tips for a Secure and Long-lasting Leather to Wood Attachment
When it comes to joining leather to wood, finding the right method of attachment is crucial to ensure a secure and long-lasting bond. Whether you’re working on a leather furniture project or a decorative item, here are some tips to help you achieve a strong and durable connection:
1. Choose the Right Adhesive
The first step in achieving a secure leather to wood attachment is selecting the appropriate adhesive. There are various options available, including contact cement, epoxy, and wood glue. Consider the type of leather and wood you are working with, as well as the desired flexibility and strength of the bond. Research the different adhesives and their compatibility with leather and wood to make an informed decision.
2. Prepare the Surfaces
Before applying the adhesive, it is essential to prepare the surfaces properly. Start by cleaning both the leather and wood to remove any dirt, dust, or oils that may hinder the bond. Use a mild detergent and a soft cloth to gently clean the leather, and sand the wood surface to ensure it is smooth and free from any rough edges or splinters. This will create a clean and conducive surface for the adhesive to adhere to.
3. Apply the Adhesive
Follow the instructions provided with the chosen adhesive and apply it to both the leather and wood surfaces. Use a brush or a small applicator to spread an even layer of adhesive, ensuring full coverage. It is crucial to apply the adhesive to both surfaces rather than just one to achieve a strong bond. Allow the adhesive to dry or become tacky according to the manufacturer’s instructions before proceeding to the next step.
4. Press and Clamp
Once the adhesive is applied, carefully align the leather and wood surfaces together. Apply pressure evenly across the entire area to ensure a secure bond. You can use your hands or a roller to press down on the surfaces firmly. To achieve an even stronger attachment, consider using clamps or weights to hold the materials together while the adhesive cures. This will prevent any movement or shifting during the drying process.
5. Allow Sufficient Drying Time
Patience is key when it comes to achieving a secure and long-lasting leather to wood attachment. Allow the adhesive to dry completely according to the manufacturer’s instructions. This may take a few hours or overnight, depending on the type of adhesive used. Avoid subjecting the attached leather and wood to any stress or pulling until the adhesive has fully cured to ensure a strong and durable bond.
6. Maintain and Protect
Once the leather and wood are securely attached, it is important to maintain and protect the bond to prolong its lifespan. Avoid exposing the attachment to excessive moisture or extreme temperature changes, as this can weaken the adhesive over time. Regularly clean and condition the leather to prevent drying or cracking, and periodically inspect the attachment to identify any signs of wear or damage that may require repair.
In summary, achieving a secure and long-lasting leather to wood attachment requires careful consideration of the adhesive, proper surface preparation, and the application of pressure during bonding. By following these tips and taking necessary maintenance measures, you can ensure a durable and aesthetically pleasing connection between leather and wood.
Alternatives to Adhesive for Attaching Leather to Wood
When it comes to attaching leather to wood, adhesive is the most commonly used method. However, there are alternative techniques that can be just as effective, if not more. These alternatives provide different options for those who may have concerns about using adhesive, or simply want to explore other options for attaching leather to wood. In this section, we will discuss a few of these alternatives.
1. Leather Lacing
Leather lacing is a traditional method of attaching leather to wood that has been used for centuries. It involves sewing the leather to the wood using a series of holes and a strong, durable lacing material such as waxed thread or rawhide lace. This method not only securely fastens the leather to the wood but also adds a decorative touch to the overall design.
To use leather lacing, first, determine the placement of the leather on the wood surface and mark the holes accordingly. Then, using an awl or a leather punch, create evenly spaced holes along the edges of the leather and corresponding holes on the wood. Next, thread the lacing material through the holes, pulling it tight to ensure a secure attachment. Finally, tie off the ends of the lacing and trim any excess.
2. Rivets
Rivets offer a sturdy and durable alternative to adhesive for attaching leather to wood. They are small metal fasteners that are inserted through holes in both the leather and the wood, and then secured by flattening the exposed end of the rivet. This method provides a clean and professional look while ensuring a strong bond between the leather and the wood.
To attach leather to wood using rivets, start by marking the desired placement of the leather on the wood. Then, using a leather punch or a small drill bit, create holes in the leather and corresponding holes in the wood. Insert the rivets through the holes, making sure they are aligned properly. Using a rivet setter or a hammer, flatten the exposed end of the rivet to secure it in place. Repeat this process for each rivet until the leather is securely attached to the wood.
3. Stitching
Stitching is another popular method for attaching leather to wood without the use of adhesive. This method involves using a needle and thread to sew the leather directly onto the wood surface. It provides a strong and secure attachment that can withstand regular use and movement.
To stitch leather to wood, start by marking the desired placement of the leather on the wood. Then, using an awl or a leather punch, create evenly spaced holes along the edges of the leather and corresponding holes on the wood. Thread a needle with a strong and durable thread, such as waxed thread or nylon, and begin stitching the leather to the wood. Make sure to pull the thread tight with each stitch to ensure a secure attachment. Once you have stitched all the way around the leather, tie off the thread and trim any excess.
4. Velcro
If you are looking for a removable option for attaching leather to wood, Velcro can be a viable alternative to adhesive. Velcro consists of two components: a hook side and a loop side. The hook side can be attached to the wood, while the loop side can be sewn onto the leather. This allows for easy attachment and detachment of the leather to the wood.
To use Velcro for attaching leather to wood, start by determining the placement of the leather on the wood surface. Cut the loop side of the Velcro to the desired size and sew it onto the backside of the leather. Then, cut the hook side of the Velcro to the corresponding size and attach it to the wood surface. Press the two sides of the Velcro together to securely attach the leather to the wood, and easily detach it when needed.
5. Clamps
Clamps can be a temporary solution for attaching leather to wood. While they may not offer a permanent bond, they can be useful for holding the leather in place during certain projects or for temporary applications. Clamps come in various sizes and styles, allowing for flexibility depending on the size and thickness of the leather and wood.
To use clamps for attaching leather to wood, first, determine the placement of the leather on the wood. Place the leather in position and use clamps to hold it securely in place. Make sure to evenly distribute the clamping pressure to avoid distorting the leather or damaging the wood. Once the leather is securely held by the clamps, you can proceed with your project or application.
In summary, while adhesive is the most common method
FAQs
Question 1: How do I attach leather to wood?
To attach leather to wood, you can use adhesive glue specifically designed for bonding leather and wood. Apply the glue evenly on both surfaces and press them together firmly. You can also use leather rivets or stitching for a more secure attachment. Make sure to follow the instructions provided by the adhesive manufacturer for the best results.
Question 2: Can I use nails or screws to attach leather to wood?
Using nails or screws to attach leather to wood is not recommended as it can damage the leather and create unsightly holes. It is best to use adhesive glue, leather rivets, or stitching to ensure a secure and professional attachment.
Question 3: How do I ensure a strong bond between leather and wood?
To ensure a strong bond between leather and wood, make sure both surfaces are clean and free from dust and grease. Apply the adhesive glue evenly and press the surfaces together firmly. Allow sufficient time for the glue to dry and cure according to the manufacturer’s instructions. Using additional reinforcement methods such as leather rivets or stitching can also enhance the strength of the attachment.
Conclusion
In conclusion, attaching leather to wood is a straightforward process that can add a touch of elegance and sophistication to any furniture or accessory. By following the steps mentioned in this guide, you can ensure a strong and durable bond between the two materials. Whether you are working on a DIY project or repairing a piece of furniture, the right adhesive and proper techniques are essential for a successful attachment. Remember to clean and prepare the surfaces, apply the adhesive evenly, and allow sufficient drying time. Don’t forget to use clamps or weights to ensure a tight connection. With a little patience and attention to detail, you can achieve professional-looking results and enjoy the unique combination of wood and leather in your creations.