If you’re looking to make a wooden drawer slide easily, you’ve come to the right place. In this guide, we’ll walk you through the step-by-step process of creating a functional and smooth wooden drawer slide. Whether you’re a DIY enthusiast or a woodworking beginner, these simple tips and techniques will help you achieve the perfect sliding drawer for your furniture project. Let’s get started!
First, you’ll need to gather the necessary materials and tools. This may include wood boards, screws, a saw, a drill, sandpaper, and a measuring tape. Having these items on hand will make the process smoother and more efficient.

Next, measure and cut the wooden boards to the appropriate size for your drawer. Ensure that they are precisely measured and evenly cut to ensure a seamless sliding motion. Sand the edges and surfaces of the boards to create a smooth finish.
Once the boards are cut and sanded, it’s time to assemble the drawer slide. Use a drill and screws to attach the sides of the drawer to the base. Make sure the joints are secure and sturdy, as this will determine the overall stability of the drawer slide.
After assembling the slide, test it by sliding the drawer in and out. Make any necessary adjustments to ensure that the motion is smooth and effortless. You may need to sand or lubricate the wooden surfaces to achieve the desired result.
Finally, once you’re
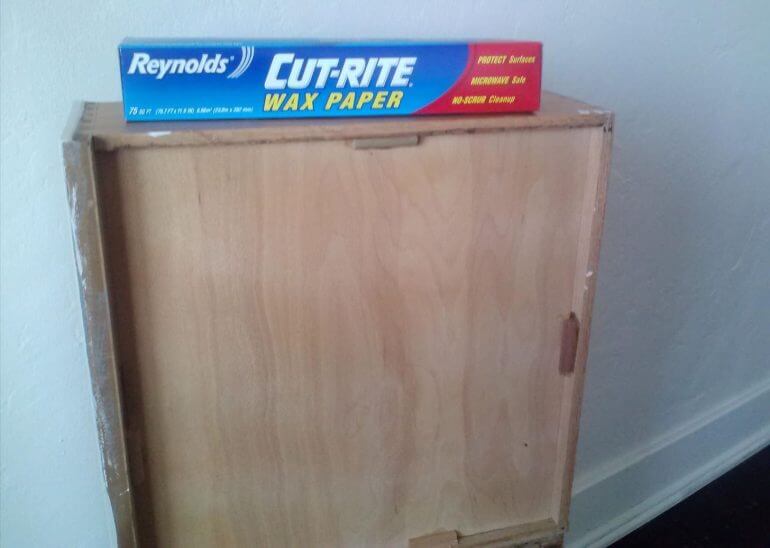
Measuring and Cutting the Wooden Slides
When it comes to building furniture or DIY projects, one of the key steps is measuring and cutting the wooden slides. These slides are essential for smooth and seamless movement, whether it’s for drawers, sliding doors, or other moving parts of your project. In this section, we will explore the process of measuring and cutting wooden slides, so you can achieve precise and functional results.
1. Gather the Necessary Tools and Materials
Before you begin, gather all the tools and materials you will need for this task. This includes:
- Wooden boards
- Measuring tape or ruler
- Pencil or marking tool
- Circular saw or table saw
- Clamps
- Sandpaper or a sander
2. Measure the Length and Width
Start by measuring the length and width of the area where you will install the wooden slides. Use a measuring tape or ruler to ensure accurate measurements. Mark the measurements on the wooden board using a pencil or marking tool.
3. Determine the Thickness
The next step is to determine the thickness of the wooden slides. This will depend on the weight and load-bearing capacity required for your specific project. Thicker wooden slides are generally more durable and can support heavier loads. Measure the thickness and mark it on the wooden board.
4. Cut the Wooden Slides
Secure the wooden board to a workbench or sawhorse using clamps to prevent it from moving while cutting. Use a circular saw or table saw to cut along the marked lines. Take your time and ensure straight and precise cuts. Always wear appropriate safety gear, such as goggles and gloves, when operating power tools.
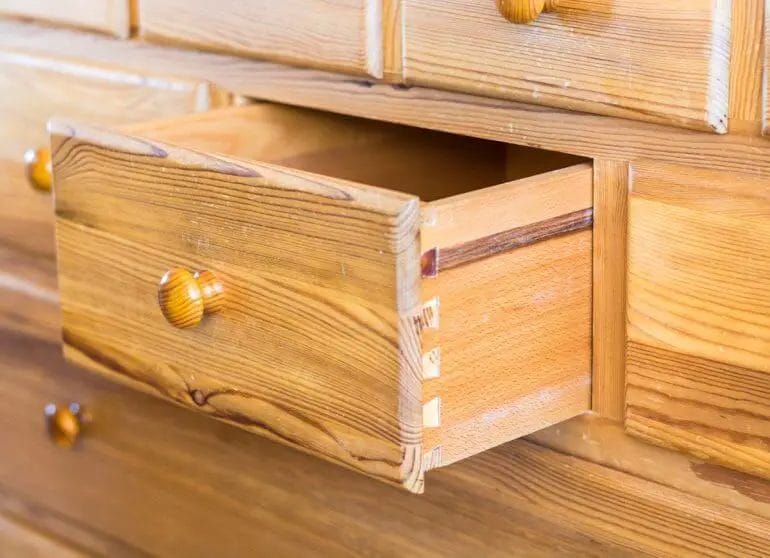
5. Sand and Smooth the Slides
After cutting the wooden slides, use sandpaper or a sander to smooth any rough edges or surfaces. This will ensure that the slides can move smoothly without any friction. Sand in the direction of the wood grain to achieve the best results. Remove any sawdust or debris before proceeding.
6. Test the Fit
Before installing the wooden slides, it’s important to test the fit. Place the slides in the intended location and check if they glide smoothly without any obstructions or sticking. Make any necessary adjustments or refinements if needed.
7. Install the Wooden Slides
Once you are satisfied with the fit, it’s time to install the wooden slides. Use screws or nails to secure the slides in place, ensuring they are aligned properly and level. Double-check the movement to ensure smooth operation.
In summary, measuring and cutting wooden slides is a crucial step in any woodworking or DIY project involving moving parts. By following the steps outlined above, you can achieve precise and functional wooden slides that will enhance the overall functionality and aesthetics of your project.
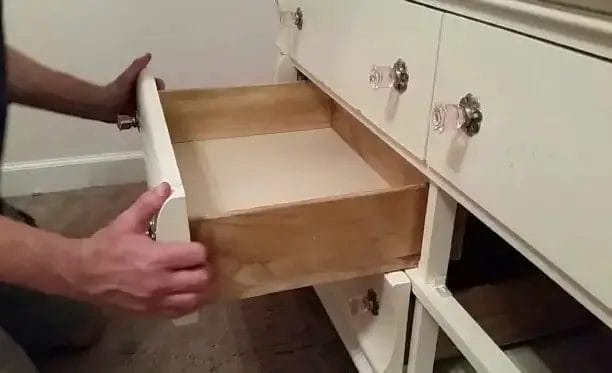
Installing the Drawer Slides in Your Cabinet
Now that you have measured and prepared your cabinet for the drawer slides, it’s time to install them. Follow these steps for a successful installation.
Step 1: Gather the Necessary Tools
Before you begin, make sure you have all the tools you will need:
- Drawer slides
- Screwdriver or drill
- Measuring tape
- Pencil
- Level
- Clamps (optional)
Step 2: Mark the Placement
With your measuring tape and pencil, mark the desired placement of the drawer slides on the inside of the cabinet. Ensure that the marks are level and evenly spaced for each slide.
Step 3: Attach the Drawer Slides
Using your screwdriver or drill, attach the drawer slides to the cabinet sides or runners. Follow the manufacturer’s instructions for the specific type of slides you are using. Usually, this involves aligning the slides with your marked placements and screwing them into place.
For extra stability, you can use clamps to hold the slides in place while attaching them.
Step 4: Install the Drawer Slides on the Drawer
With the cabinet slides securely in place, it’s time to attach the corresponding drawer slides to the sides or bottom of the drawer. Make sure they are aligned with the cabinet slides.
Step 5: Test the Drawer
Once the drawer slides are attached to both the cabinet and the drawer, carefully slide the drawer in and out to test the smoothness of the movement. If there are any issues, such as sticking or misalignment, adjust the slides accordingly.
Use a level to ensure that the drawer is sliding evenly and not tilted.
Step 6: Secure the Drawer Slides
If you are satisfied with the functionality of the drawer slides, secure them in place by tightening any screws or fasteners that may be included with the slides. This will help prevent any movement or shifting over time.
Step 7: Repeat for Additional Drawers
If you have multiple drawers in your cabinet, repeat the installation process for each one, ensuring consistent measurements and alignments.
Step 8: Test and Adjust
After all the slides are installed and secured, test each drawer again to make sure they are sliding smoothly and without any issues. If necessary, make any final adjustments to the slides to ensure optimal functionality.
Step 9: Enjoy Your Newly Installed Drawer Slides
With the drawer slides properly installed, you can now enjoy the convenience of smoothly gliding drawers in your cabinet. Whether it’s in the kitchen, bathroom, or any other space, properly installed drawer slides can greatly enhance the functionality and organization of your cabinets.
Adding Lubrication for Smooth Sliding
One of the key factors in achieving smooth sliding is proper lubrication. Without adequate lubrication, friction between moving parts can cause resistance and hinder the sliding motion. In this section, we will discuss the importance of lubrication and how to effectively add lubrication for smooth sliding.
Importance of Lubrication
Lubrication plays a crucial role in ensuring smooth sliding by reducing friction between surfaces. Friction occurs when two surfaces come into contact and rub against each other. This friction can lead to wear and tear on the surfaces, resulting in increased resistance and decreased performance.
By applying lubrication to the sliding surfaces, a thin layer of lubricant is formed. This layer acts as a barrier between the surfaces, reducing the direct contact and minimizing friction. As a result, the sliding motion becomes smoother and more effortless.
Choosing the Right Lubricant
When it comes to selecting a lubricant for smooth sliding, it is important to consider the specific requirements of your application. Different types of lubricants have varying properties and are suitable for different conditions. Here are some factors to consider when choosing a lubricant:
- Viscosity: The viscosity of a lubricant determines its flow and resistance to shear. Higher viscosity lubricants are typically used for heavy loads and slow sliding speeds, while lower viscosity lubricants are suitable for lighter loads and faster sliding speeds.
- Temperature range: Ensure that the lubricant can withstand the temperature range of your application. Extreme temperatures can affect the viscosity and effectiveness of the lubricant.
- Compatibility: Consider the compatibility of the lubricant with the materials involved in the sliding motion. Some lubricants may react with certain materials, leading to corrosion or damage.
- Environmental factors: If your application operates in harsh environments such as high humidity or exposure to chemicals, choose a lubricant that can withstand these conditions.
Consult the manufacturer’s recommendations or seek expert advice to determine the most suitable lubricant for your specific sliding application.
Applying Lubrication
Once you have identified the appropriate lubricant, the next step is to apply it effectively to ensure smooth sliding. Here are some guidelines to follow:
- Clean the surfaces: Before applying lubrication, make sure the sliding surfaces are clean and free from dust, debris, or old lubricants. Use a suitable cleaning agent and wipe the surfaces thoroughly.
- Apply a thin and even layer: Using a clean applicator or brush, apply a thin and even layer of lubricant to the sliding surfaces. Avoid applying excessive amounts, as this can lead to buildup or attract more debris.
- Spread the lubricant: Once the lubricant is applied, use a clean cloth or brush to evenly spread the lubricant across the surfaces. This helps ensure uniform coverage and effective lubrication.
- Reapply as needed: Over time, the lubricant may wear off or become less effective. Monitor the sliding motion and reapply lubrication as needed to maintain smooth sliding.
Be sure to follow any specific instructions provided by the lubricant manufacturer for optimal results.
Regular Maintenance
Lastly, to ensure continued smooth sliding, it is essential to incorporate regular maintenance into your routine. This includes periodic cleaning of the sliding surfaces, inspection for any signs of wear or damage, and lubrication as necessary.
By following proper lubrication practices and maintaining the sliding system, you can enjoy smooth and effortless sliding for an extended period.
In summary, lubrication is a critical aspect of achieving smooth sliding. It reduces friction, minimizes wear, and enhances overall performance. By selecting the right lubricant, applying it effectively, and incorporating regular maintenance, you can ensure optimal sliding motion and prolong the lifespan of your sliding system.
Troubleshooting Common Issues with Wooden Drawer Slides
Wooden drawer slides are a popular choice for many homeowners due to their durability and classic aesthetic. However, like any mechanical component, wooden drawer slides can encounter issues over time. In this section, we will discuss some common problems that you may face with wooden drawer slides and how to troubleshoot them effectively.1. Sticky or Difficult Drawer Movement
One of the most common issues with wooden drawer slides is sticky or difficult drawer movement. This can occur due to various reasons such as dirt, debris, or lack of lubrication. To troubleshoot this issue, follow these steps:- Remove the drawer from the cabinet.
- Clean the wooden slides with a soft cloth to remove any dirt or debris.
- Inspect the slides for any signs of damage or wear. If there are any visible issues, consider replacing the slides.
- Apply a thin layer of furniture wax or silicone-based lubricant to the wooden slides. This will help reduce friction and improve the drawer’s movement.
- Reinsert the drawer into the cabinet and test its movement. If the issue persists, repeat the cleaning and lubrication process or consider seeking professional assistance.
2. Drawer Misalignment
Drawer misalignment can cause the drawer to become uneven or stick out when closed. This issue is often caused by loose or damaged hardware. Here’s how you can troubleshoot it:- Remove the drawer from the cabinet.
- Check the alignment of the drawer. If it is misaligned, use a level tool to adjust it accordingly.
- Inspect the drawer slides and mounting hardware for any looseness or damage. Tighten any loose screws or replace damaged hardware as necessary.
- Reinsert the drawer into the cabinet and test its alignment. Make any additional adjustments if needed.
3. Excessive Drawer Movement
Excessive drawer movement, such as side-to-side or up-and-down wobbling, can be frustrating and may indicate a problem with the slides. Here’s how you can troubleshoot this issue:- Remove the drawer from the cabinet.
- Inspect the drawer slides for any signs of wear or damage. If the slides are worn out, consider replacing them with new ones.
- Check the mounting hardware for any looseness. Tighten any loose screws or replace damaged hardware if necessary.
- If the slides and hardware are in good condition, check if the drawer itself is properly constructed and square. If not, adjust or reinforce the drawer as needed.
- Reinsert the drawer into the cabinet and test its movement. If the excessive movement persists, consider seeking professional assistance.
4. Drawer Slides Not Closing Properly
If your drawer slides are not closing properly and leave a noticeable gap when closed, there may be an issue with the alignment or installation. Here are some troubleshooting steps:- Remove the drawer from the cabinet.
- Inspect the slides and mounting hardware for any misalignment or damage. Adjust or replace as necessary.
- Check if the drawer itself is square and properly constructed. Make any adjustments or reinforcements if needed.
- Reinsert the drawer into the cabinet and test the closing mechanism. If the issue persists, consider seeking professional assistance.
FAQs
1. How can I make a wooden drawer slide easily?
To make a wooden drawer slide easily, you can follow these steps: 1. Measure and cut the wooden slides to fit the width of your drawer. 2. Screw the slides onto the sides of the drawer using a drill. 3. Attach the corresponding slides to the inside of the cabinet or furniture piece. 4. Slide the drawer into place to ensure it moves smoothly. 5. Make any necessary adjustments or sand the slides for a better fit.
2. What materials do I need to make wooden drawer slides?
To make wooden drawer slides, you will need the following materials: – Wood (preferably hardwood) – Measuring tape – Saw – Screwdriver or drill – Screws or nails – Sandpaper
3. Are wooden drawer slides durable?
Wooden drawer slides can be durable if made and installed correctly. However, they may require occasional maintenance, such as sanding or lubrication, to ensure smooth operation. Consider using hardwood for better durability, and be mindful of weight limits when designing your drawers.
Conclusion
In conclusion, making a wooden drawer slide can be a straightforward process with the right tools and techniques. By following the steps outlined in this guide, you can create functional and smooth-operating drawer slides for your woodworking projects. Remember to measure accurately, choose high-quality materials, and use proper joinery techniques to ensure the durability and longevity of your slides.
Whether you are a beginner or an experienced woodworker, the satisfaction of crafting your own drawer slides can be immensely rewarding. Not only does it save you money, but it also allows you to customize the slides to suit your specific needs and preferences.
So, why wait? Start your next woodworking project with confidence and create beautiful and functional drawer slides that will enhance the overall functionality and aesthetics of your furniture.